Managing Project Files, Reports, and Tasks in PrepBase

Managing Project Files, Reports, and Tasks in PrepBase

This article explains how admins can organize files, track reports, and manage tasks within a project. These tools work together to keep all project-related information structured, searchable, and accessible to the right people at the right time.

1. Overview: Where to Manage Files, Reports, and Tasks

All file, report, and task management happens inside an individual project.

Navigation path:
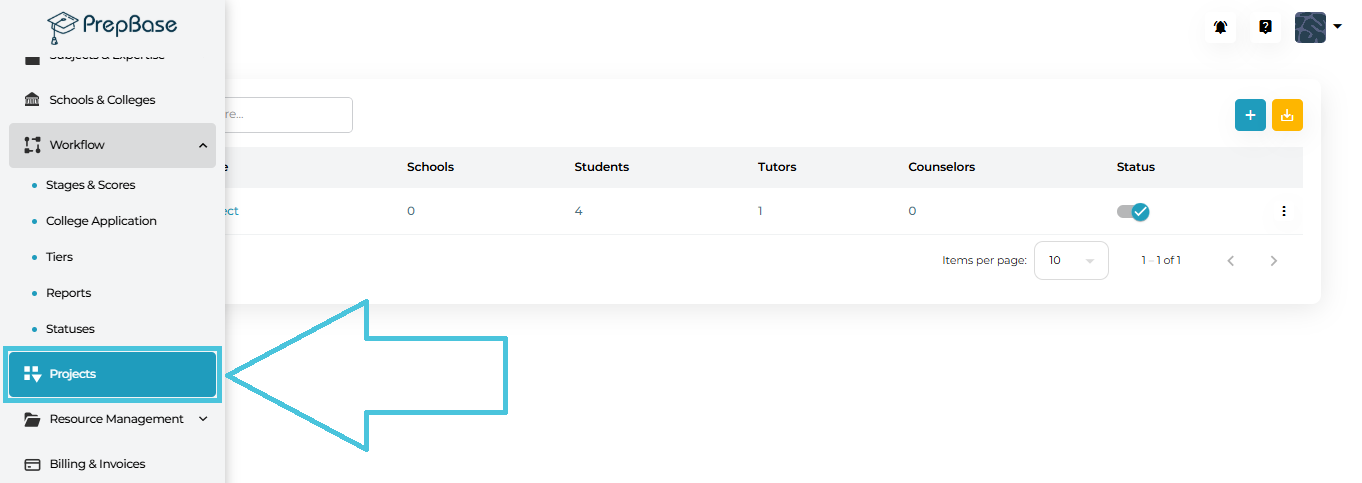


Projects → Select a Project  → View Lists

Within View Lists, you will find dedicated tabs for:
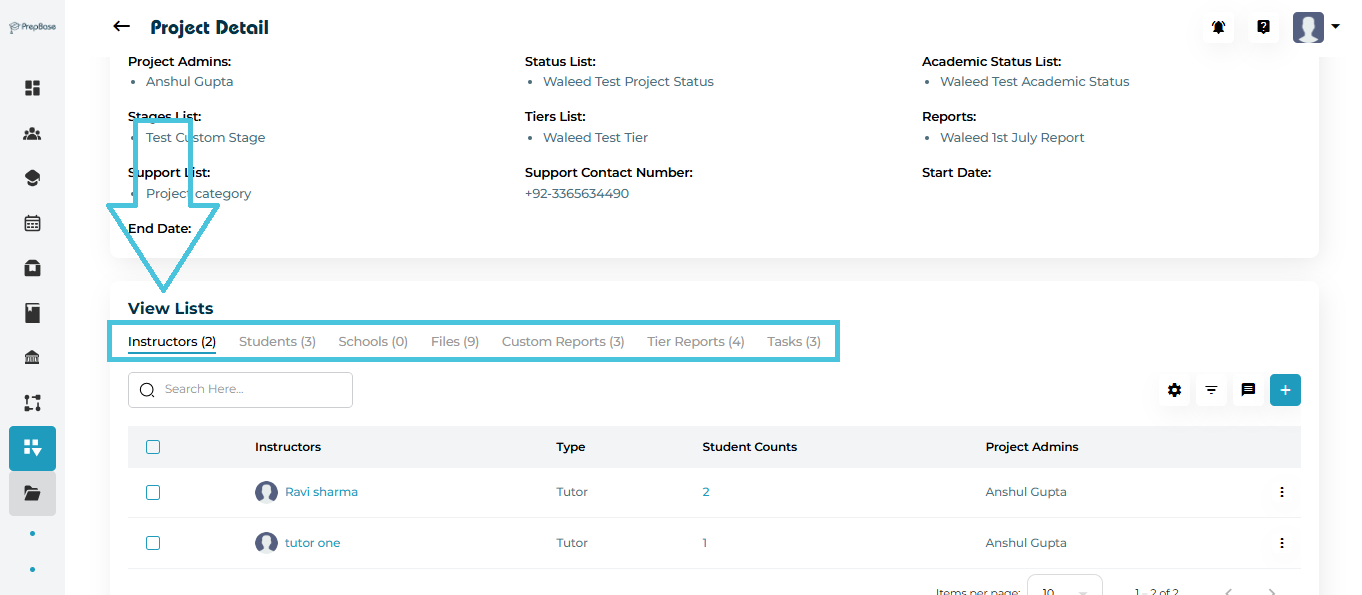
  • Files

  • Custom Reports

  • Tier Reports

  • Tasks

Each tab has its own add, edit, filter, and action controls.
 

2. Managing Project Files

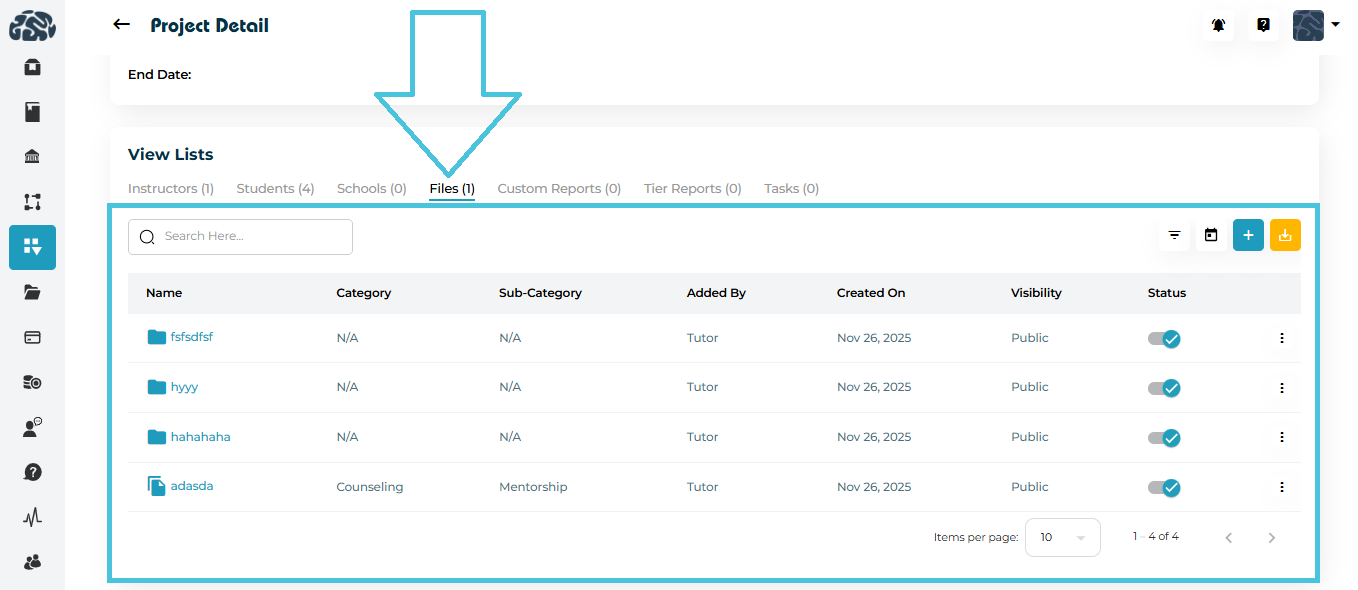
The Files tab is used to store and organize all documents related to a project, such as study material, resources, and reference material.


Adding Files
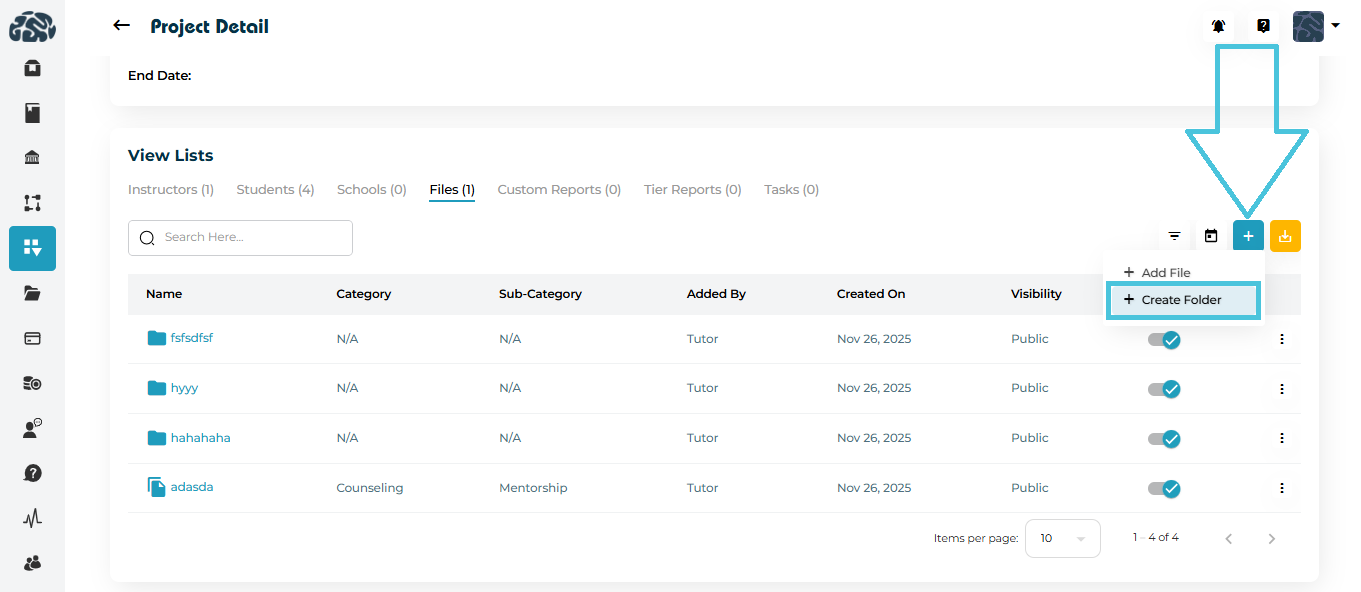
  1. Open the Files tab inside the project.

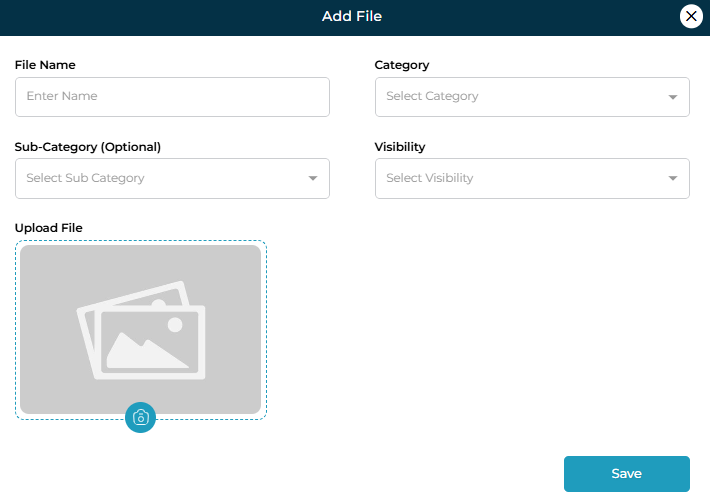
  2. Click ➕ Add File.

  3. Fill in the following fields:

    • File Name

    • Category (e.g., Counseling, Tutoring)

    • Sub-Category (optional)

    • Visibility (Public, Admin, etc.)

    • Upload File

  4. Click Save to upload the file.

Creating Folders

  • Use ➕ Create Folder to group related files.

  • Click a folder name to open it in a new view and manage files inside it.

  • Folders help separate documents by topic, phase, or department.

You can also click on the three dots to add files within the folder.
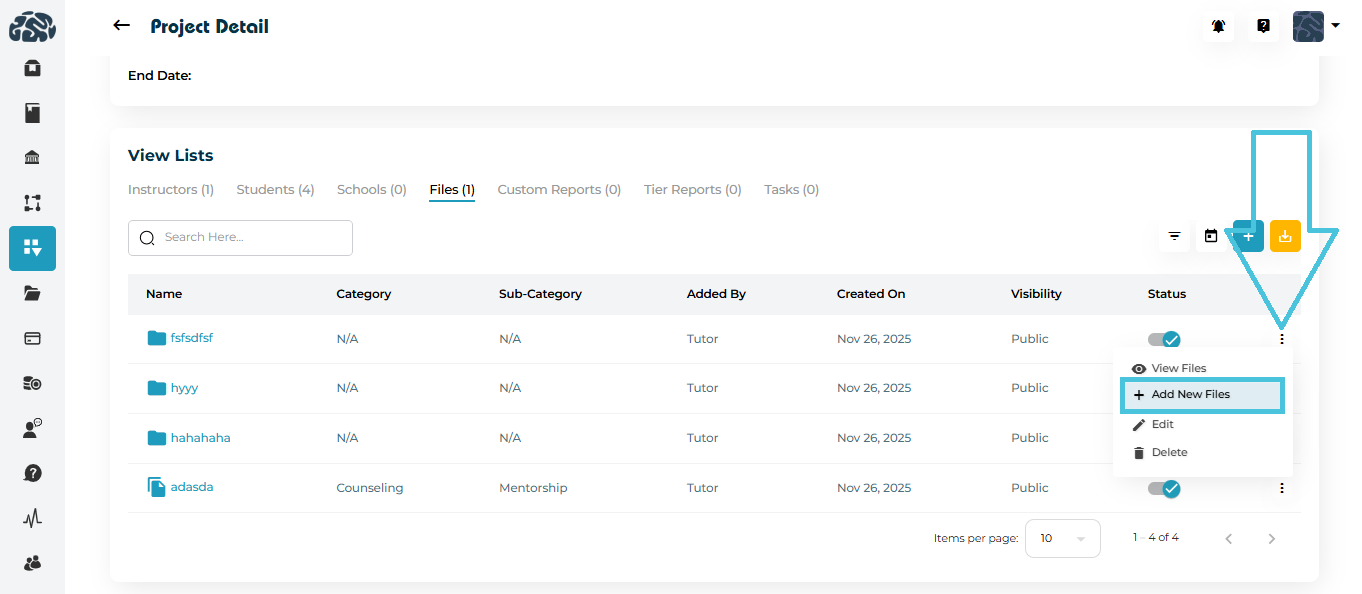
File Actions

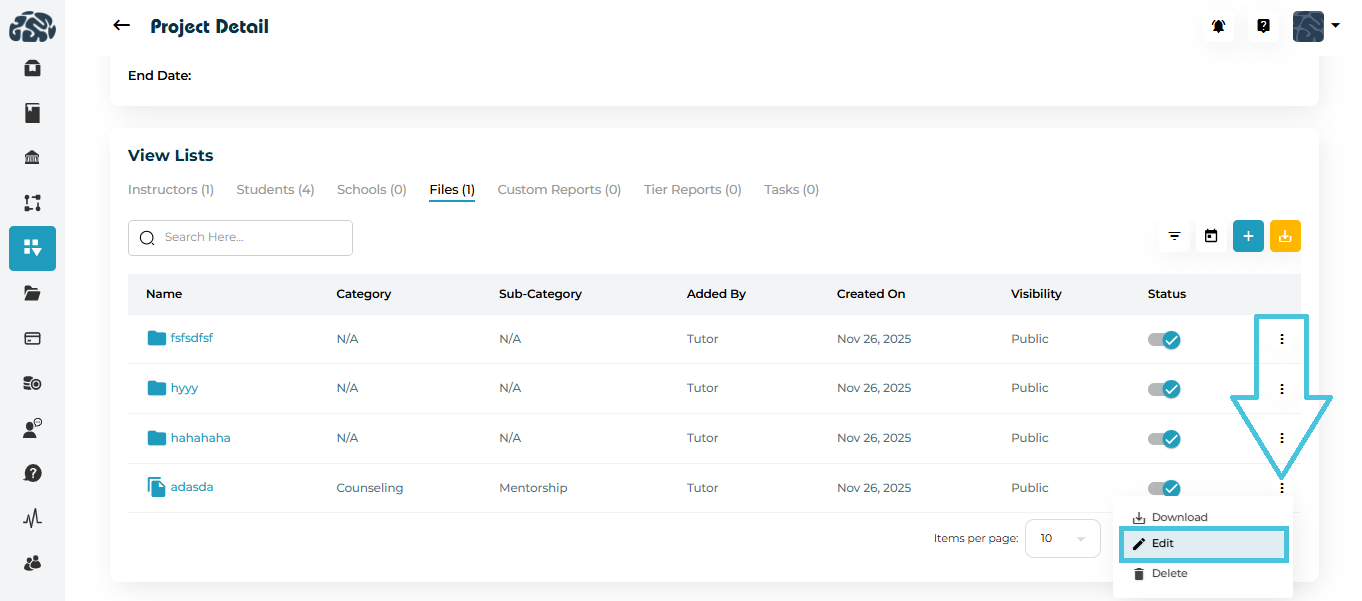
Clicking on the name of the file will view in a new tab
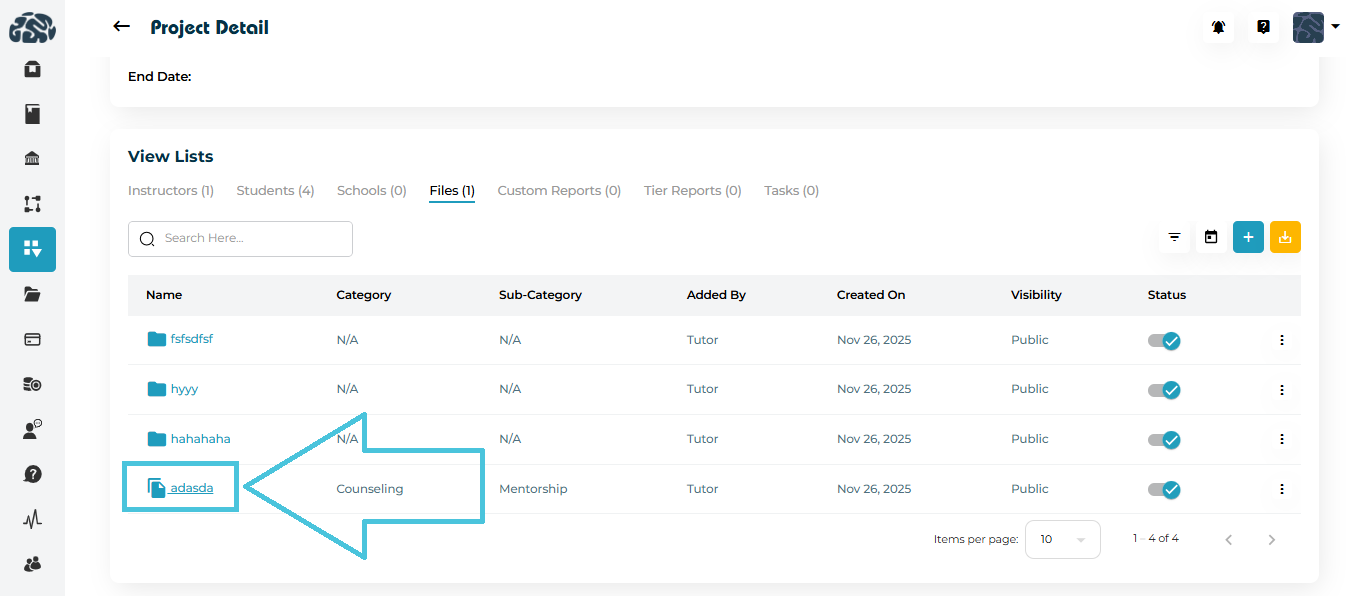
From the three-dot menu beside any file, you can:
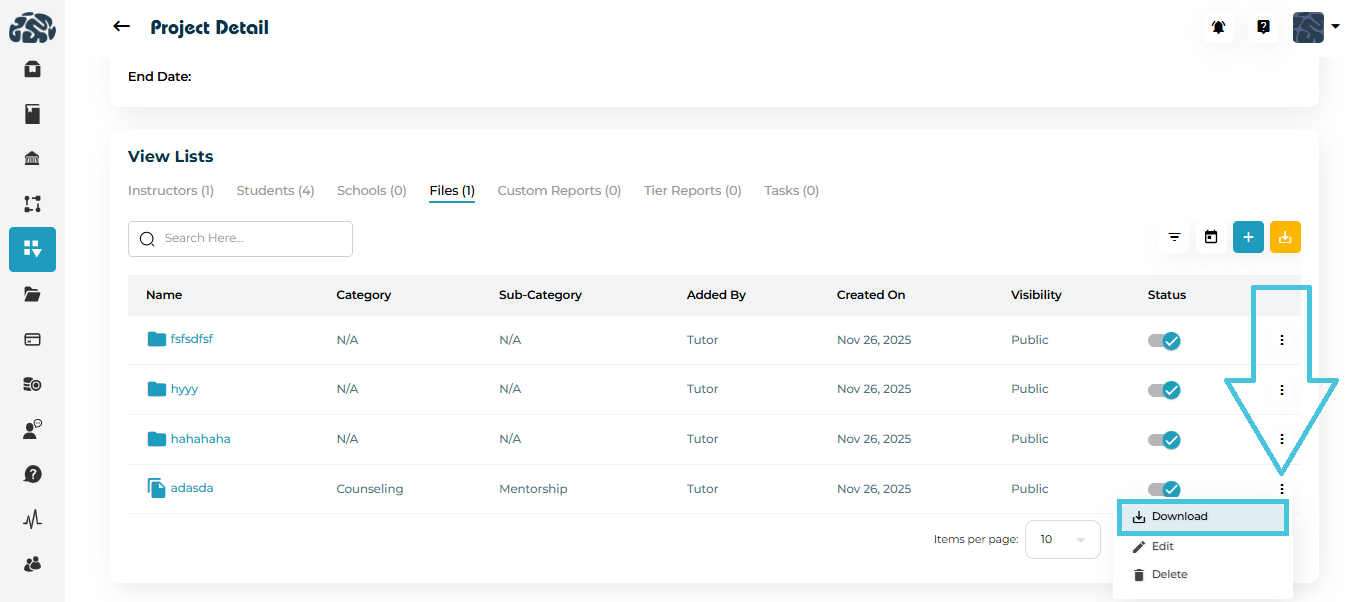
  • Download the file

  • Edit file details (name, category, visibility)
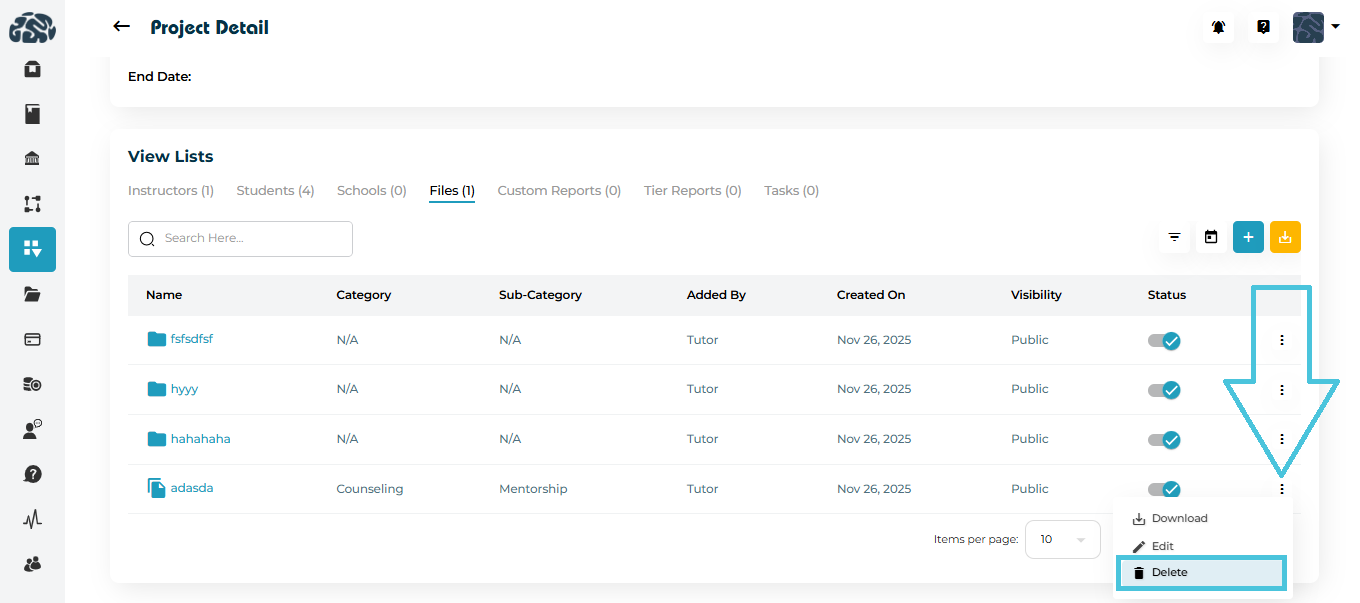
  • Delete the file

 
Filtering Files

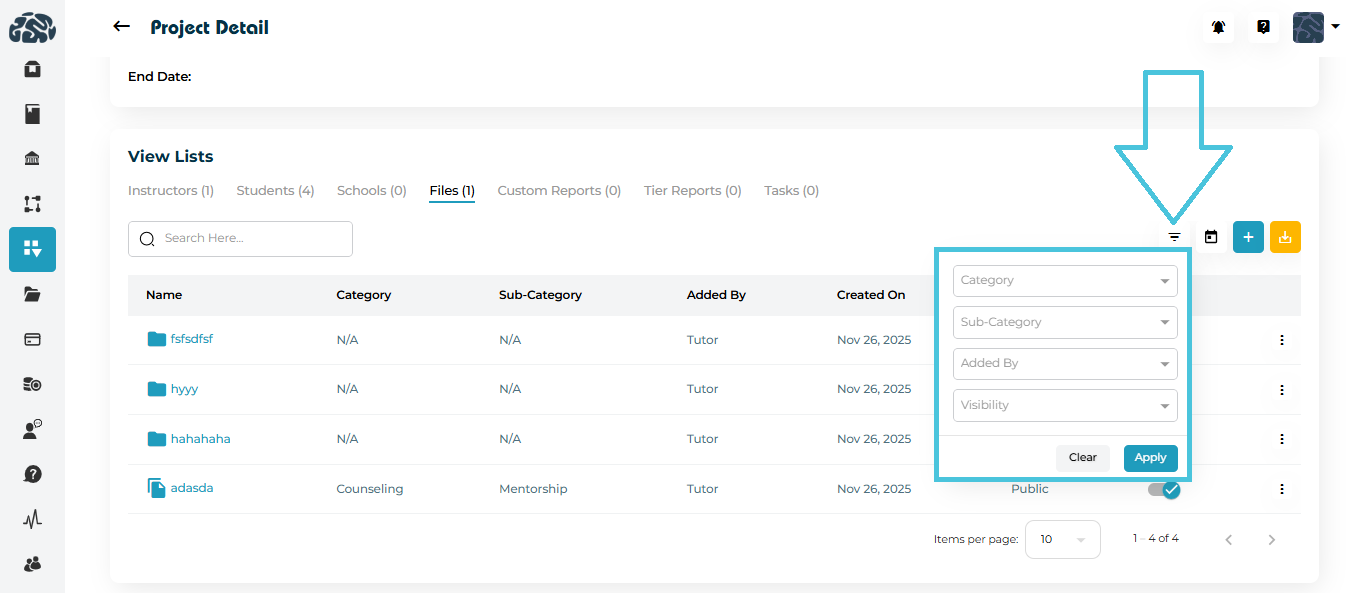
Use filters to quickly find files by:

  • Category

  • Sub-Category

  • Added By

  • Visibility

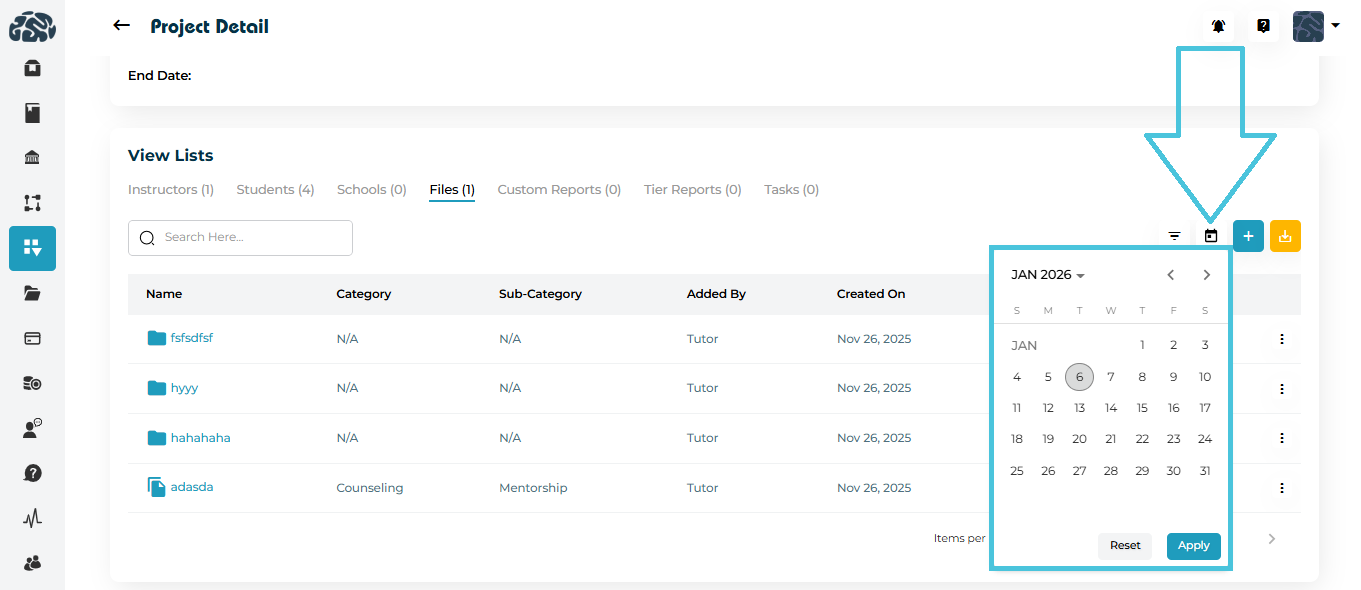
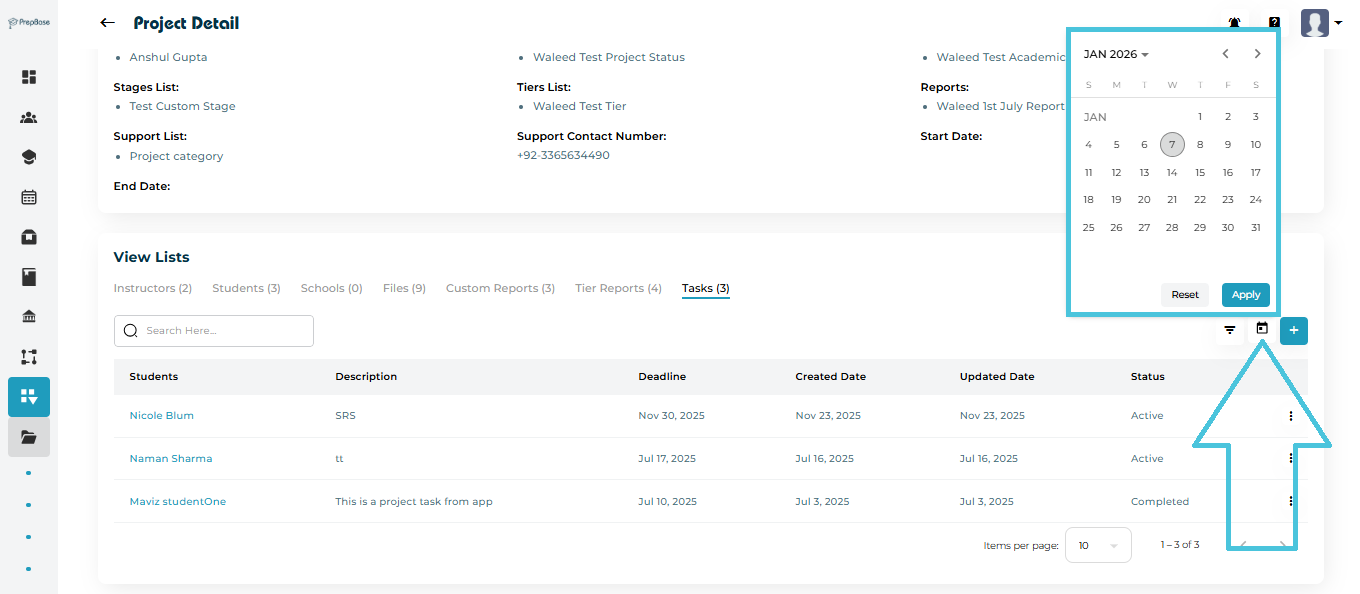
  • Date (calendar filter)


3. Managing Custom Reports

Custom Reports allow structured data collection for students within a project (for example: assessments, reviews, or evaluations).
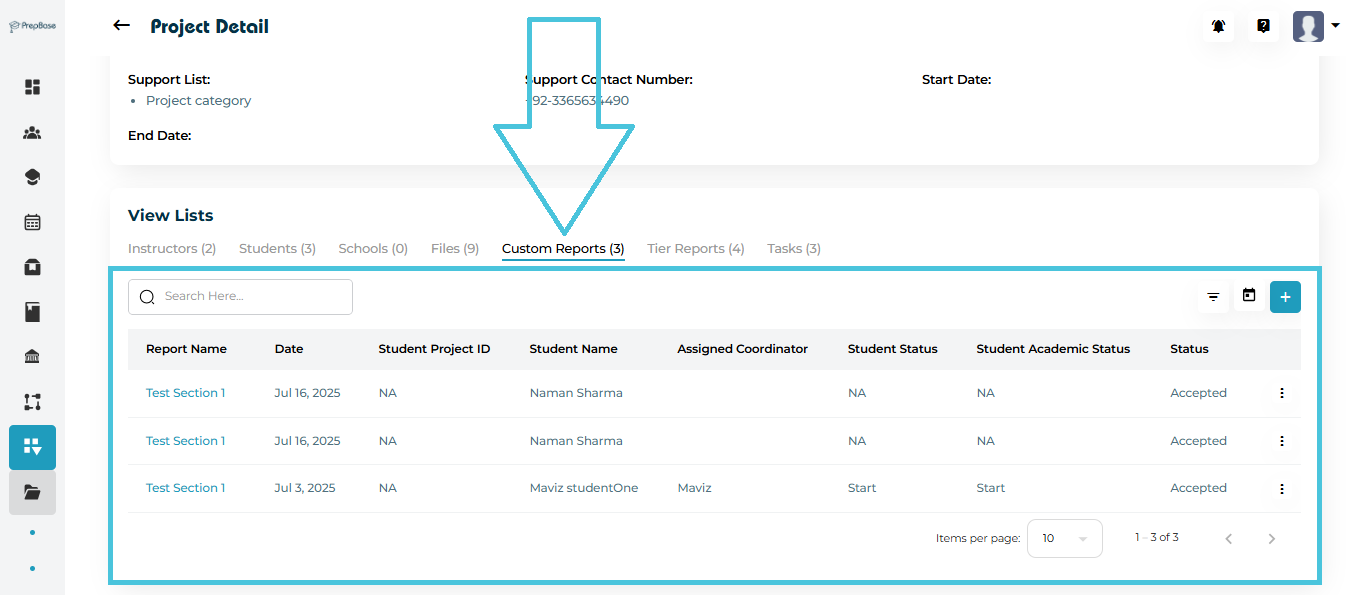
 

Adding a Custom Report to a Project
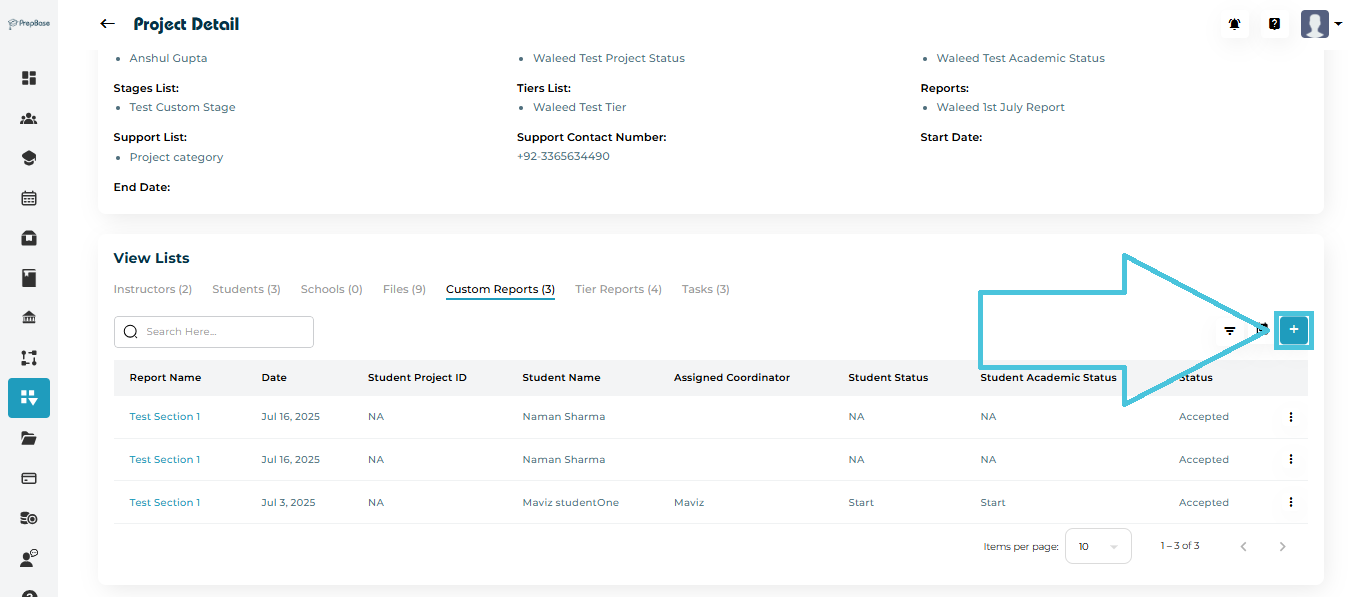
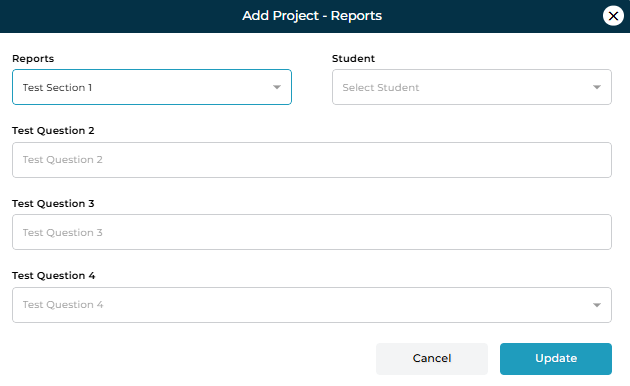
  1. Open the Custom Reports tab.

  2. Click ➕ Add.

  3. Select:

    • Report Template From the List

    • Student linked to the Report

  4. Fill in the report questions as configured in the template.

  5. Click Update to save the submission.

Viewing Report Submissions
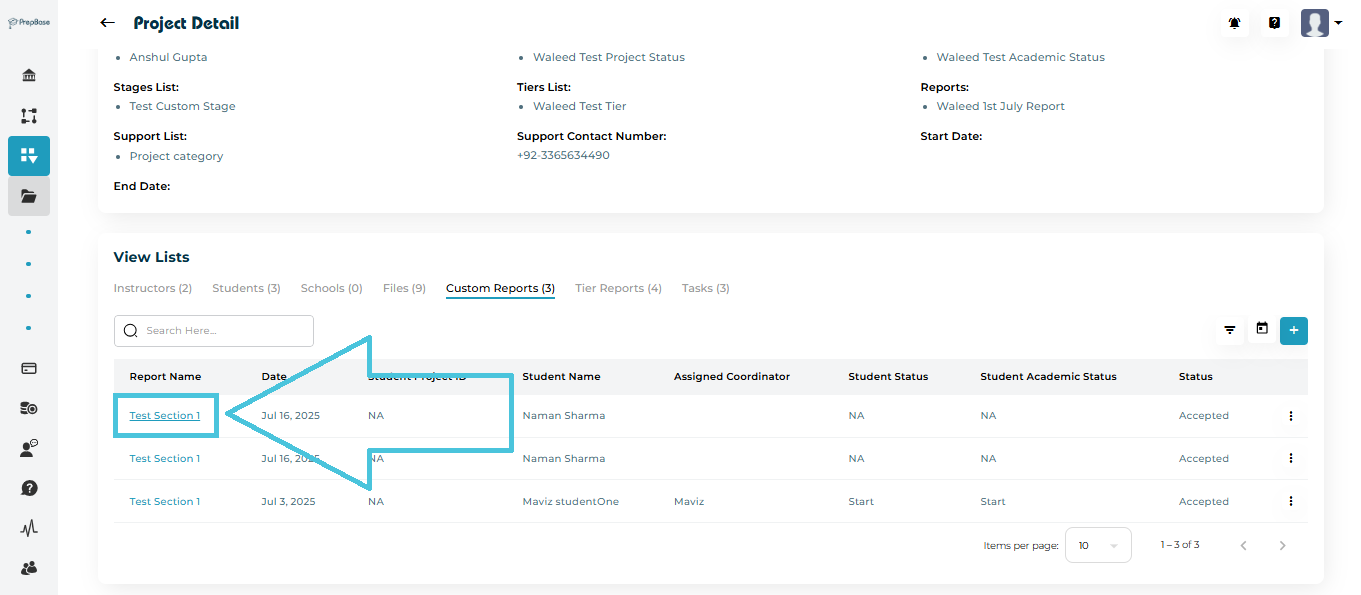
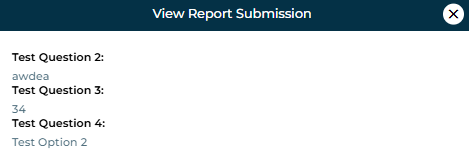
  • Click the Report Name to open the submitted report.

  • A modal displays all question responses in a read-only format.

Managing Reports

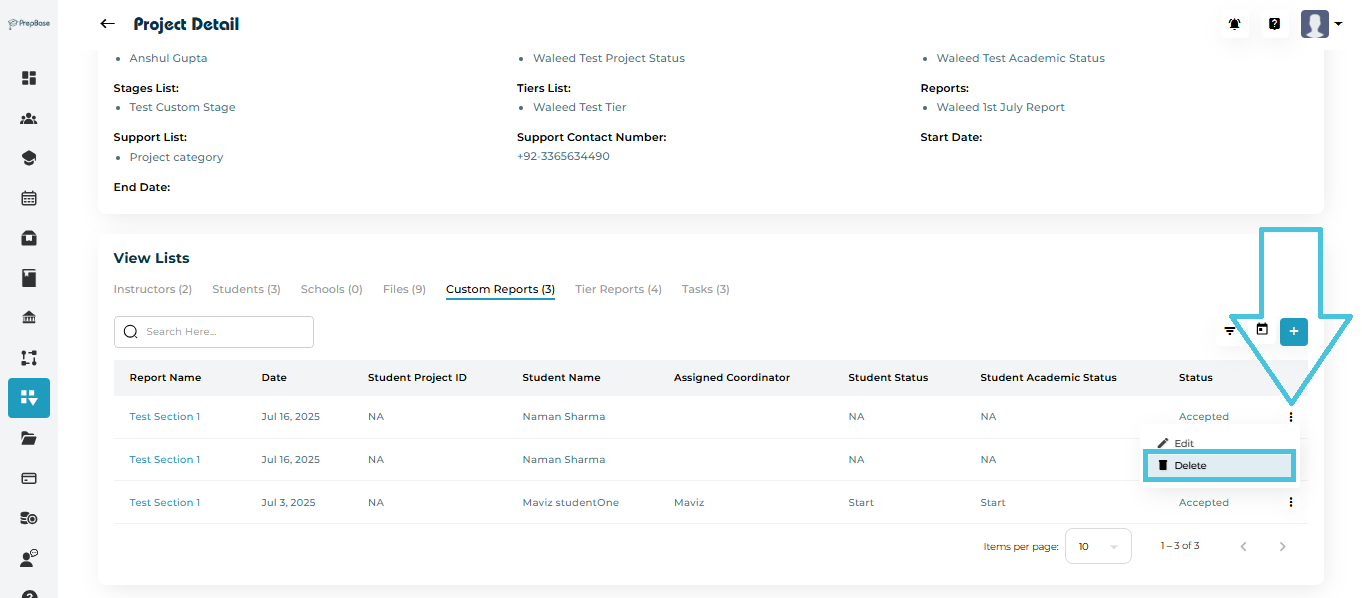
Clicking on the report name will view it.

From the three-dot menu, you can:
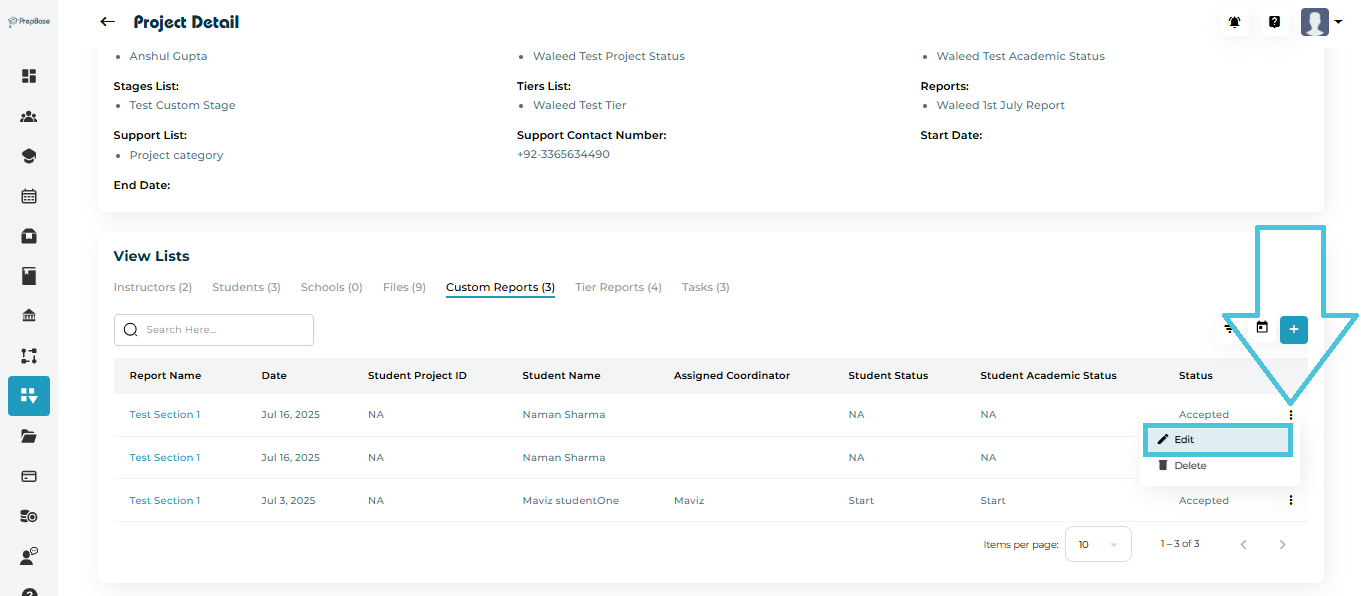
  • Edit responses

  • Delete the report entry

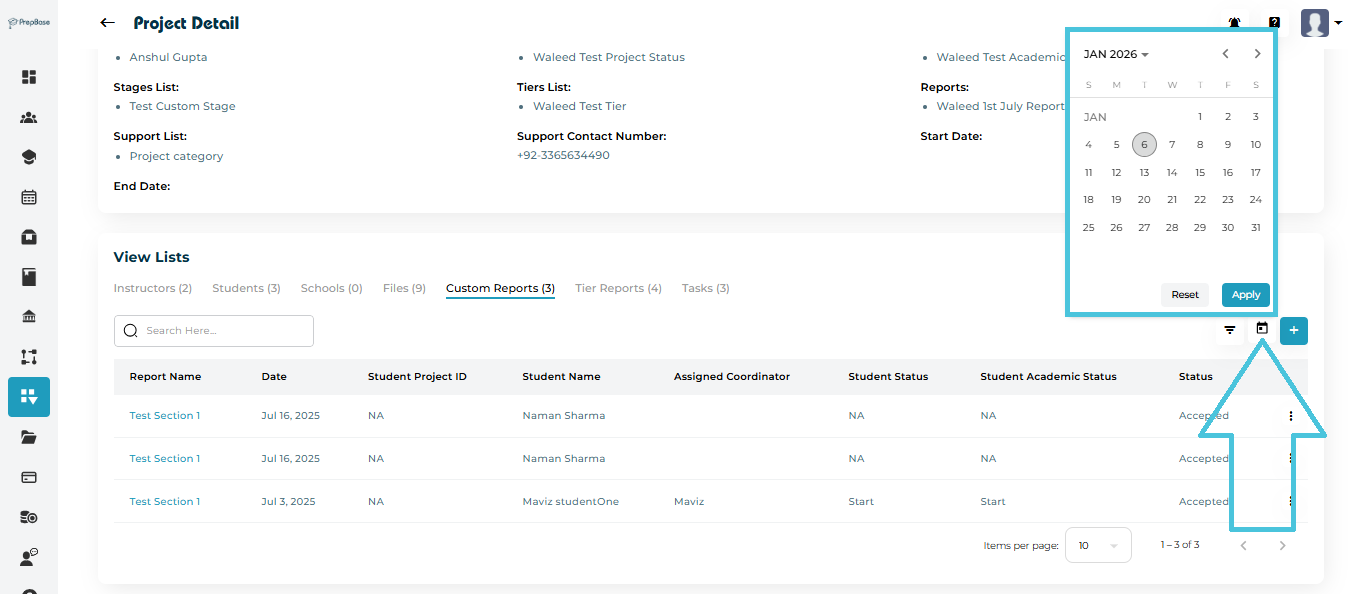
Filtering Reports
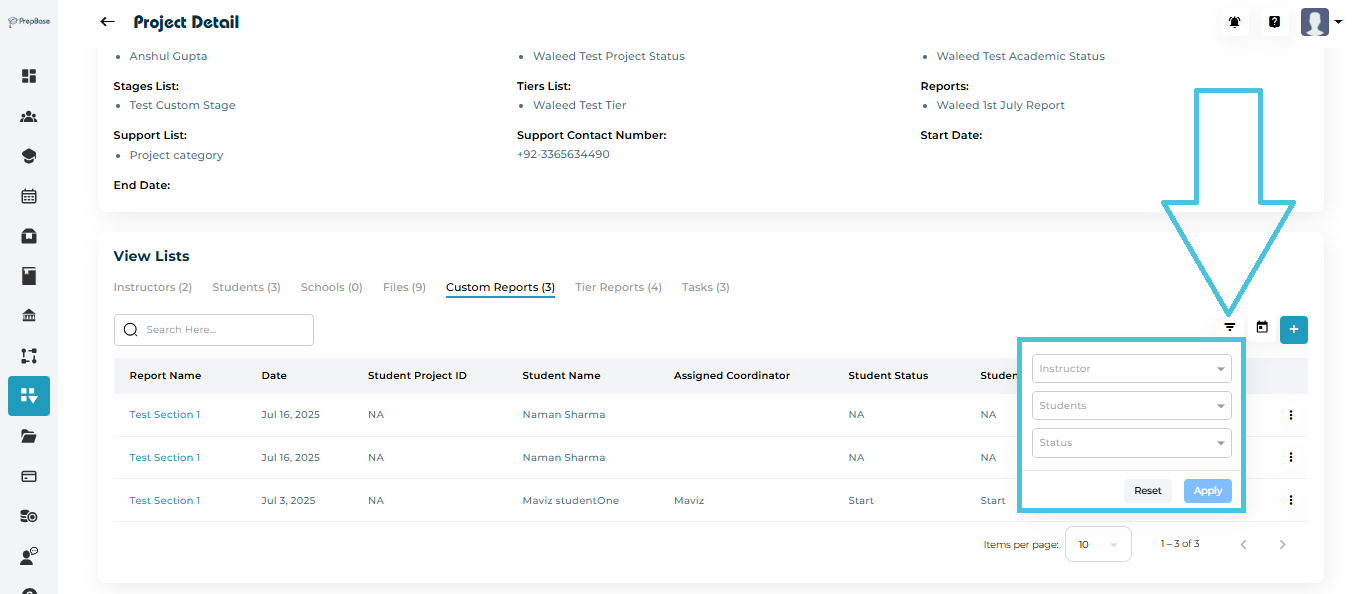
 

Reports can be filtered by:

  • Instructor

  • Student

  • Status

  • Date range (calendar filter)

4. Managing Tier Reports

Tier Reports are linked to tier-based workflows and help track student actions, status, and feedback for each defined tier.
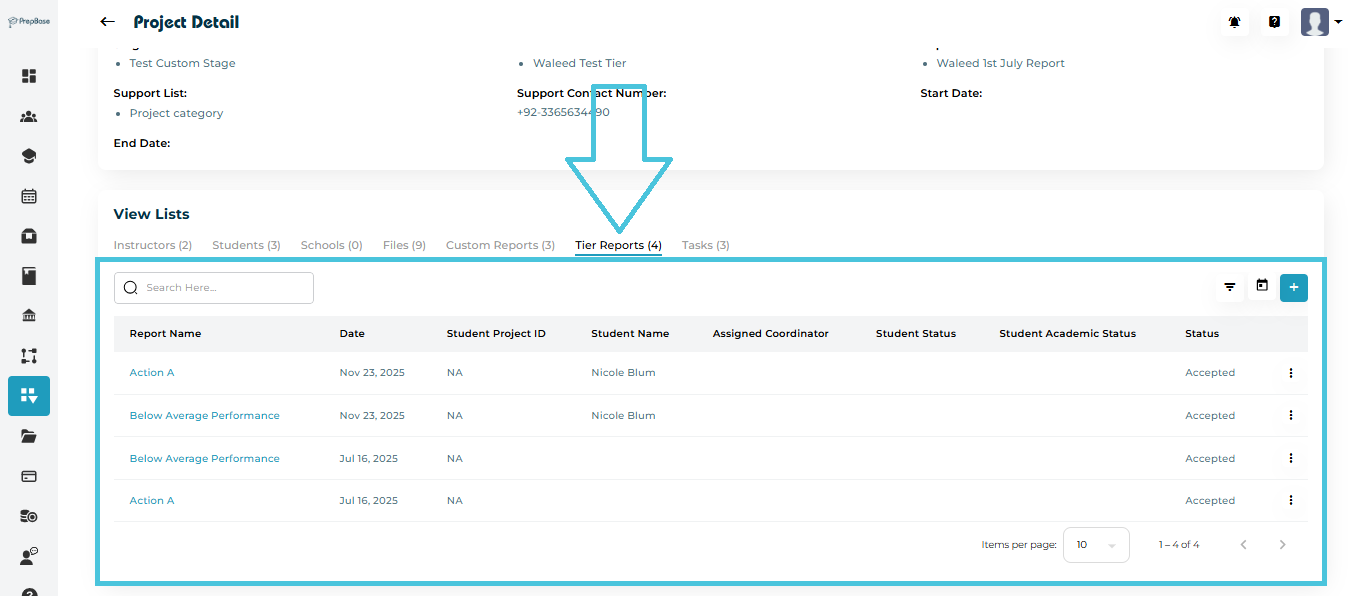
 
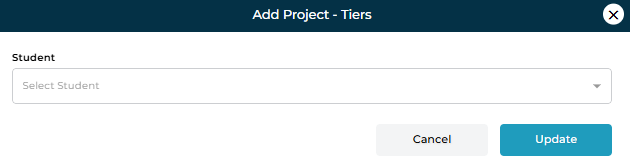
Adding a Tier Report
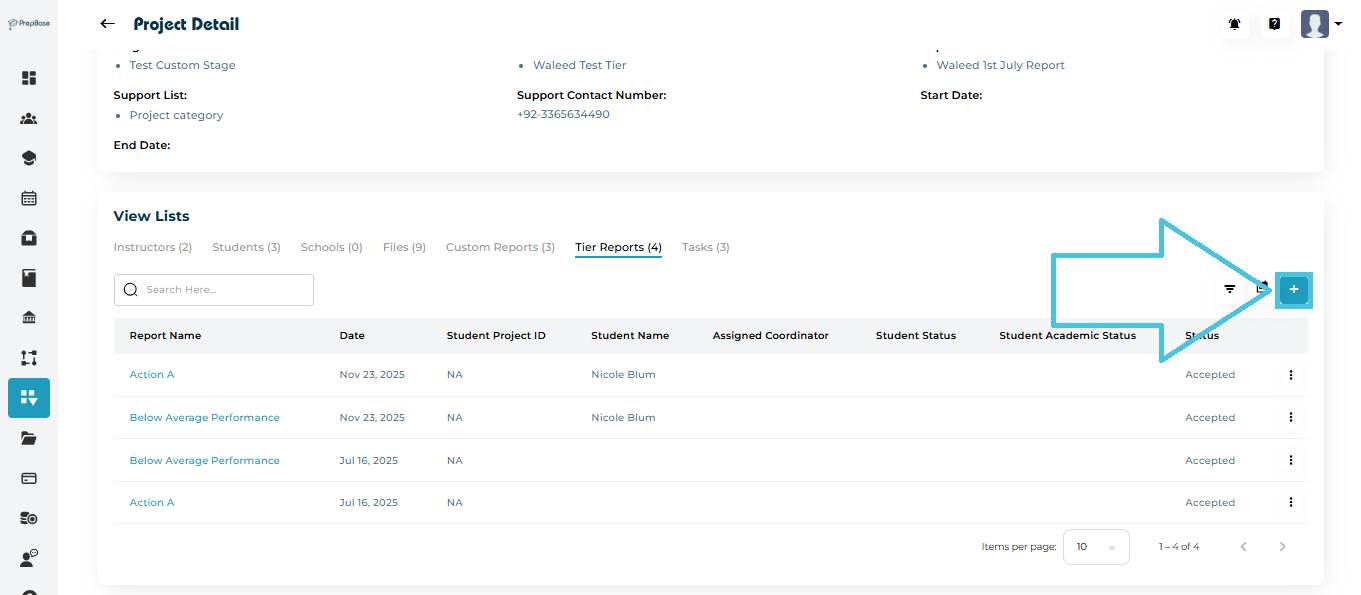
 

  1. Open the Tier Reports tab.

  2. Click ➕ Add.

  3. Select the Student.

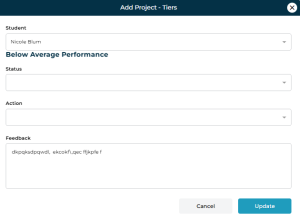
  4. For each of the tiers fill in:

    • Status

    • Action

    • Feedback (if activated in the template)

  5. Click Update to save.


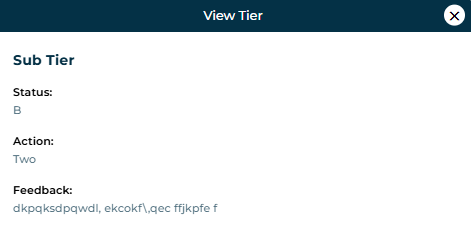
Viewing Tier Reports
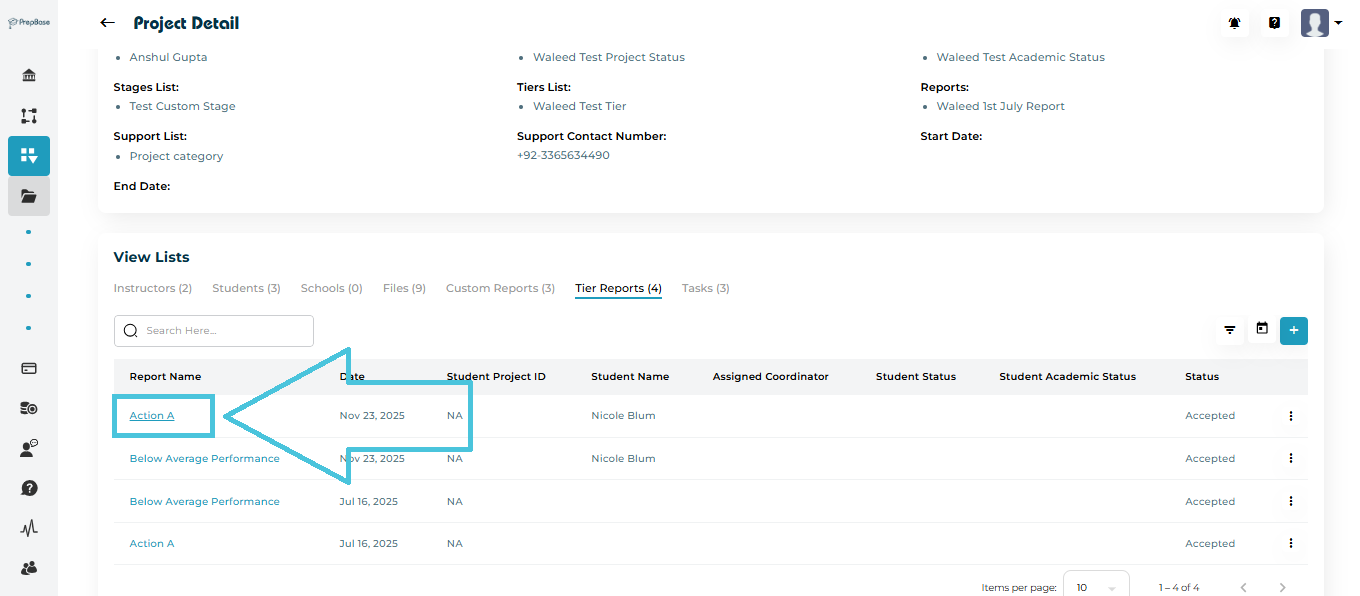
  • Click the Tier Report Name to view details.

  • The report shows status, action taken, and feedback text.

 
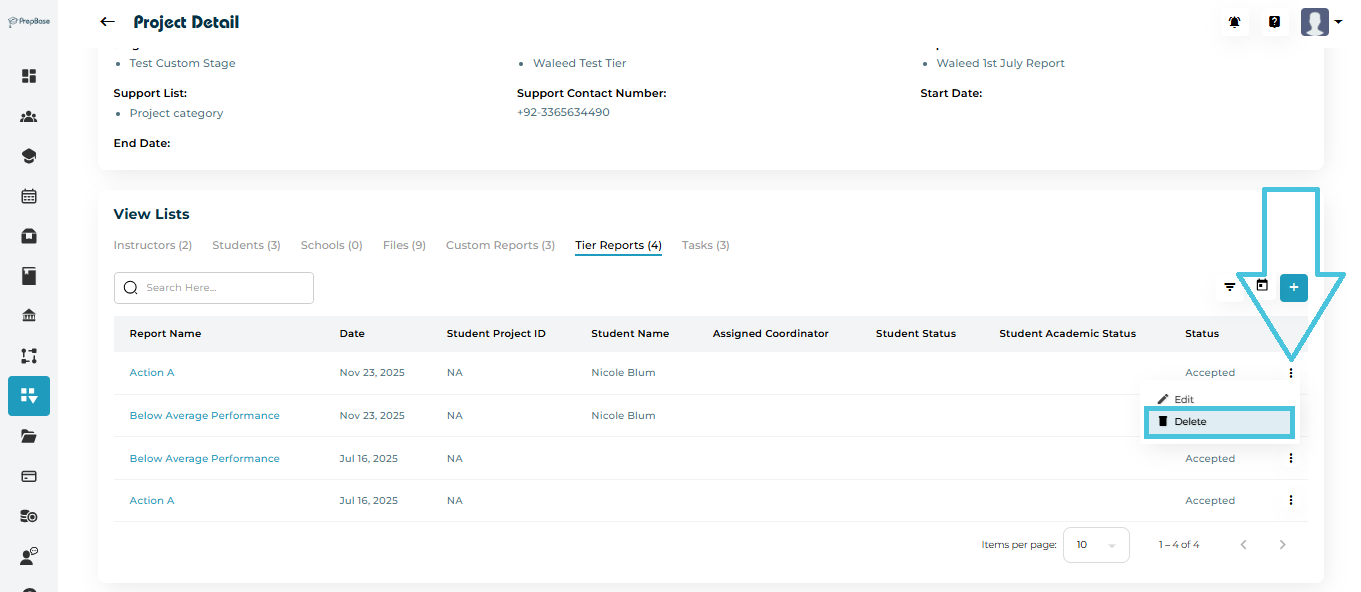
Tier Report Actions

Available actions include:
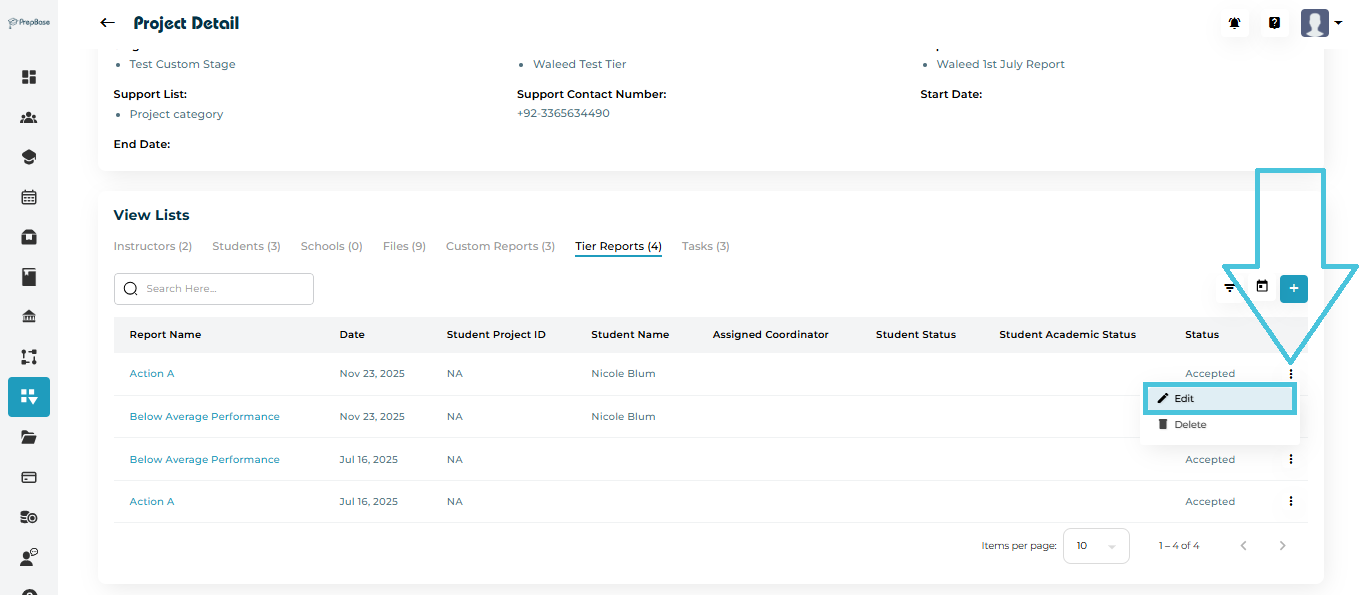
  • Edit


  • Delete


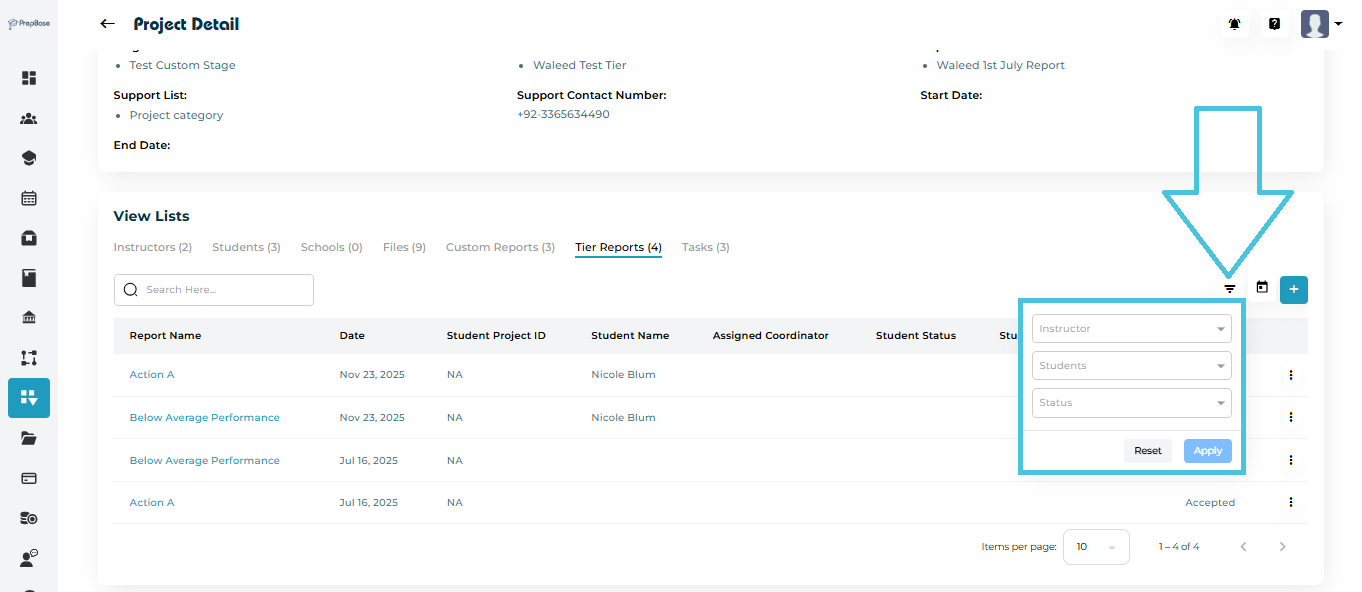
Filtering Tier Reports

Filter by:

  • Instructor

  • Student

  • Status

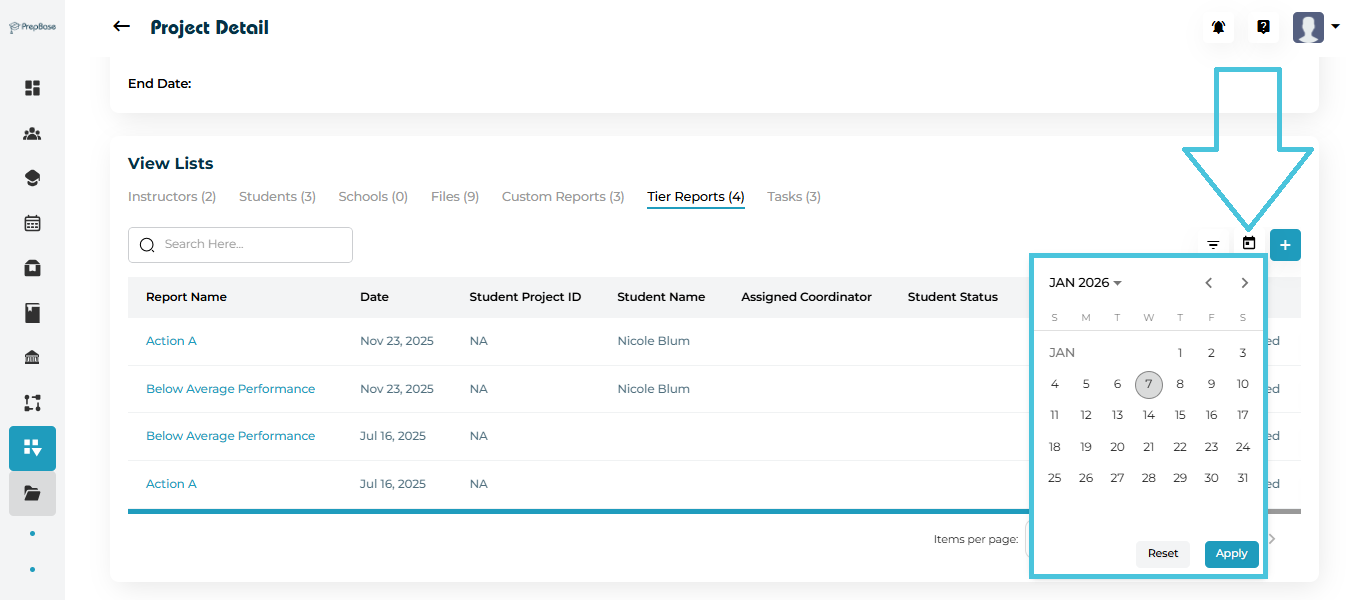
  • Date


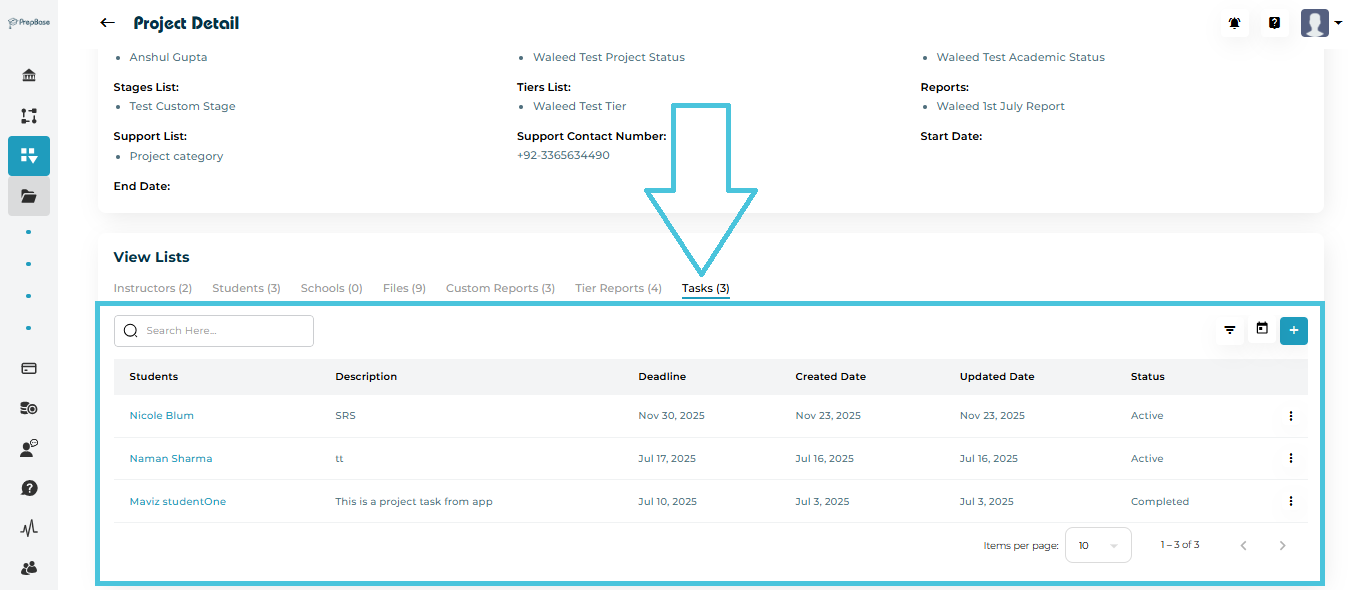
5. Managing Project Tasks

Tasks help track actionable items assigned to students within a project. Admin or Instructors  linked to a project can:

1- Assign tasks to students 

2- Review and provide feedback on students submissions


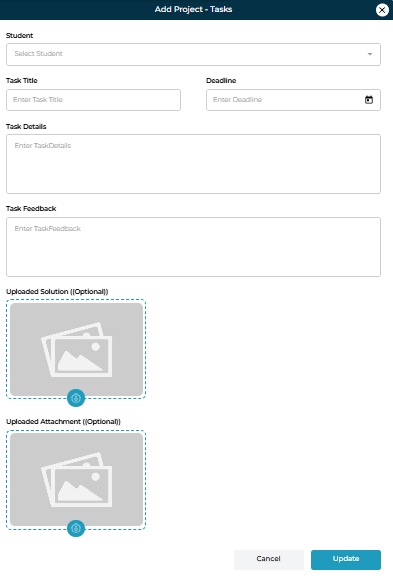
Adding a Task
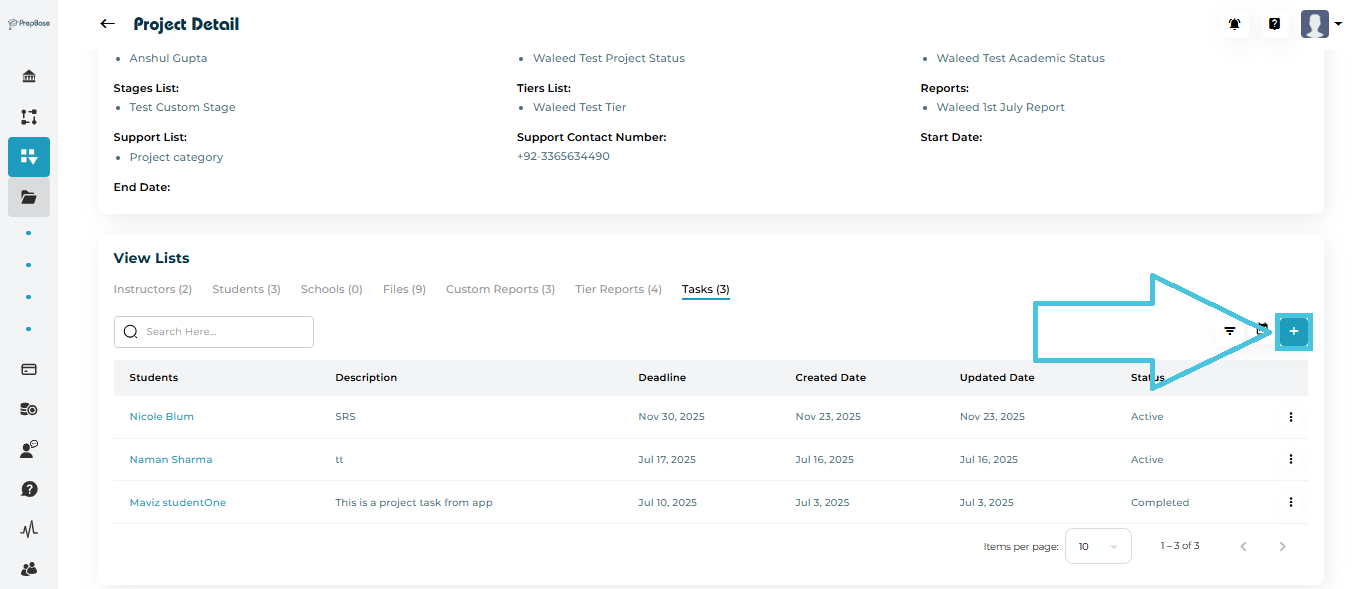
  1. Open the Tasks tab.

  2. Click ➕ Add.

  3. Complete the task form:

    • Student

    • Task Title

    • Task Details

    • Deadline

    • Task Feedback (after student submission)

    • Uploaded Solution / Attachment (to be submitted by student)

  4. Click Update to create the task.


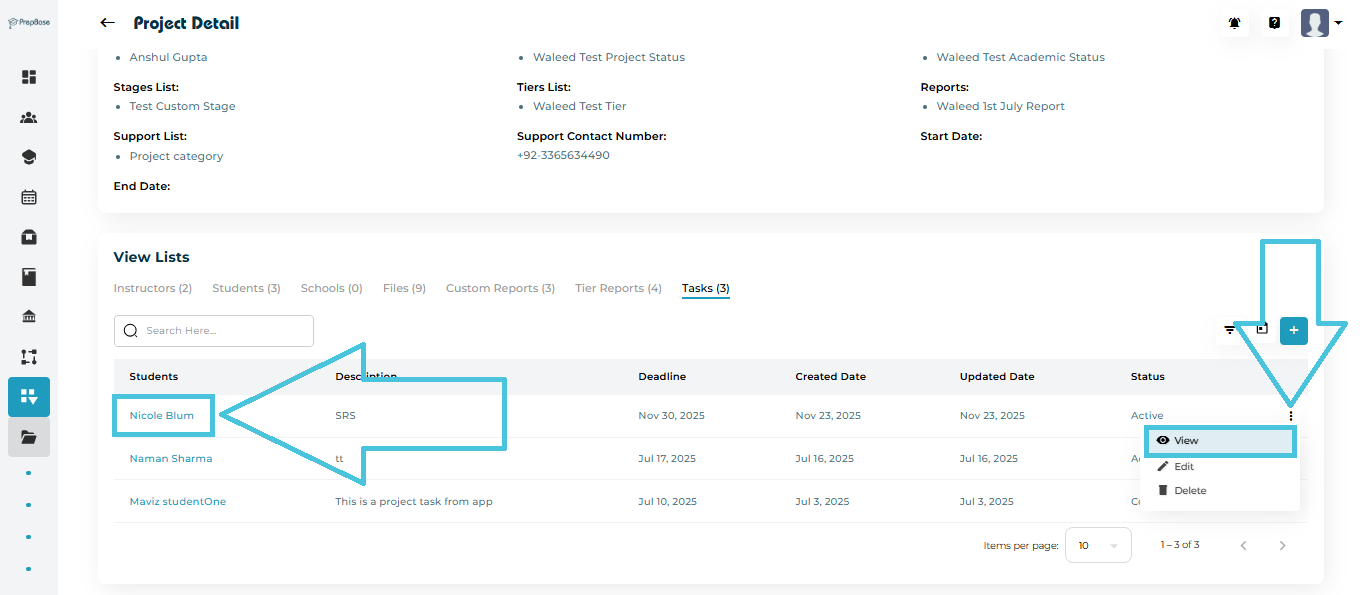
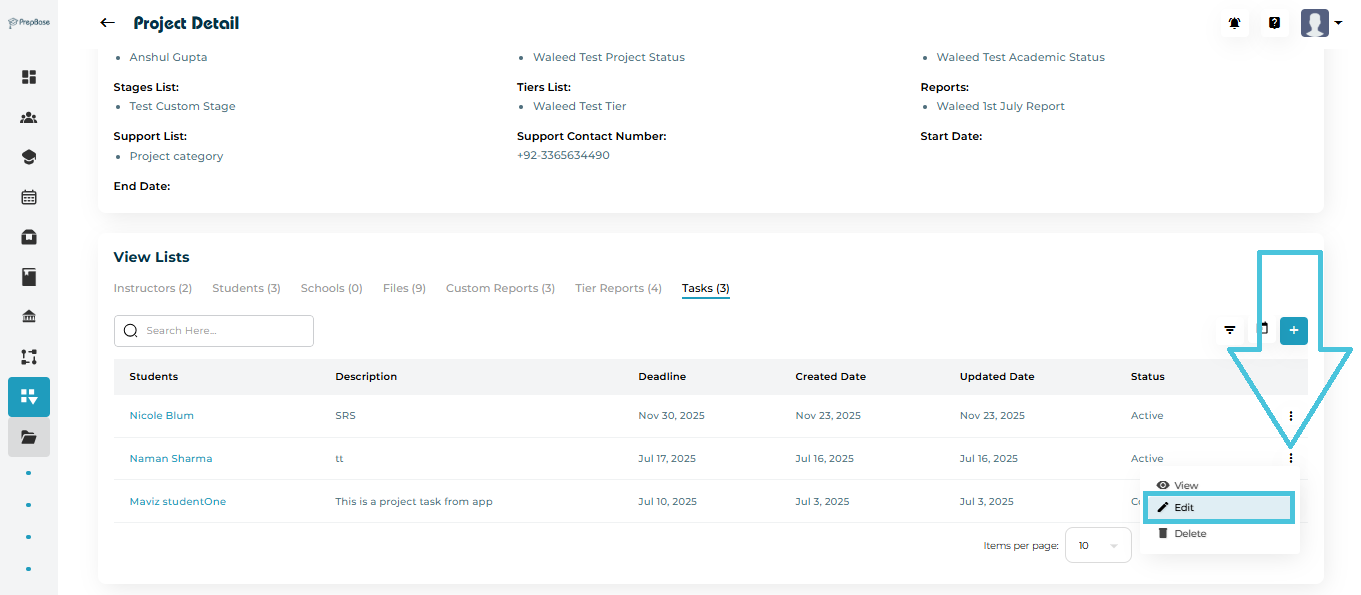
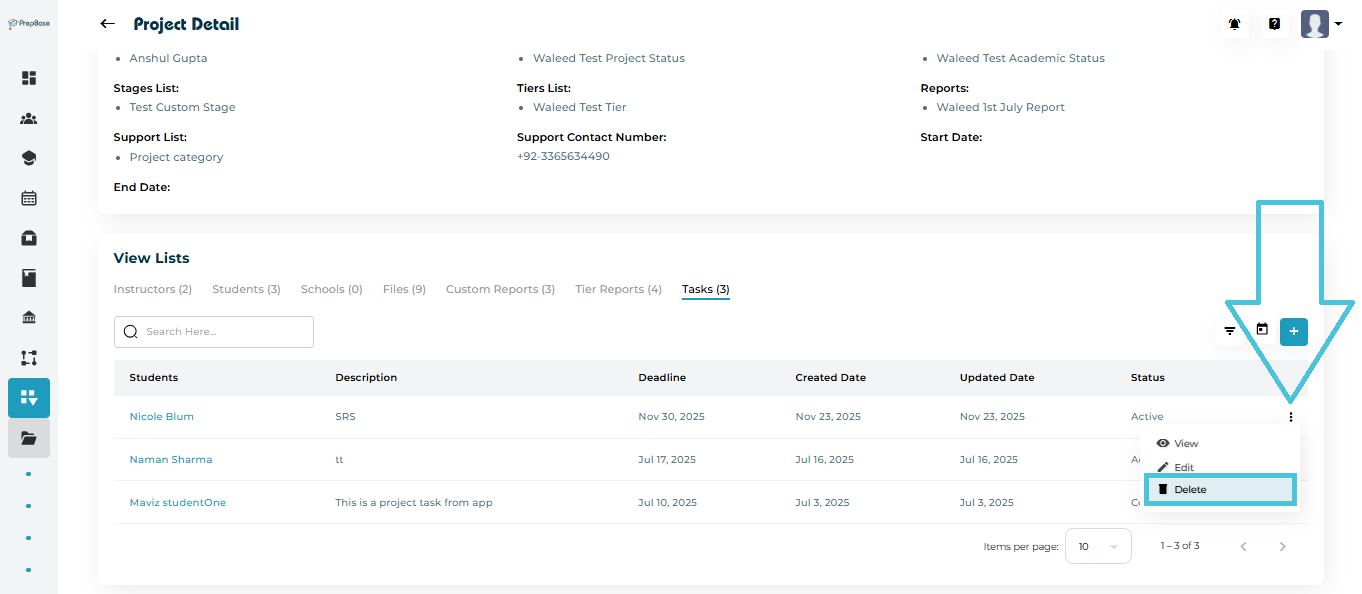
From the task’s three-dot menu you can:

View Tasks
 
Edit Tasks
 
Delete Tasks
 

Task Status Tracking

Each task displays:

  • Deadline

  • Created date

  • Updated date

  • Current status (Active, Completed)


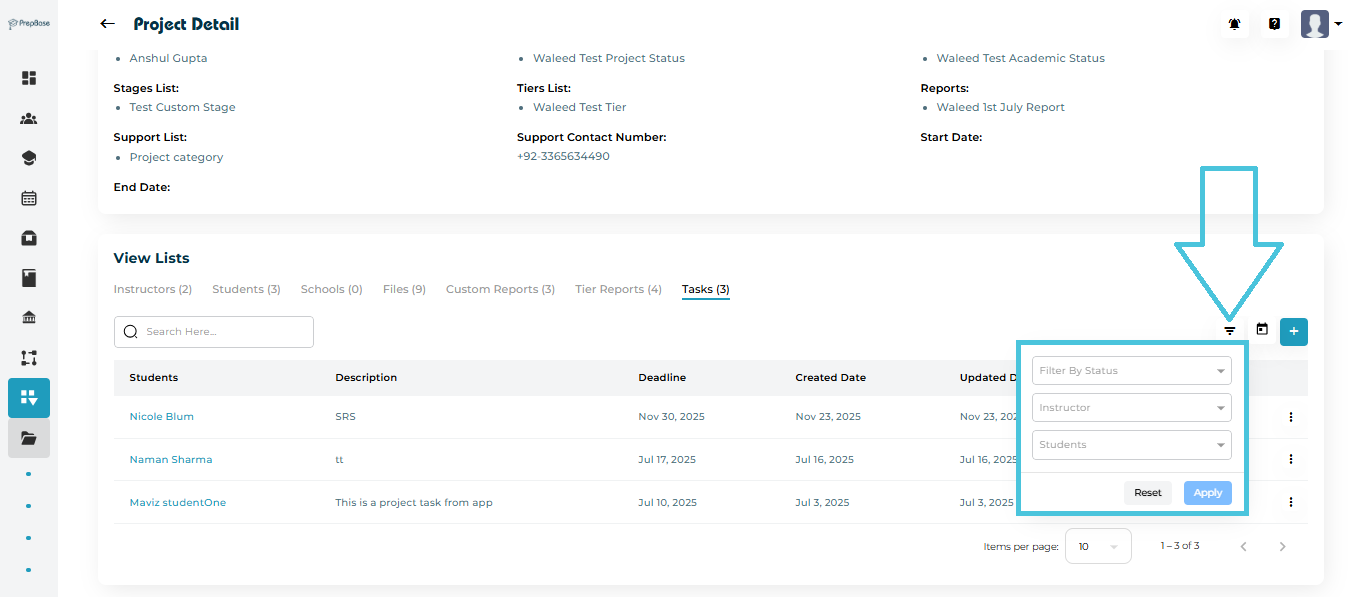
Filtering Tasks

Tasks can be filtered using:

  • Status

  • Instructor

  • Student

  • Deadline (calendar filter)
IN THIS ARTICLE

Defining and linking projects to students and instructors

Defining and Linking Projects to Students, Instructors and Schools

This article explains how Projects work in PrepBase and how admins can create projects, assign students, instructors, schools, and coordinators, and manage everything from a single project workspace. The Projects module allows students and instructors to collaborate on different activities where admin or instructors can manage the students project status and academic status, as well the stages within the project, the shared resources and tasks. In addition, custom reports and tier reports can be created and attached to projects for instructors and students to submit and report on the progress.

1. What is a Project in PrepBase?

A Project represents a structured academic or counseling engagement. It connects:

  • Students

  • Tutors and counselors

  • Project coordinators and admins
  • Schools (optional)

  • Stages, resources, and tasks

  • Project and academic status
  • Custom and tier reports

Each project acts as a centralized hub where all related activities, tasks, and reporting are managed.

2. Accessing Projects

To open the Projects module:

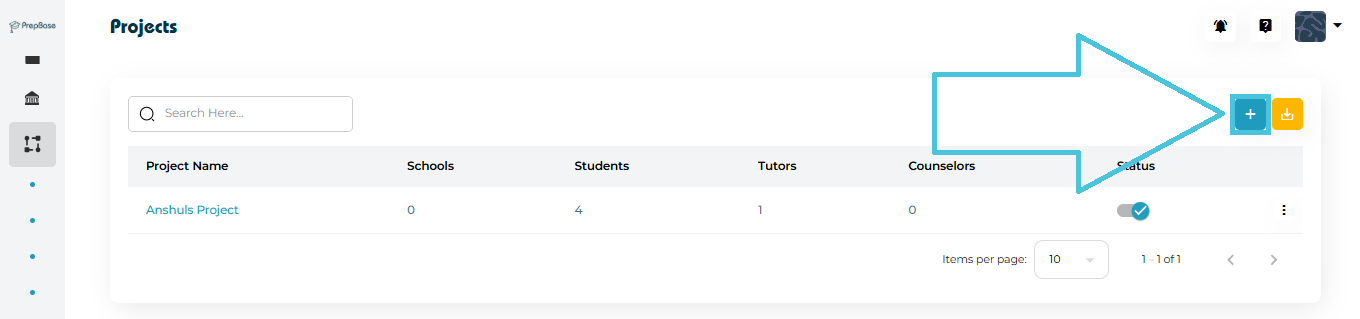
  1. From the left sidebar, go to Projects.

  2. You’ll see a list of all projects with quick metrics such as:

    • Number of students

    • Assigned tutors and counselors

    • Linked schools

    • Current project status

Clicking a Project Name opens the detailed project view.

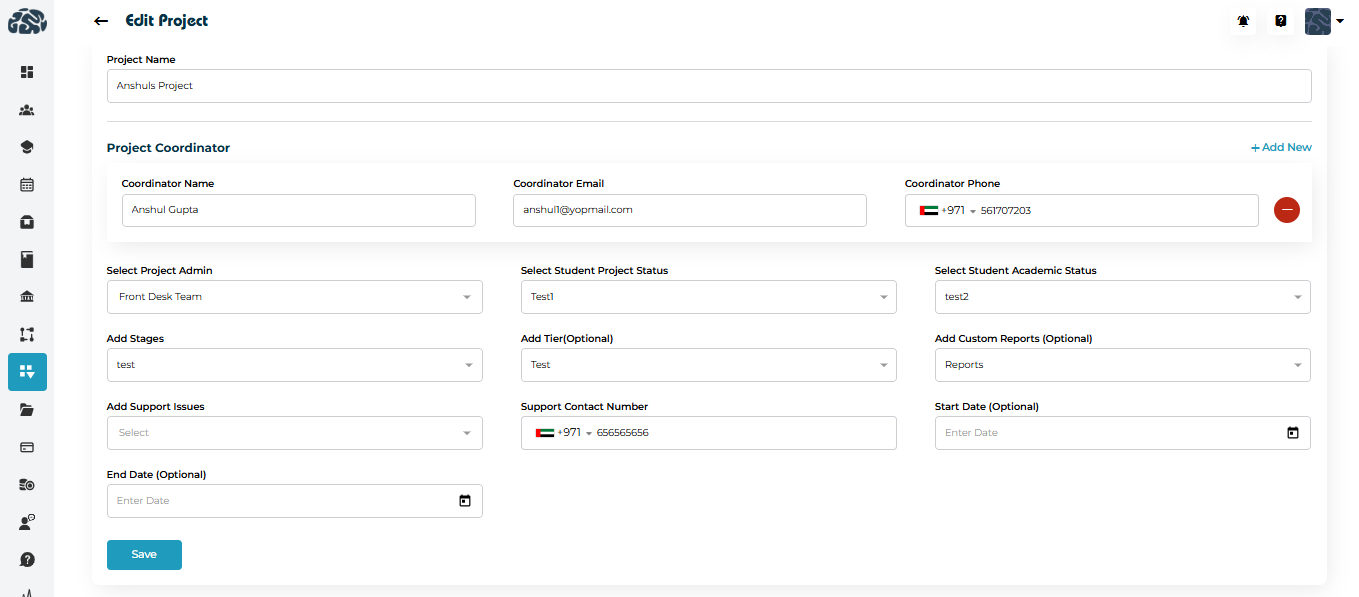
3. Creating a New Project

  1. Click the ➕ Add Project button on the Projects page.

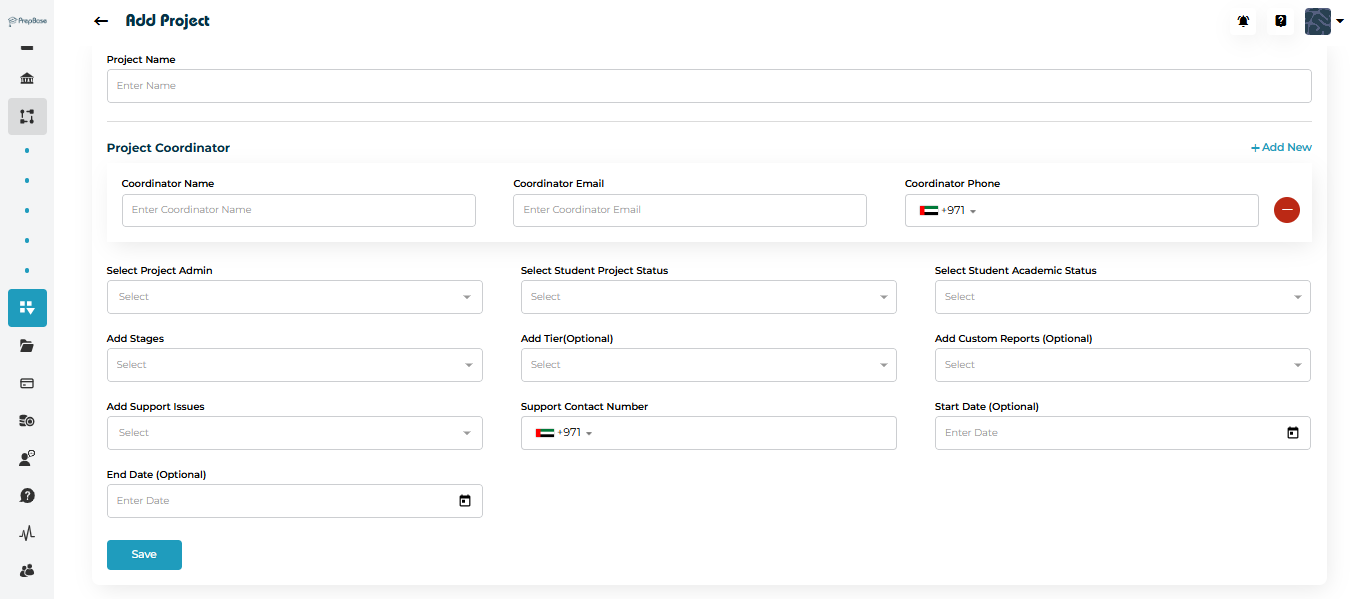
  2. Fill in the Project Name.

  3. Add Project Coordinator(s): this can be a system user or any other user to receive notifications for the project.

    • Name

    • Email

    • Phone number
      (You can add multiple coordinators if needed.)

  4. Select:

    • Project Admin (from the amin users list)

    • Student Project Status List to be used
      (created from the Statuses subtab under Workflows)

    • Student Academic Status List to be used
      (created from the Statuses subtab under Workflows)

  5. Attach optional configurations:

    • Stages List to be used
      (created from the Planners & Scores subtab under Workflows)

    • Tiers Report to be used
      (created from the Tiers subtab under Workflows)

    • Custom Reports to be used
      (created from the Reports subtab under Workflows)

    • Support Issues List to be used
      (created from the Lists subtab under Support)

  6. Enter:

    • Support contact number

    • Optional start and end dates

  7. Click Save.

The project is now created and ready for linking students and instructors.

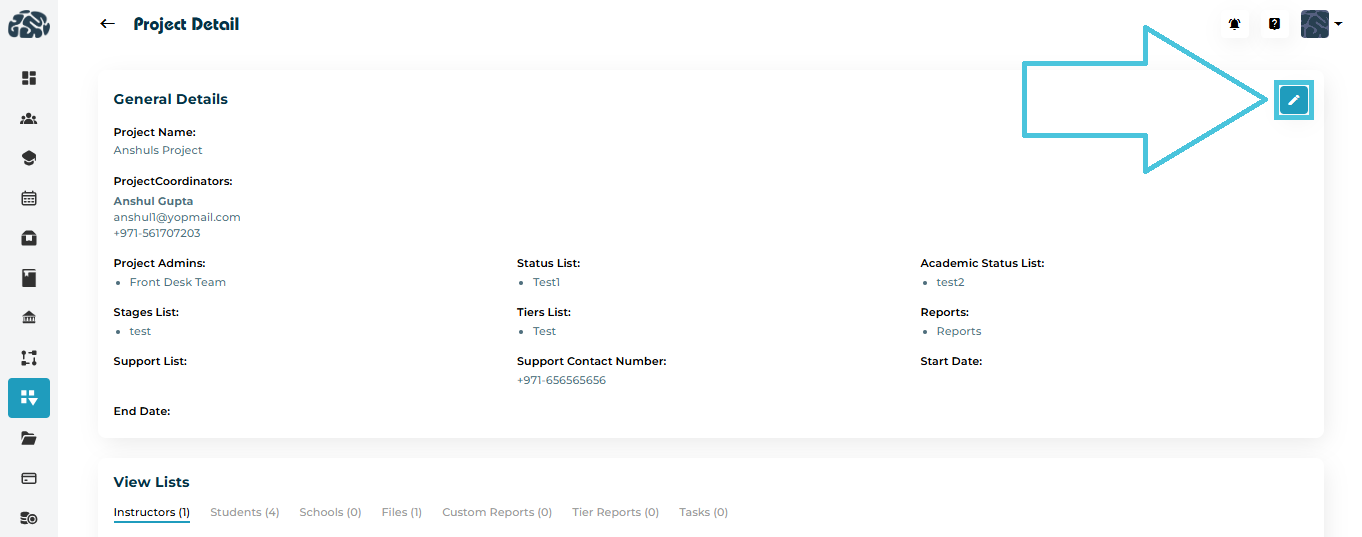
4. Project Detail Page Overview

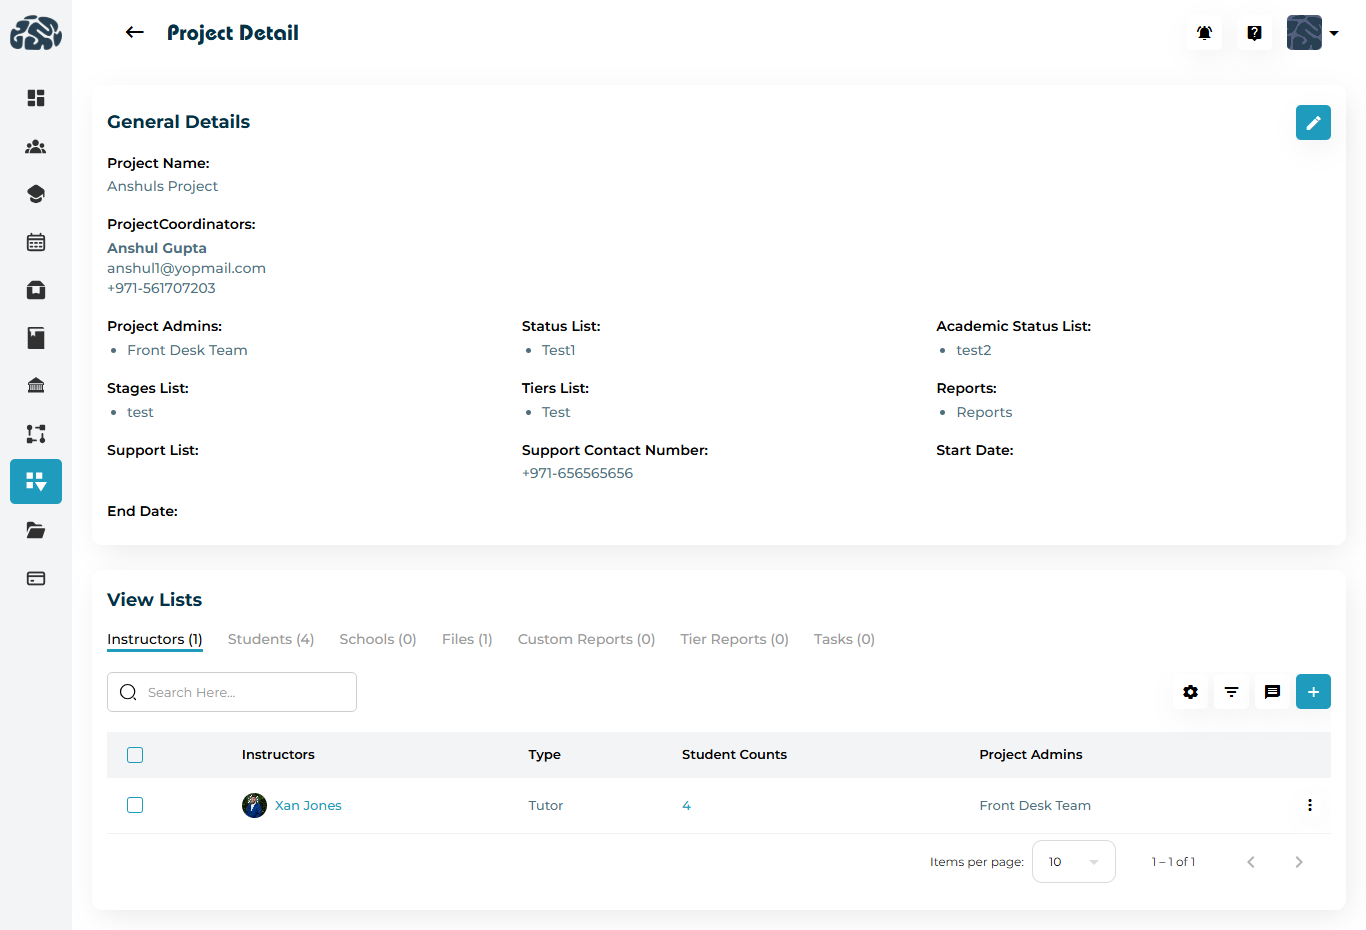
The Project Detail page is divided into two main sections:

1. General Details

This section shows:

  • Project name

  • Project coordinators

  • Assigned project admins

  • Linked stages, tiers, and reports

  • Student and academic status lists

  • Support contact details

  • Start and end dates


You can edit these details anytime using the Edit (✏️) button.

 
2. View Lists (Core Management Area)

This section contains tabs that let you manage everything linked to the project:

  • Instructors

  • Students

  • Schools

  • Files

  • Custom Reports

  • Tier Reports

  • Tasks

Each tab supports searching, filtering, bulk actions, and contextual controls.

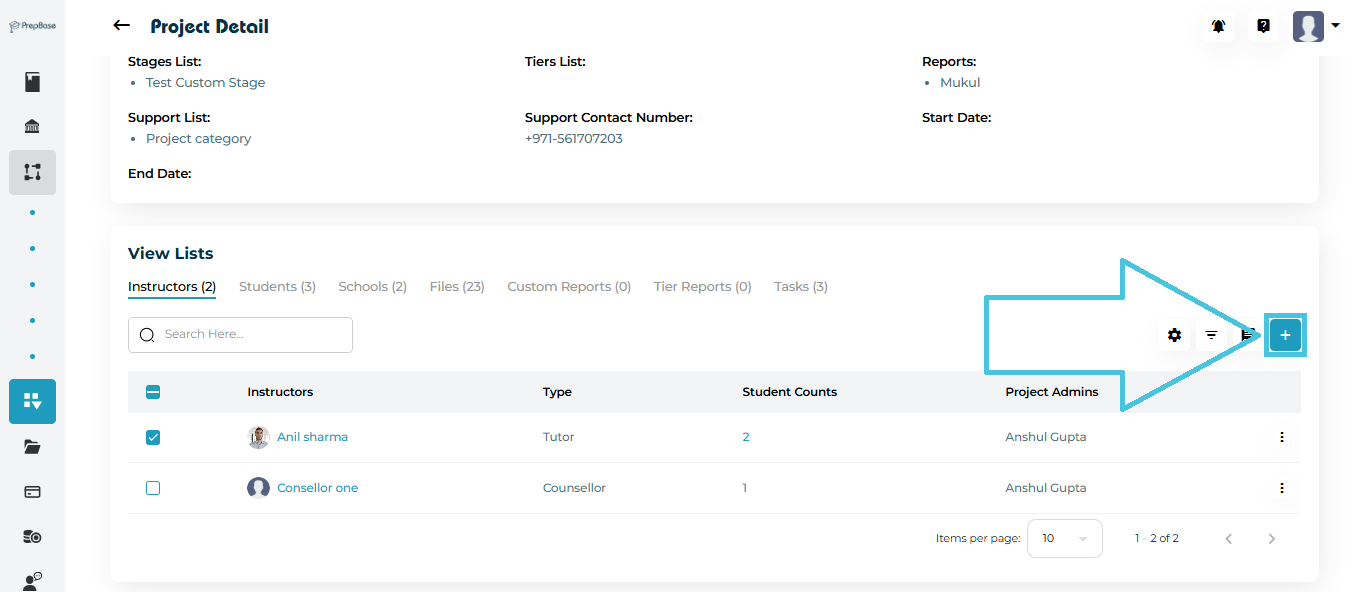
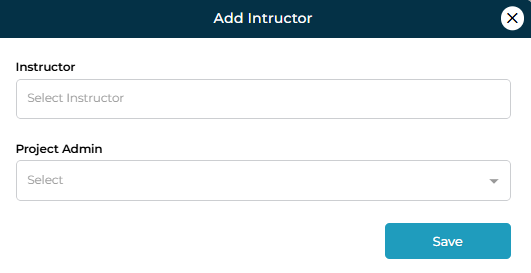
5. Linking Instructors to a Project

  1. Open the Instructors tab.

  2. Click ➕ Add.

  3. Select one or more instructors.

  4. Assign a Project Admin for the instructor.

  5. Click Save.

Instructors Management Options

From the Instructors tab, admins can:

  • Edit instructor assignments

  • Remove instructors from the project

  • Assign project admins

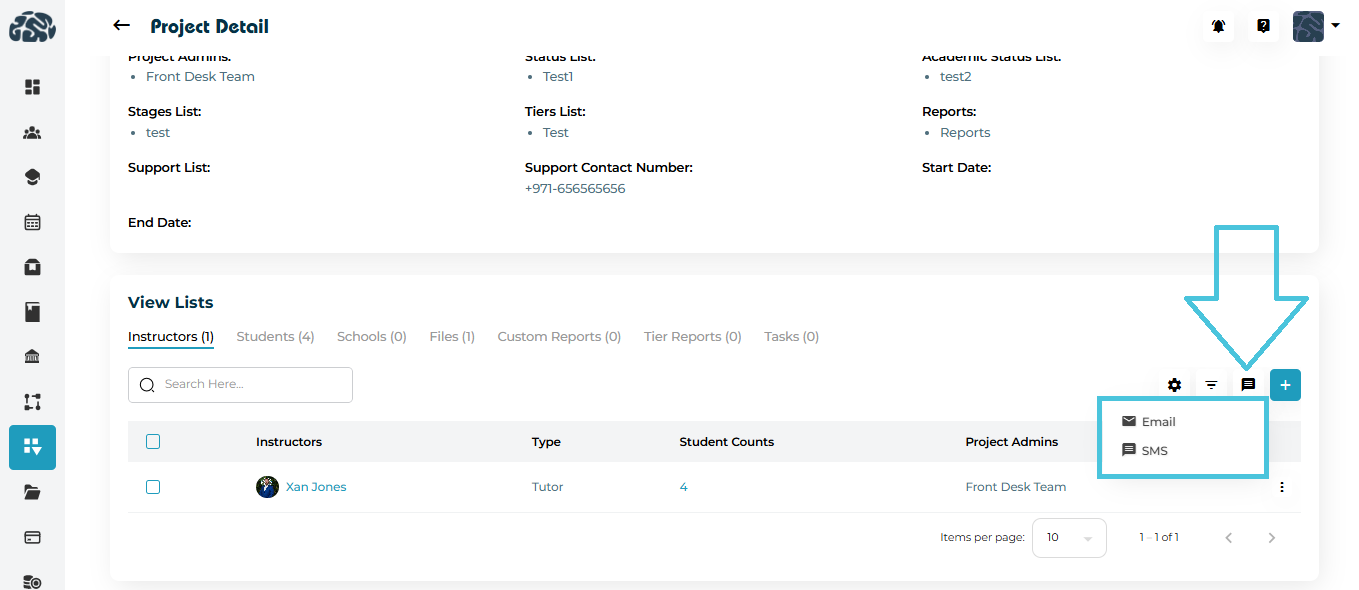
  • Send Email or SMS

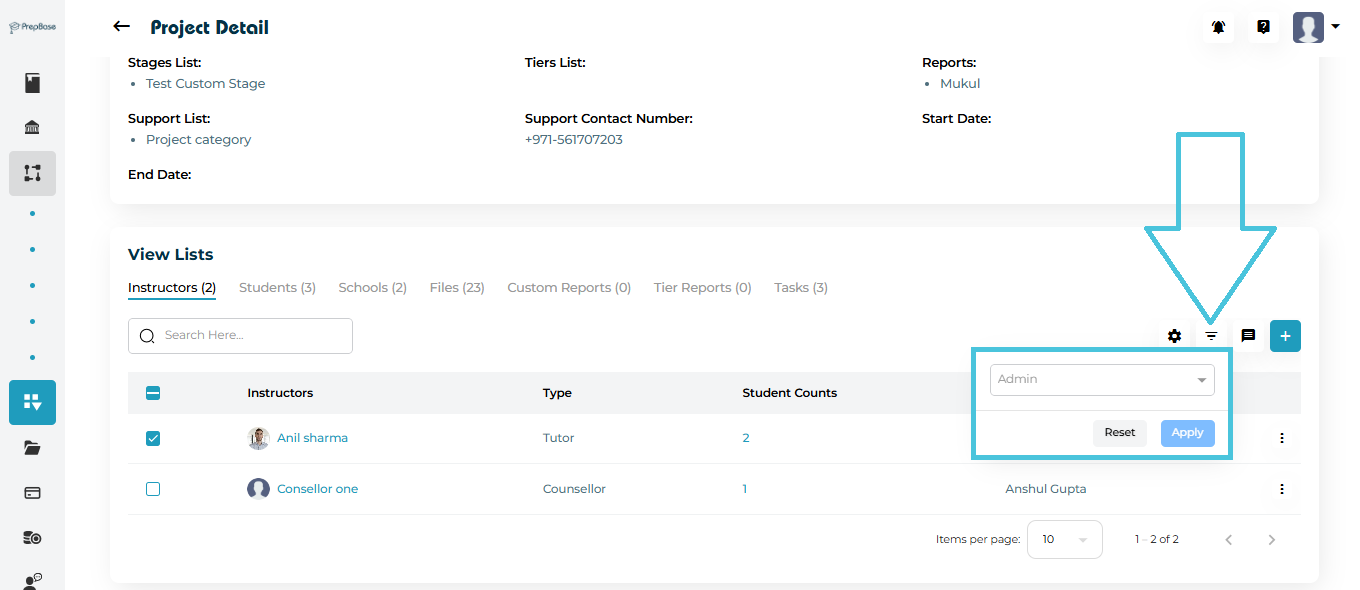
  • Apply filters (by role or admin)

Clicking an instructor’s name opens their full profile.

6. Linking Students to a Project

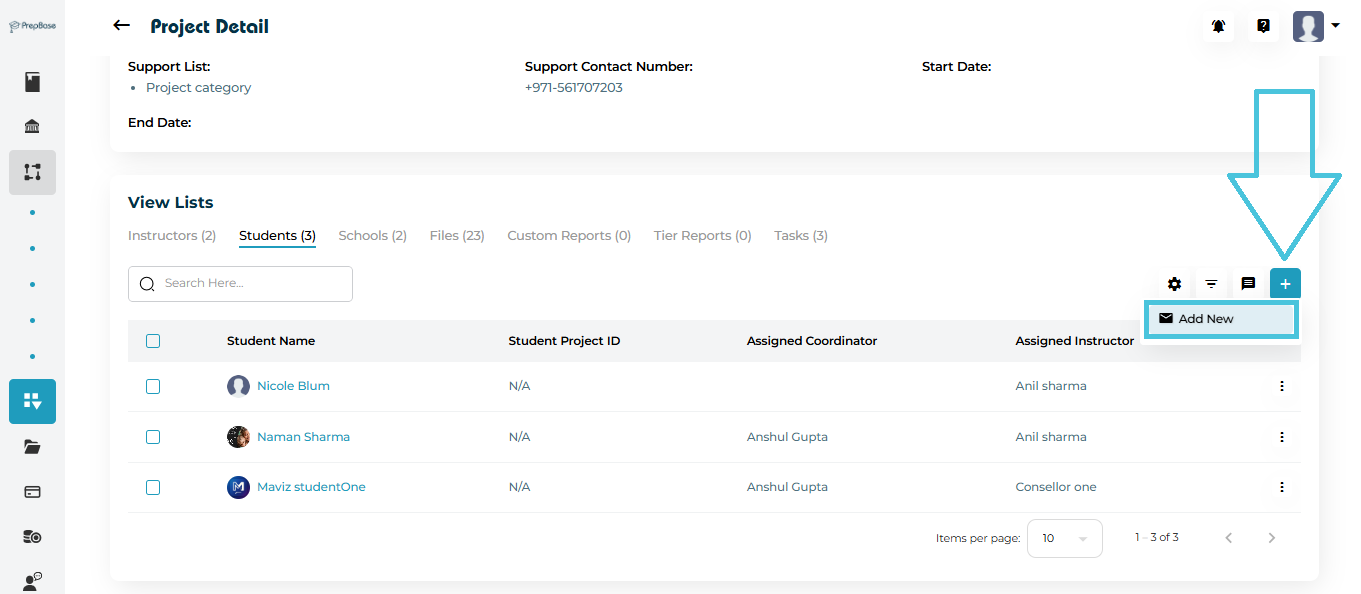
  1. Go to the Students tab.

  2. Click ➕ Add New.

  3. Select:

    • Student(s)

    • Assigned instructor

    • Assigned coordinator

  4. Click Save.

 
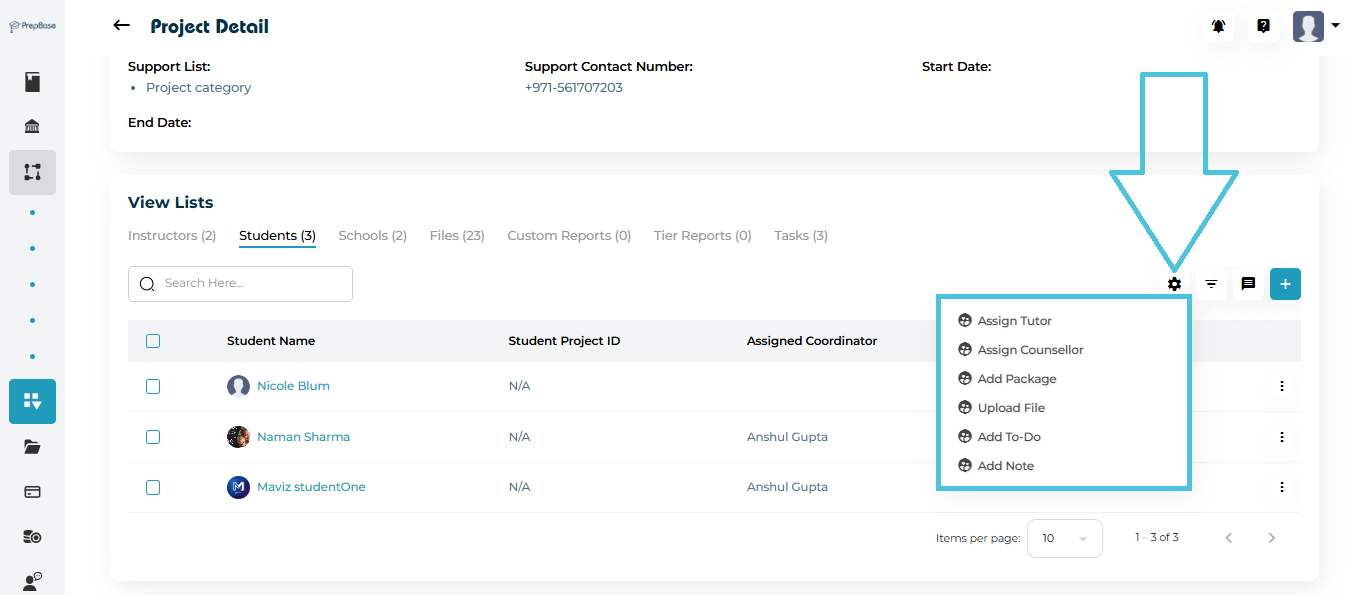
Student Management Options

Within the Students tab, you can:

  • Edit student assignments

  • Remove students from the project

  • Assign tutors or counselors

  • Upload files

  • Add packages

  • Create to-dos

  • Add student notes

  • Send Email or SMS

  • Filter by instructor or coordinator

Clicking a student name opens their individual student profile.

7. Linking Schools to a Project


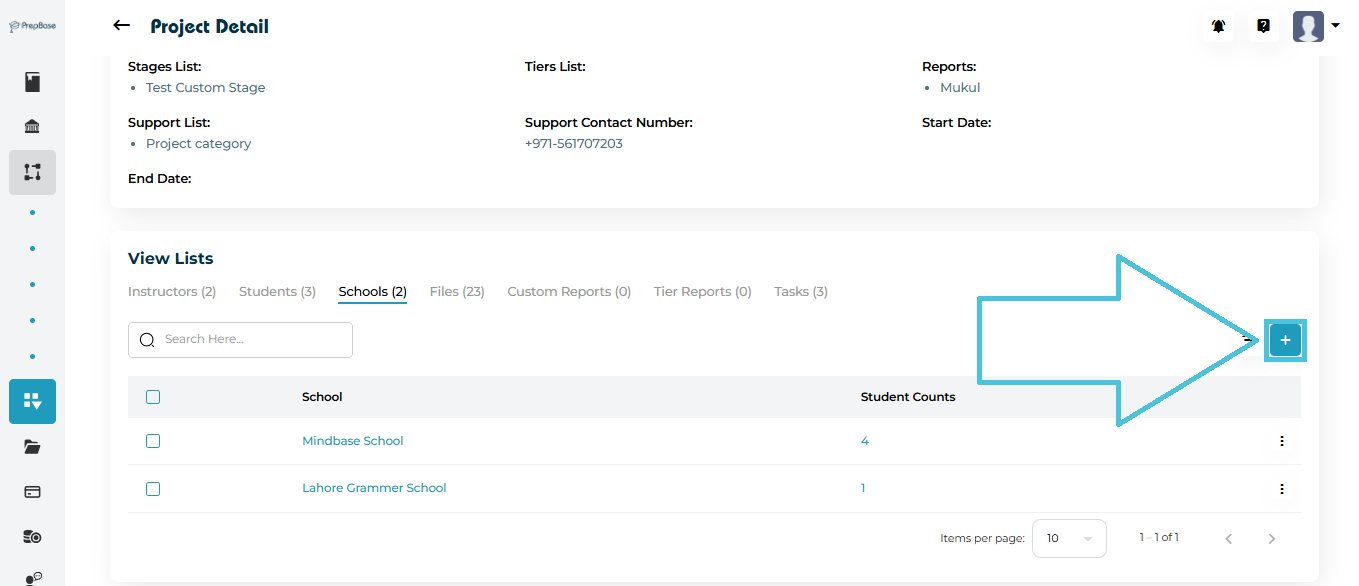
  1. Open the Schools tab.

  2. Click ➕ Add.

  3. Select one or multiple students from the list
  4. Select the school that you want to link these students to and confirm.

For each linked school, the project shows:

  • School name

  • Number of students linked to that school

Admins can remove schools at any time. Clicking a school name opens the full school profile.

8. Filters, Bulk Actions, and Communication

Across all tabs, PrepBase provides:

  • Advanced filters (by instructor, coordinator, school, or student)


  • Bulk actions for faster management


  • Built-in Email and SMS communication tools


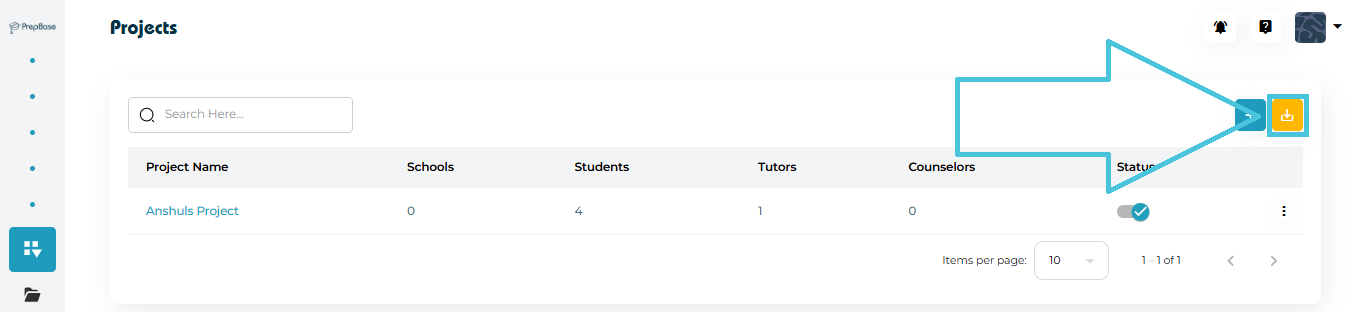
  • CSV export options for project data


These tools help admins manage large projects efficiently without leaving the project page.

9. Editing or Deleting a Project

From the Projects list or Project Detail page:

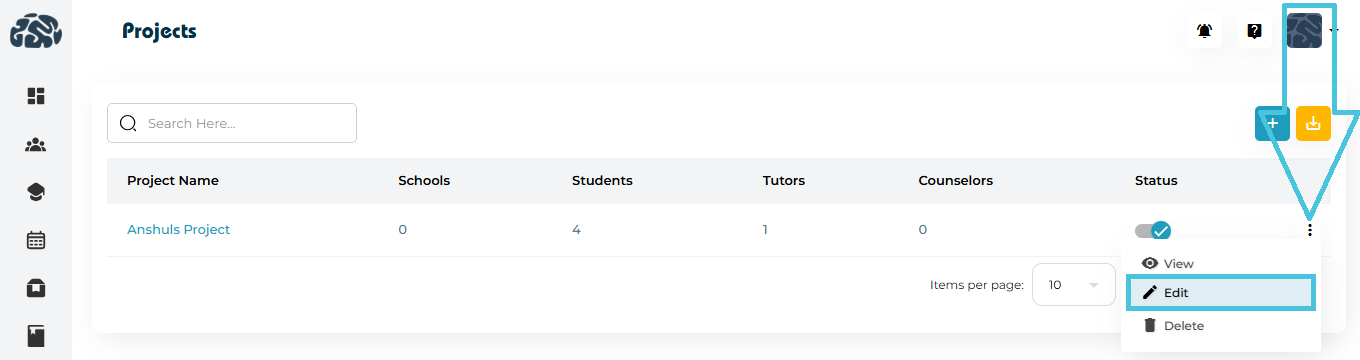
  • Edit: Update project settings, assignments, or configurations.

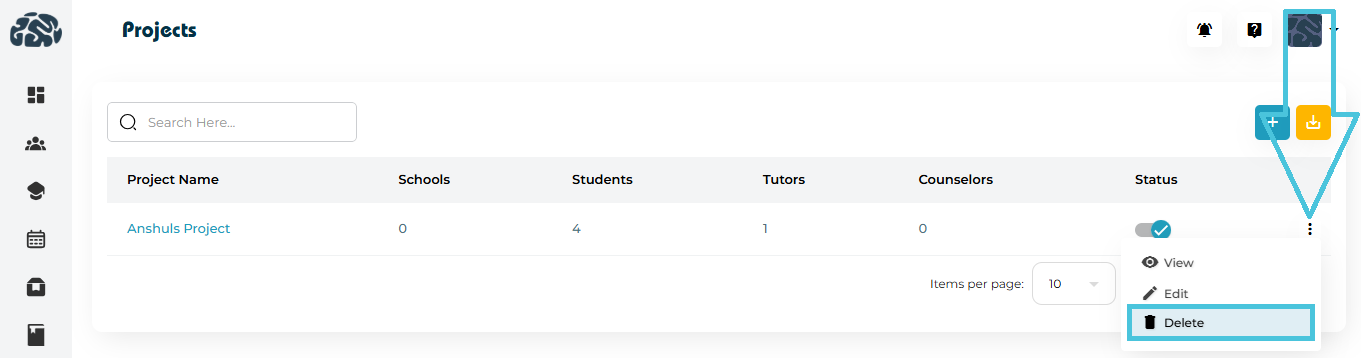
  • Delete: Permanently remove a project (use with caution).

IN THIS ARTICLE