Navigate to:
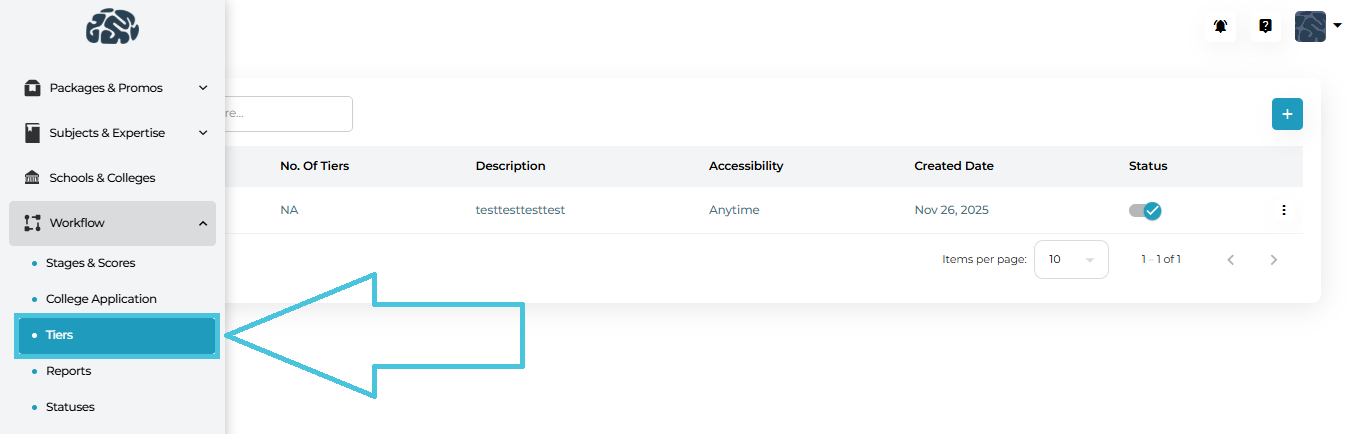
Admin Panel → Workflow → Tiers
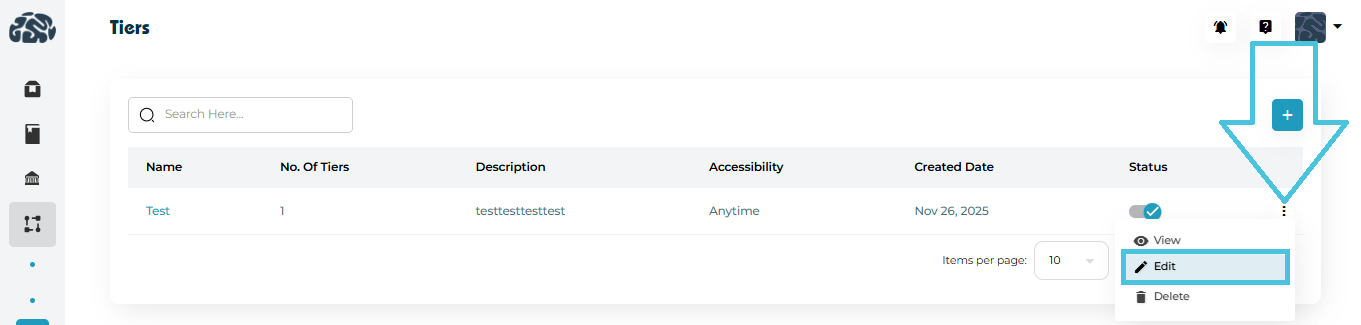
Here, you’ll see a complete list of existing tiers with:
Tier name
Number of tiers inside it
Description
Accessibility (e.g., Anytime or date-based)
Created date
Status (Active/Inactive)
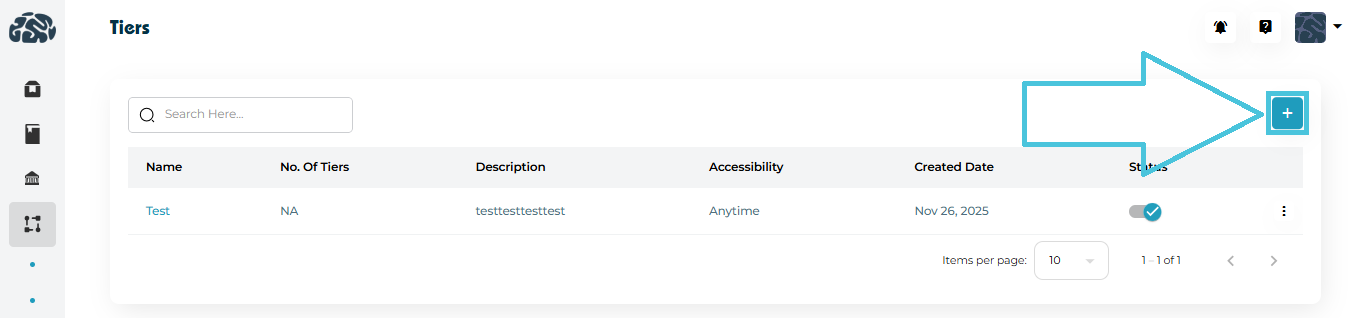
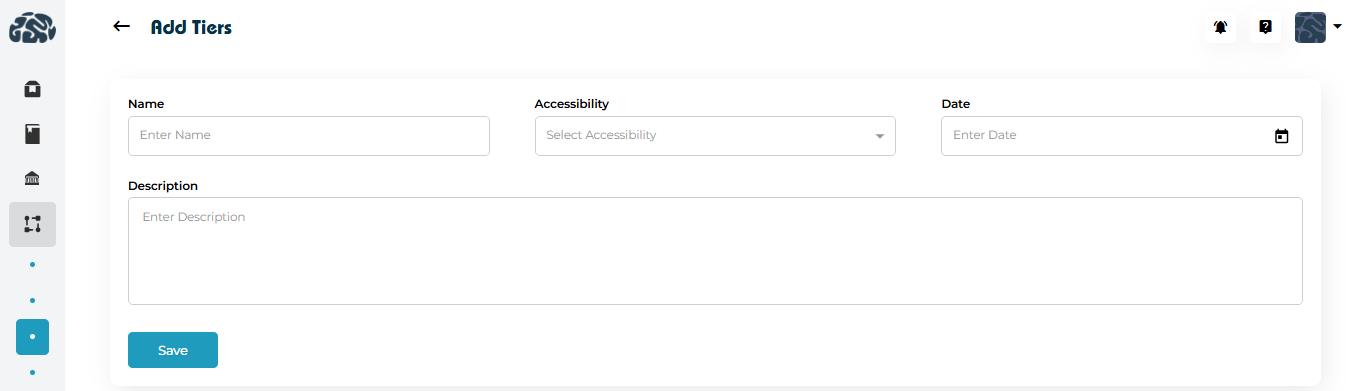
Click ➕ Add on the Tiers page.
Enter the Tier Name (e.g., “Initial Review”).
Select Accessibility:
Anytime – always available
Once per month – available
- Twice per month – available
(Optional) Add a Description to clarify the tier’s purpose.
Click Save.
The tier is now available for use in reports and workflows.
You can open a tier in two ways:
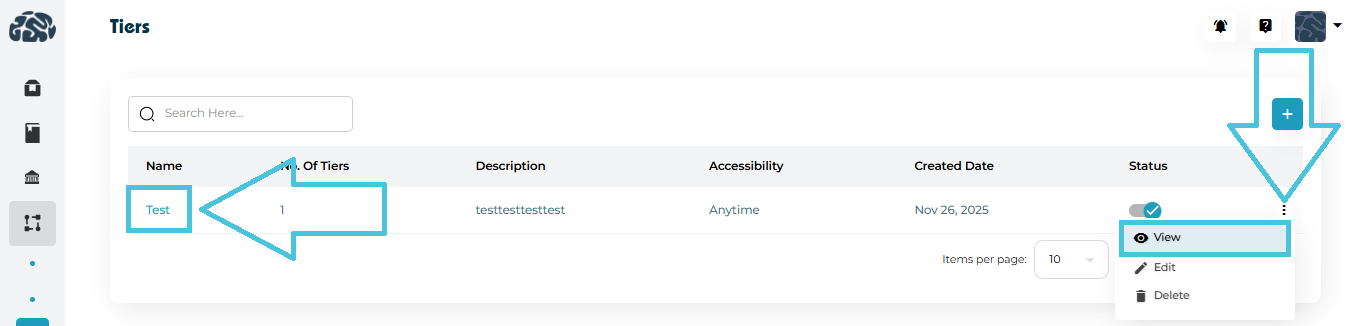
Click the tier name directly.
Use the three-dot menu → View.
The View Tier page displays:

Tier name and description
Accessibility settings
Created date
List of tiers inside it (if applicable)
Current status (active/inactive)
Some workflows require sub-tiers (e.g., “Document Review” inside “Application Review”).
From the View Tier page:
Adding Statuses and Actions to a Tier
Each tier can define how progress is tracked:
Status Options
Add multiple status labels (e.g., Not Started, In Review, Completed).
These appear when tracking or reporting progress.
Action Options
Define actions users can take (e.g., Request Documents, Approve, Escalate).
Actions standardize workflow decisions.
Feedback Toggle
Enable Feedback if qualitative input or remarks are required at this tier.
Useful for counselor notes or reviewer comments.
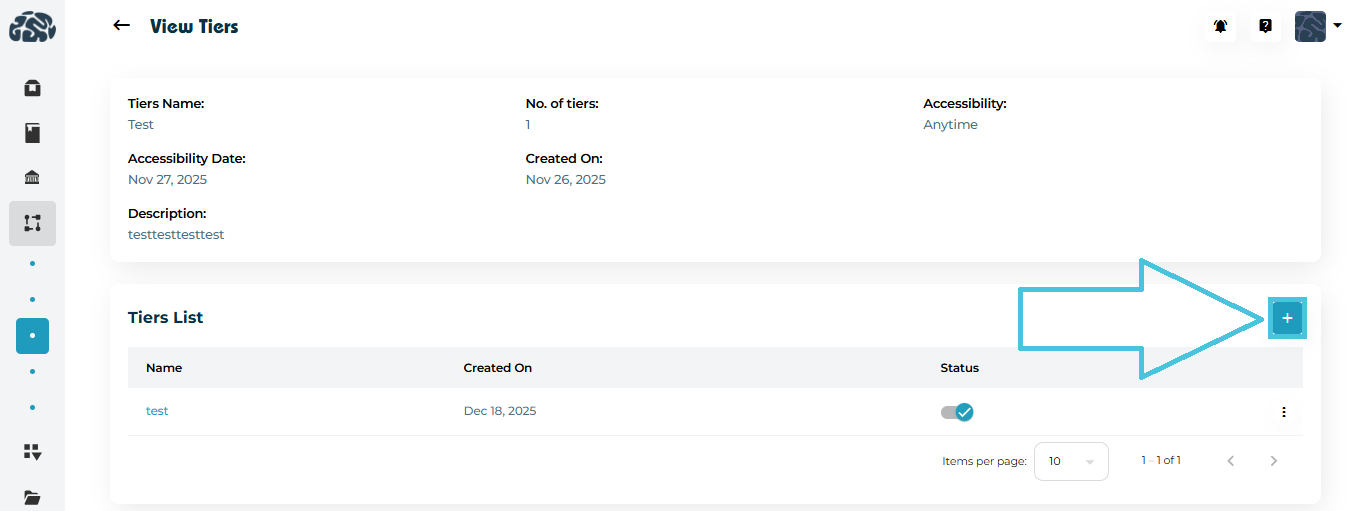
Adding a nested tier
Scroll to Tiers List.
Click
 Add to create a tier inside the parent tier.
Define its name, statuses, actions, and feedback settings.
Save to add it to the hierarchy.
This allows granular reporting without cluttering the main workflow.
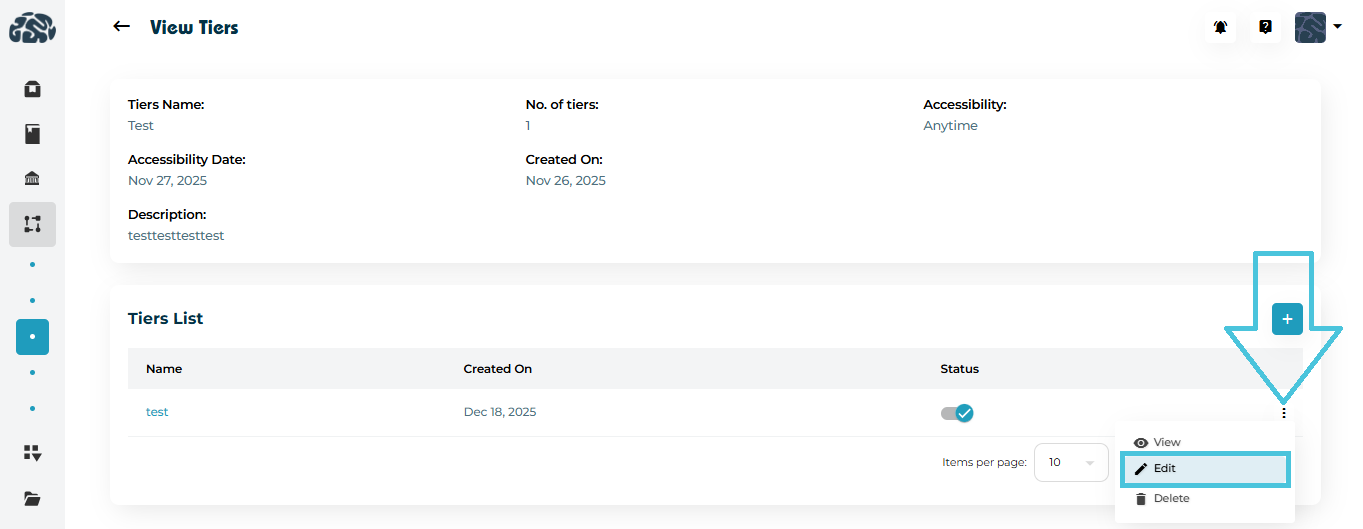
Editing a nested tier
Open the three-dot menu → Edit.
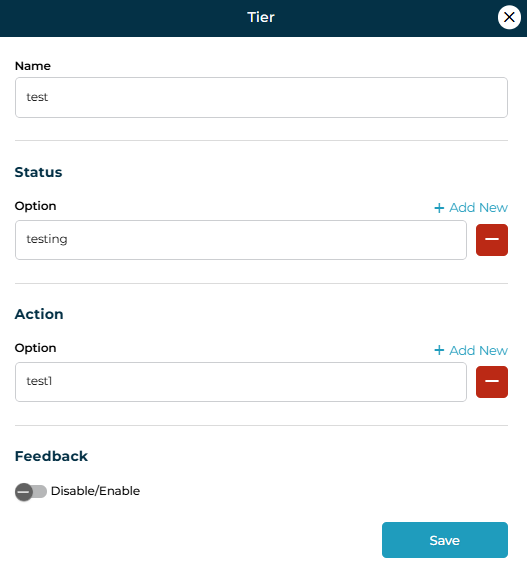
Modify:
Name
Status
- Action
Feedback
Click Save to apply changes.
Edits take effect immediately across all related reports.
Deleting a nested tier
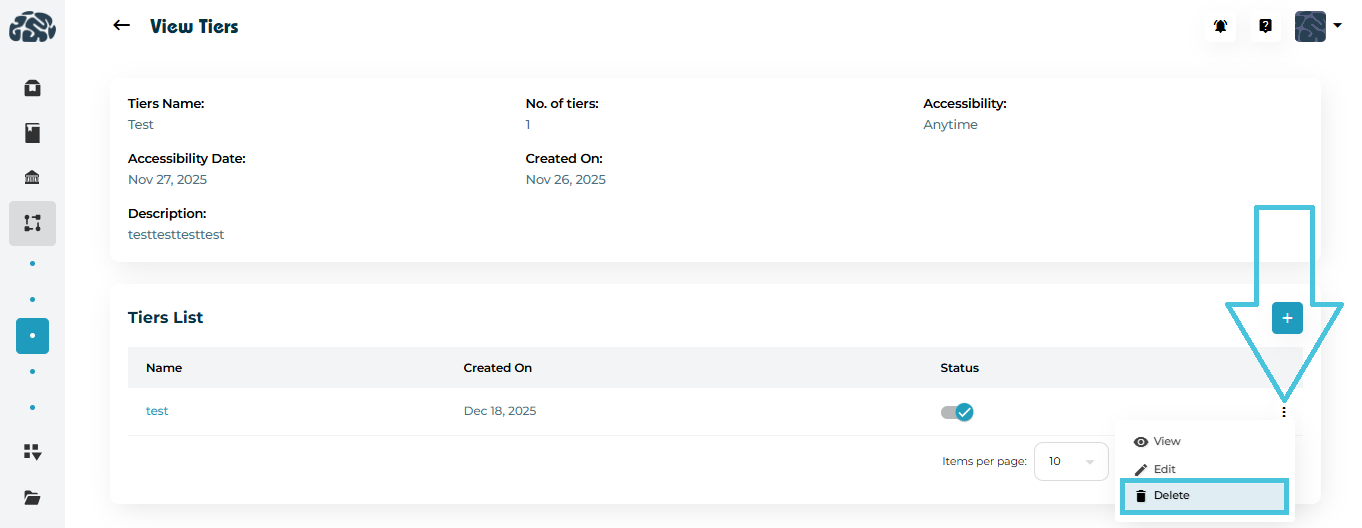
Open the three-dot menu → Delete.
Confirm the action.
To update a tier:
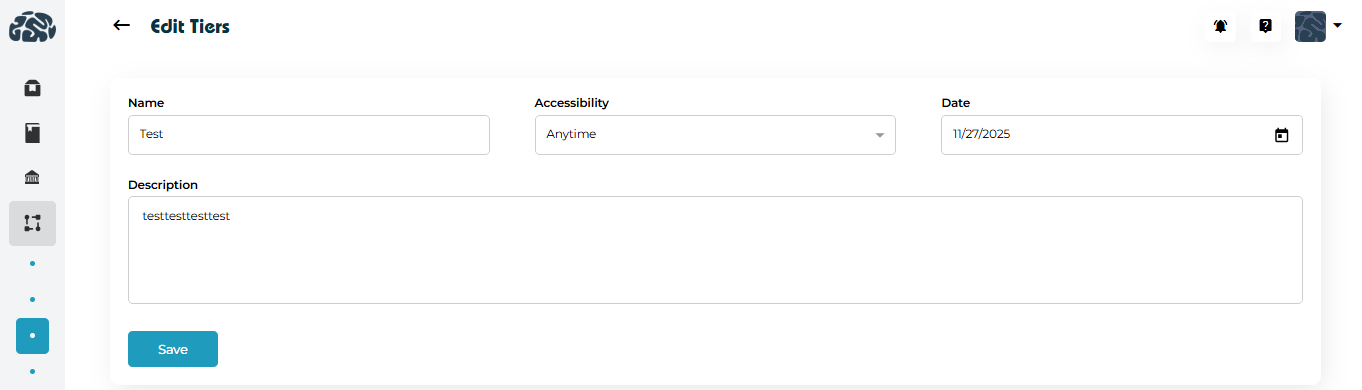
Open the three-dot menu → Edit.
Modify:
Name
Accessibility
- Date
Description
Click Save to apply changes.
Edits take effect immediately across all related reports.
To remove a tier:
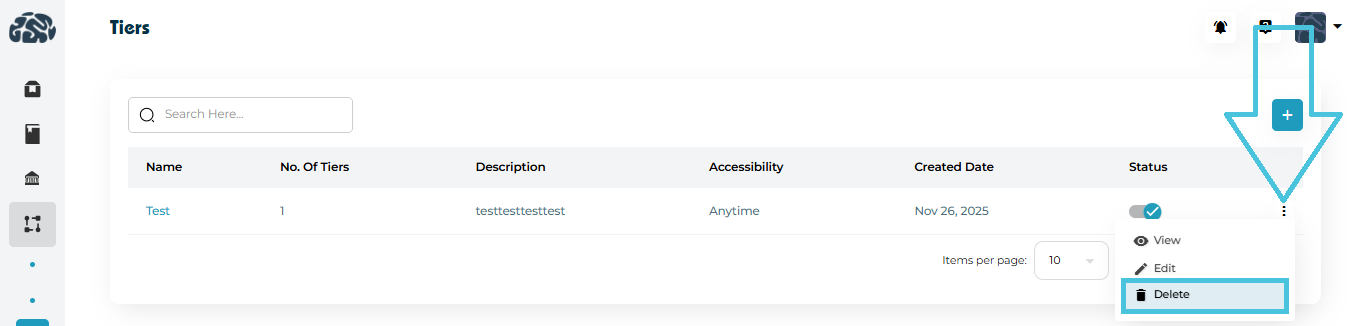
Open the three-dot menu → Delete.
Confirm the action.
⚠️ Best practice:
Only delete tiers that are no longer referenced in active workflows or reports to avoid data inconsistencies.