Go to:
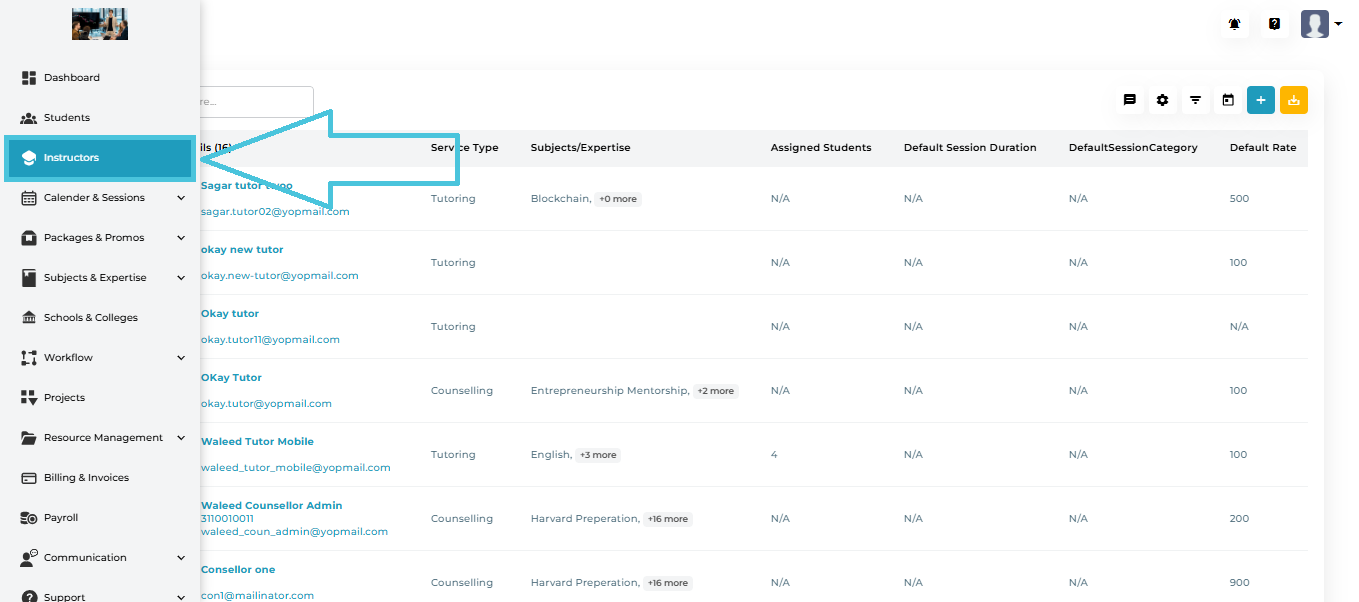
Left Sidebar → Instructors
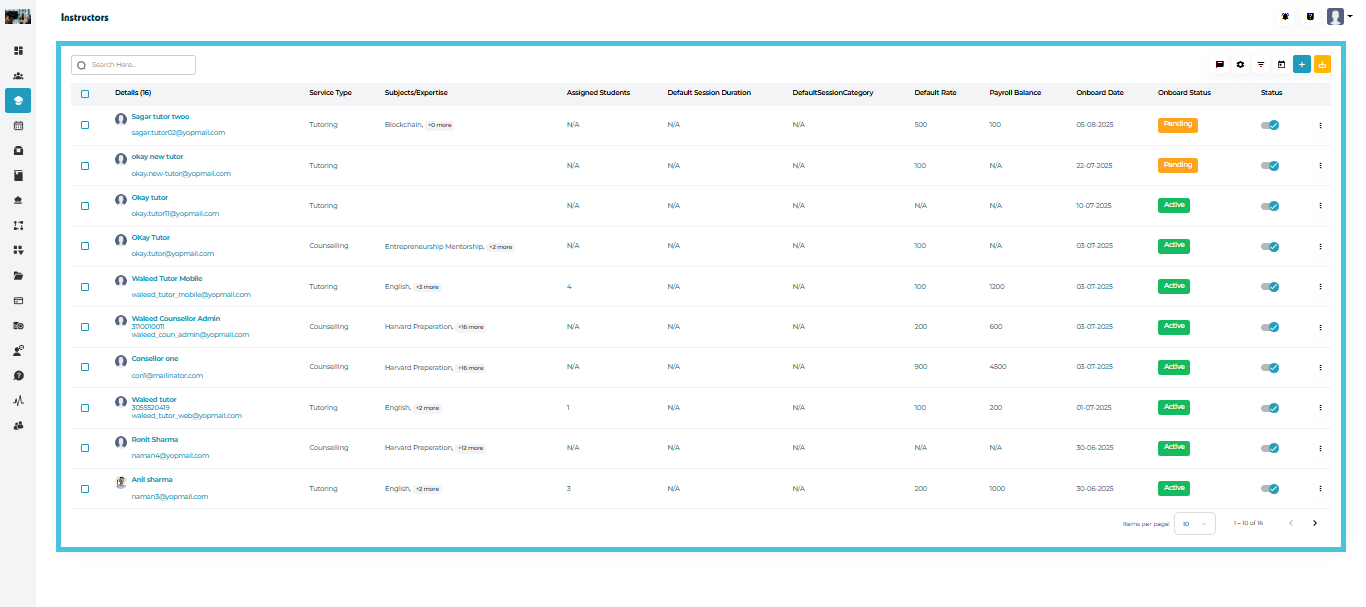
The Instructors listing page includes:
-
Instructor Name
-
Email
-
Service Type (Tutoring / Counselling)
-
Subjects & Expertise
-
Assigned Students
-
Default Session Duration / Category
-
Default Rate
-
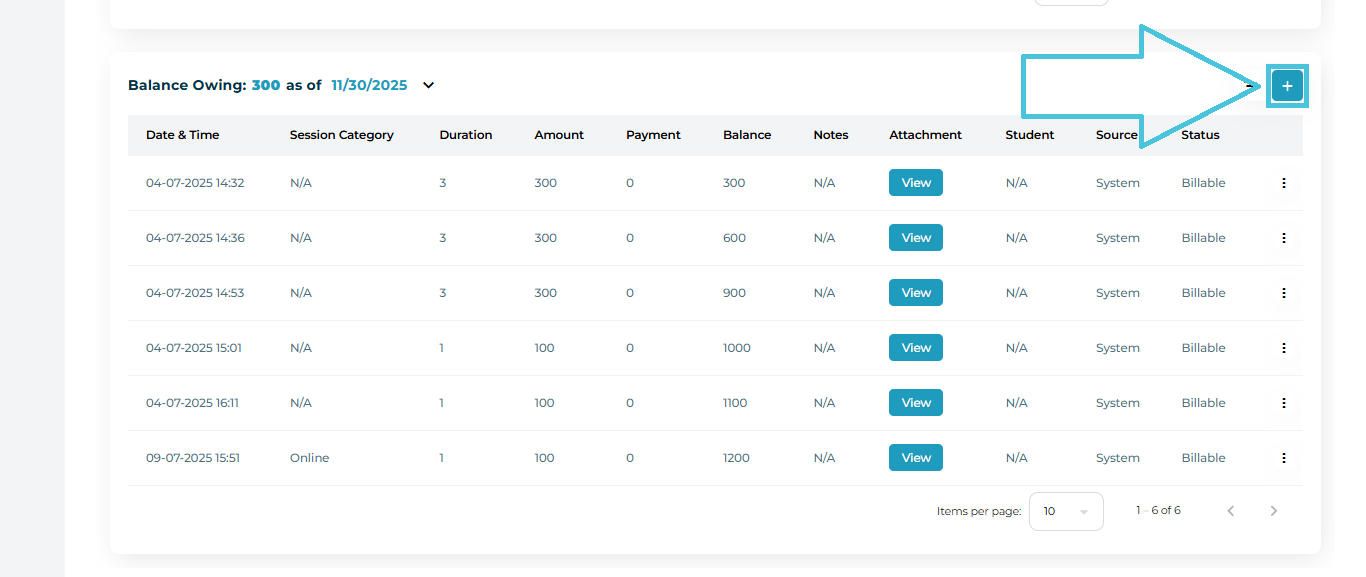
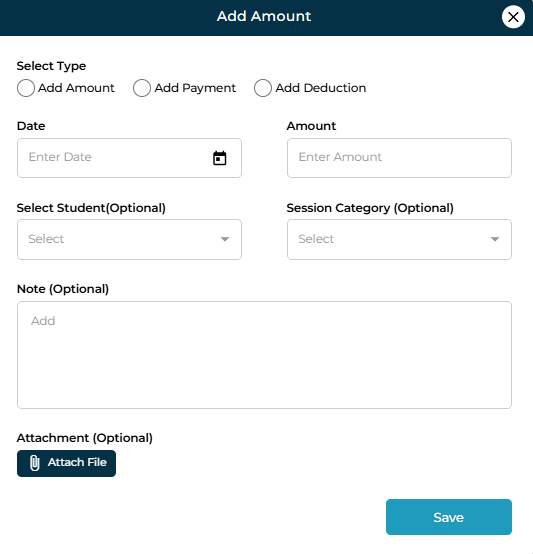
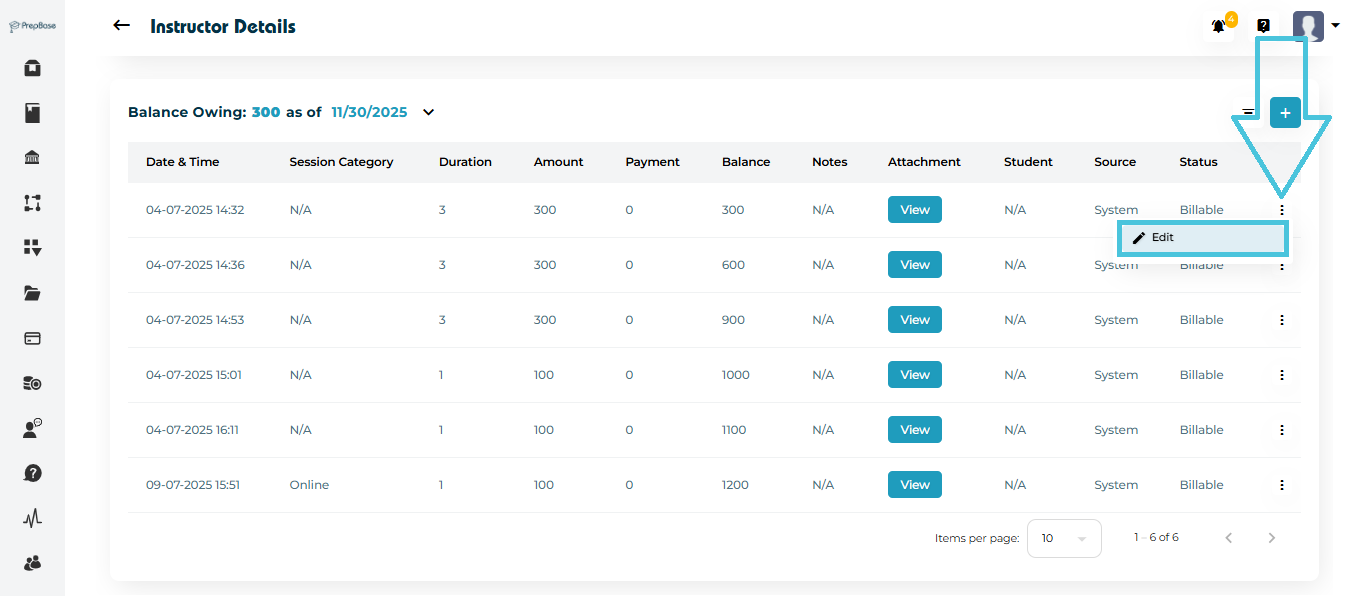
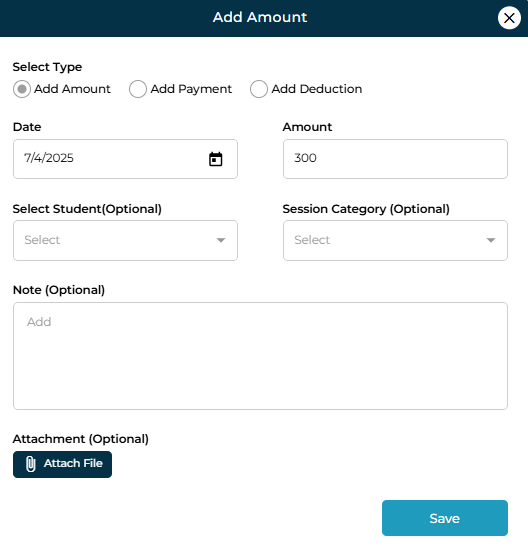
Payroll Balance
-
Onboard Date
-
Onboard Status
-
Active / Inactive Status
-
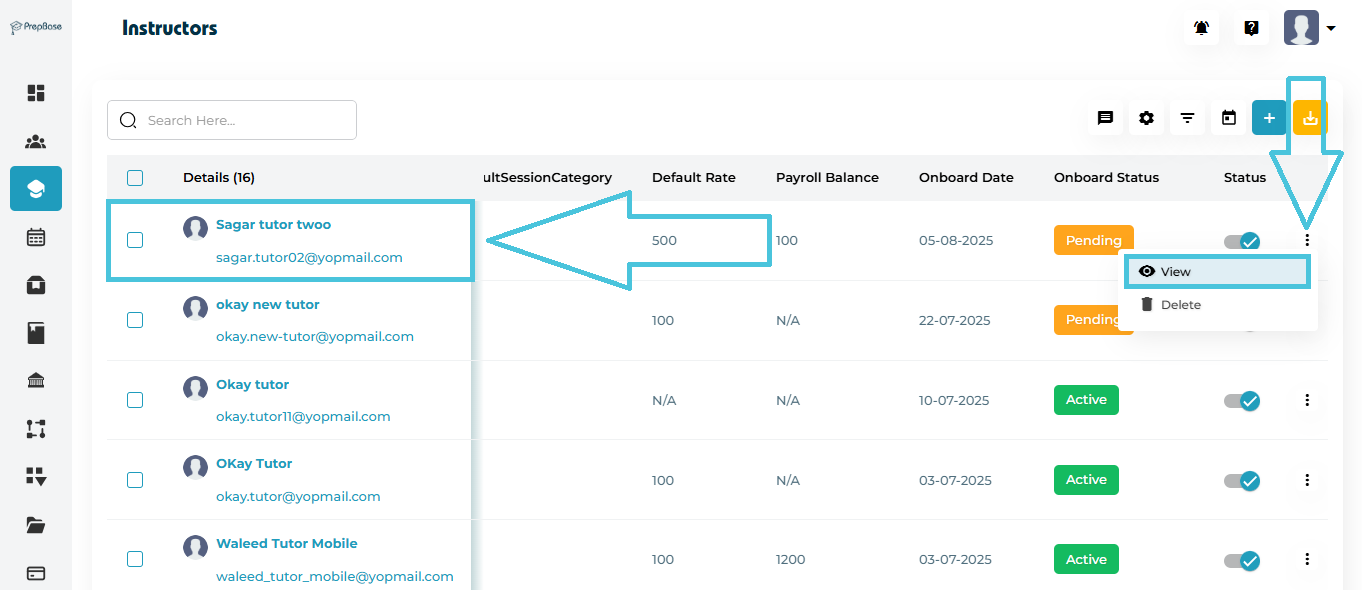
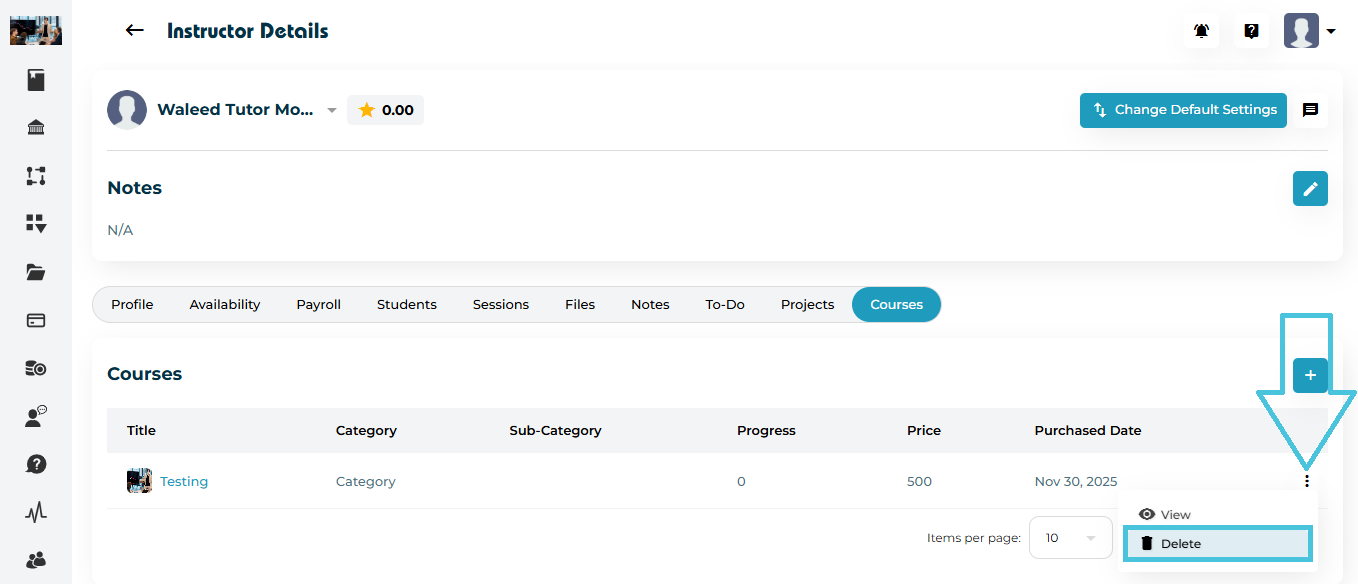
Action Menu (View / Delete)
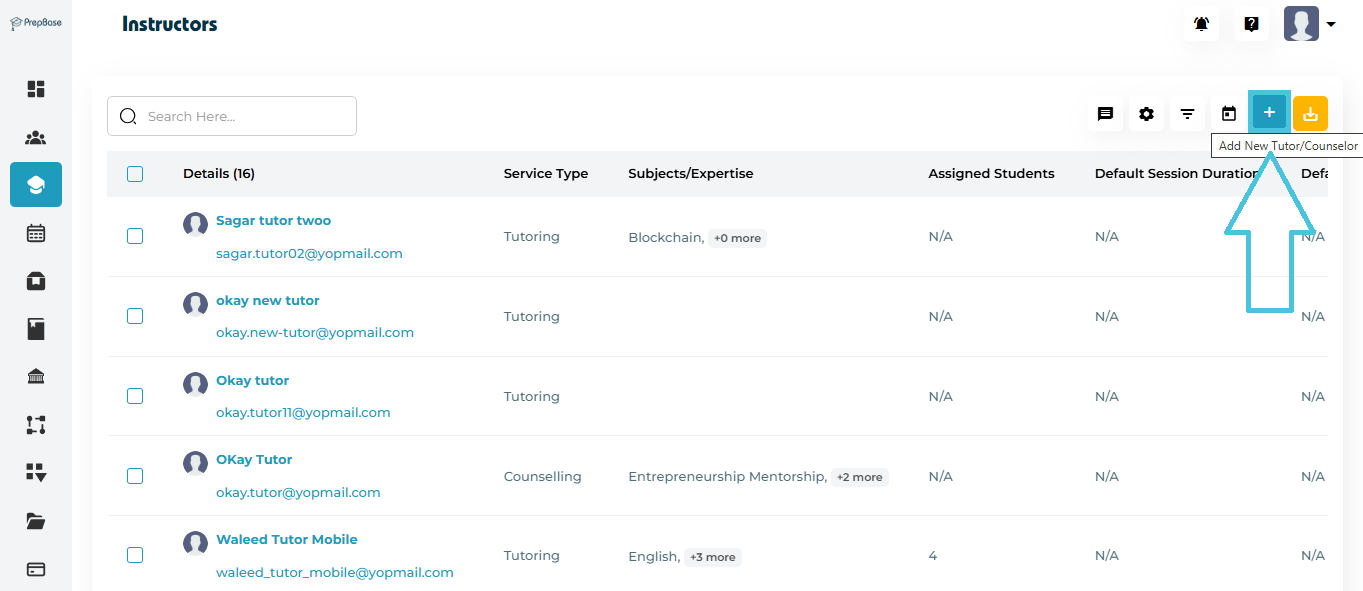
Admins can add new instructors by navigating to the Instructors module and selecting Add New Tutor/Counselor (+).
This form is used to create instructor profiles for tutors and counselors who will later be assigned to students, sessions, and academic workflows.
The Add Instructor process is completed in three structured steps:
-
Personal Details
-
Professional Details
-
Expertise
Each step captures specific information required to configure the instructor correctly within the system.
Step 1: Personal Details
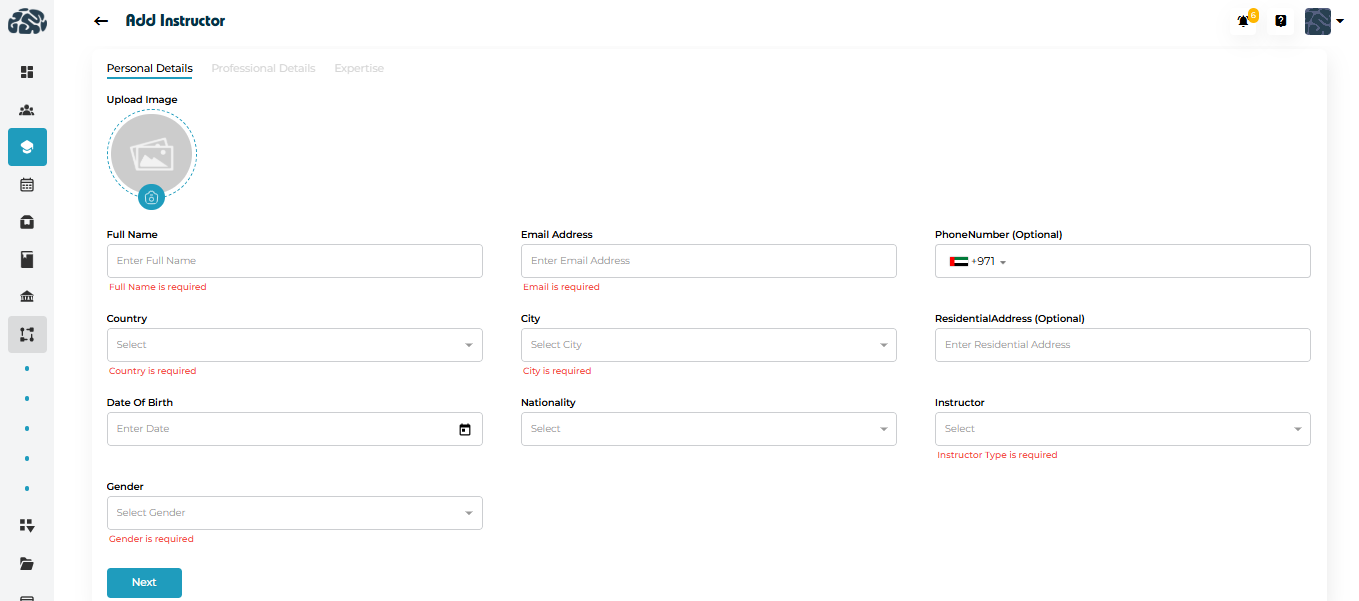
This section captures the instructor’s core identity and contact information.
| Field Name | Description |
|---|---|
| Profile Image | Upload a profile photo for the instructor. This field is optional, but recommended for easier identification across the platform. |
| Full Name | The instructor’s complete legal name as it should appear across the system. Required. |
| Email Address | A unique email address used for login credentials and system communication. Required. |
| Phone Number | Instructor’s contact number including country code. Optional. |
| Country | The instructor’s country of residence. Required. |
| City | City selected within the chosen country. Required. |
| Residential Address | Current residential address of the instructor. Optional. |
| Date of Birth | Used for internal records and verification purposes. Optional. |
| Nationality | Instructor’s nationality. Optional. |
| Instructor Type | Defines whether the profile is created as a Tutor or a Counselor. This selection controls how the instructor is assigned within PrepBase. Required. |
| Gender | Instructor’s gender selection for profile records. Required. |
Step 2: Professional Details
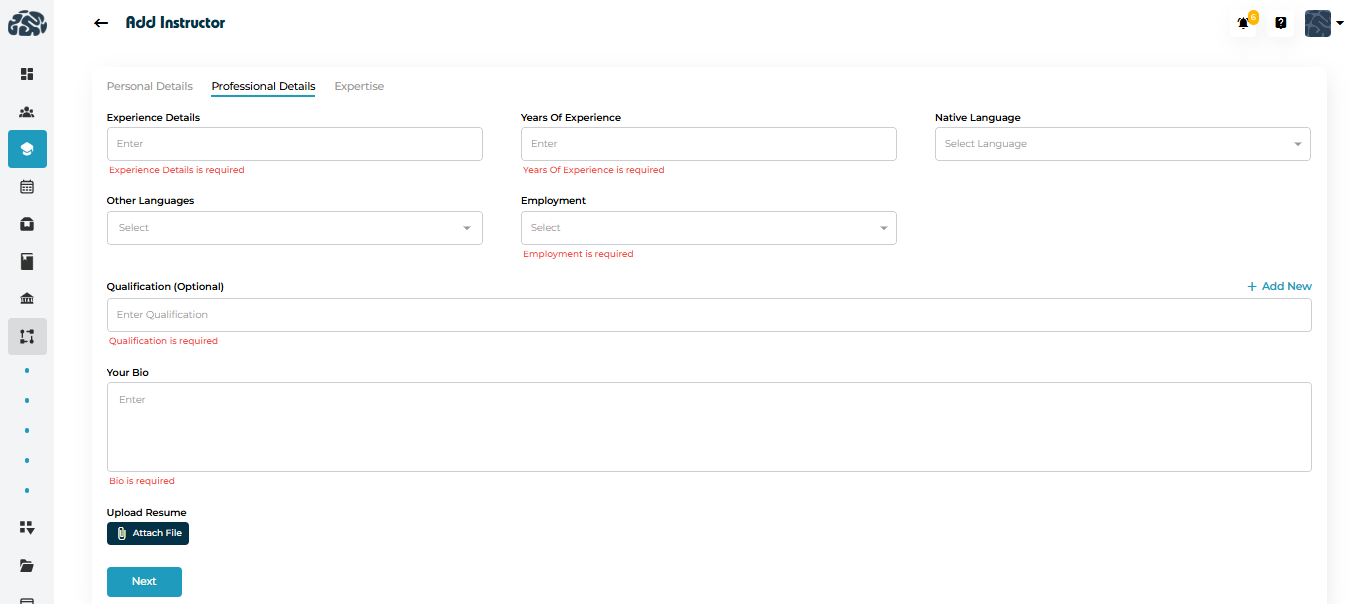
This section defines the instructor’s background, experience, and professional profile.
| Field Name | Description |
|---|---|
| Experience Details | A short summary of the instructor’s teaching or counseling background. Required. |
| Years of Experience | Total number of professional experience years. Numeric input only. Required. |
| Native Language | The instructor’s primary language of communication. Optional. |
| Other Languages | Additional languages the instructor can communicate in. Optional. |
| Employment | Specifies the instructor’s employment type (e.g., Full-Time, Part-Time, Contract). Required. |
| Qualification | Academic or professional qualifications. Multiple entries can be added using Add New. Optional. |
| Bio | A professional biography visible within the instructor profile. This helps admins and students understand the instructor’s background. Required. |
| Upload Resume | Upload the instructor’s CV or resume for internal reference. Optional, but recommended for record completeness. |
Step 3: Expertise

This section defines the academic scope and specialization of the instructor.
| Field Name | Description |
|---|---|
| Curriculums of Interest | Curriculums the instructor is available to teach (e.g., IB, A-Levels, SAT). Optional. |
| Levels of Interest | Education levels supported by the instructor (e.g., Middle School, High School, Undergraduate). Optional. |
| Subject of Interest | Subjects in which the instructor has expertise and can be assigned sessions. Optional. |
-
The Save button becomes available once all required fields are completed.
-
After saving, the instructor profile:
-
Appears in the Instructors list
-
Can be assigned to students, sessions, and academic workflows
-
Is available for scheduling and communication
-
Can be updated or edited at any time
-
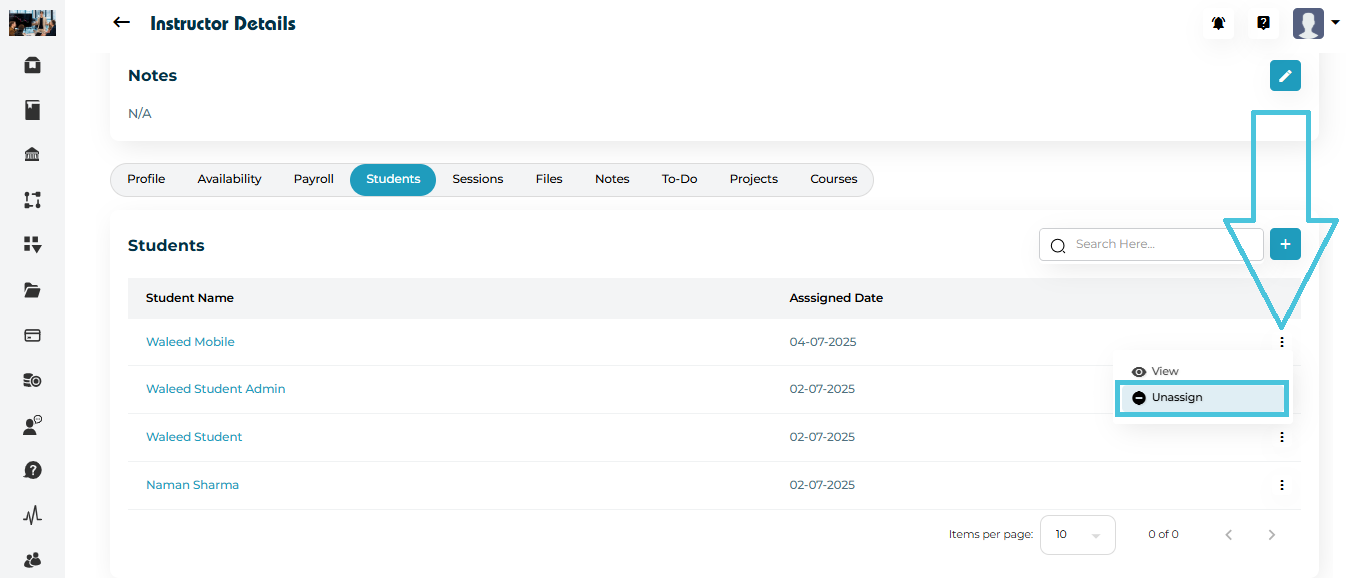
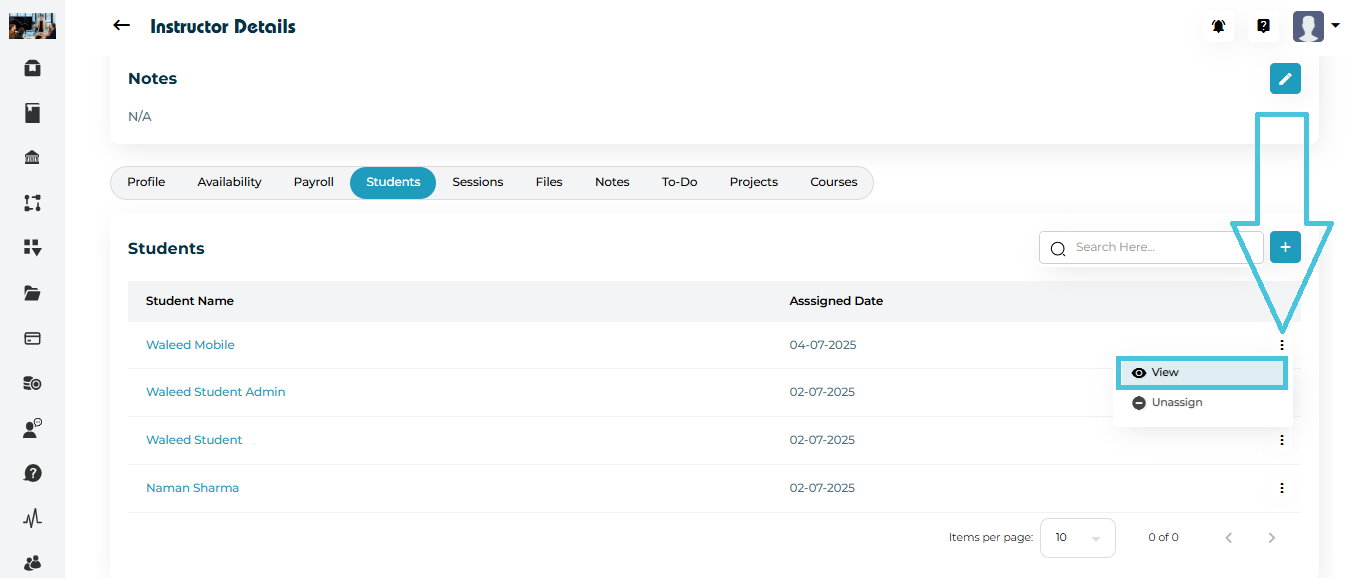
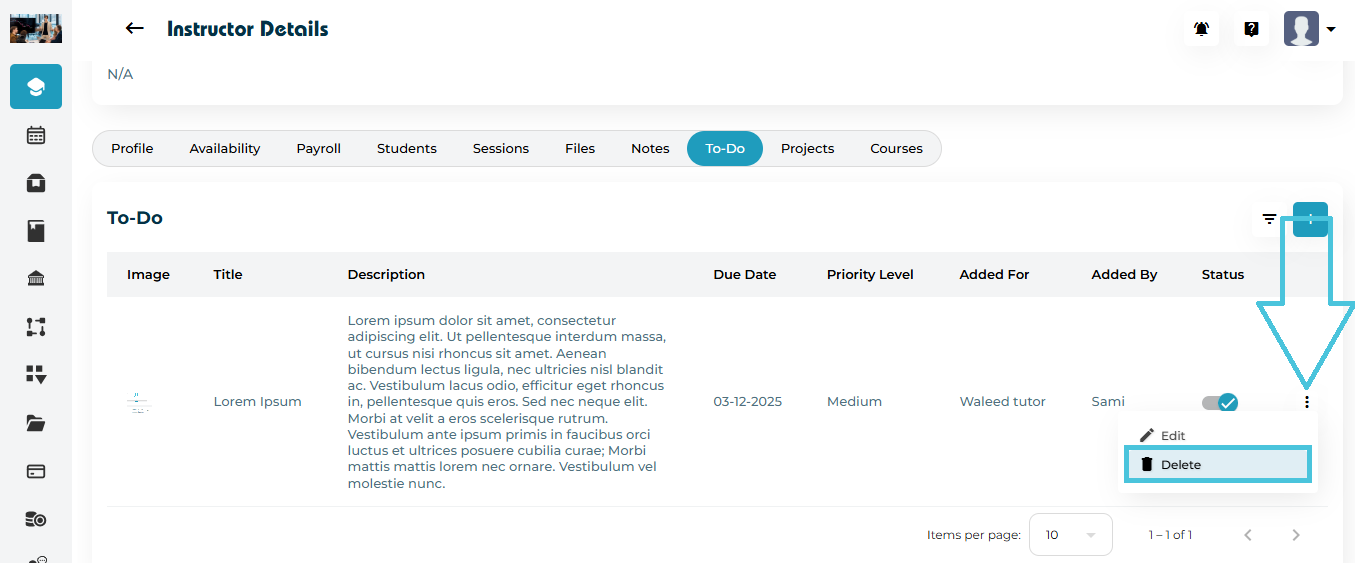
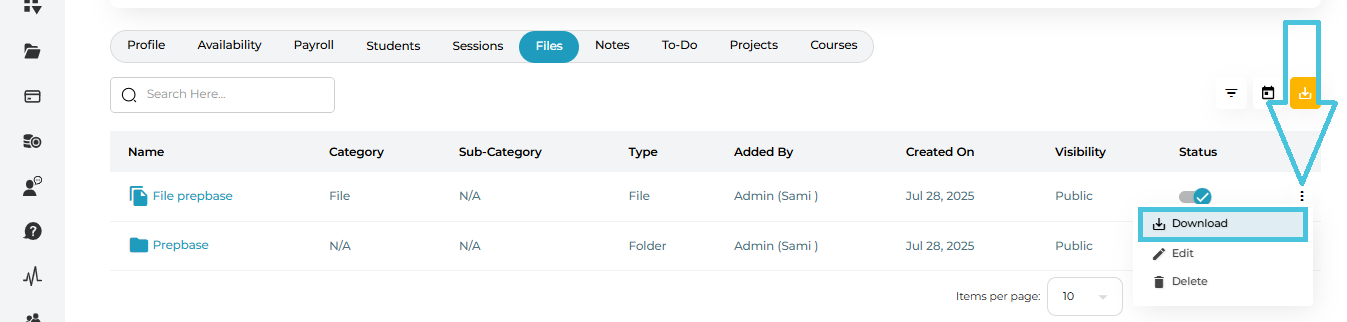
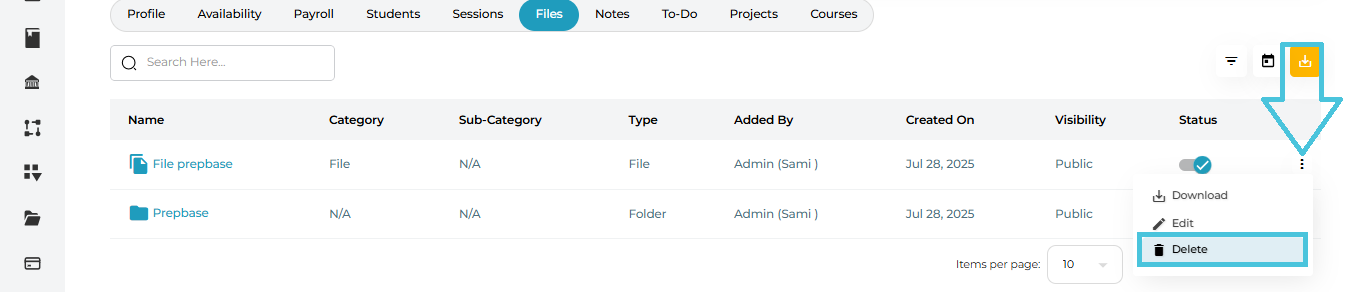
To delete:
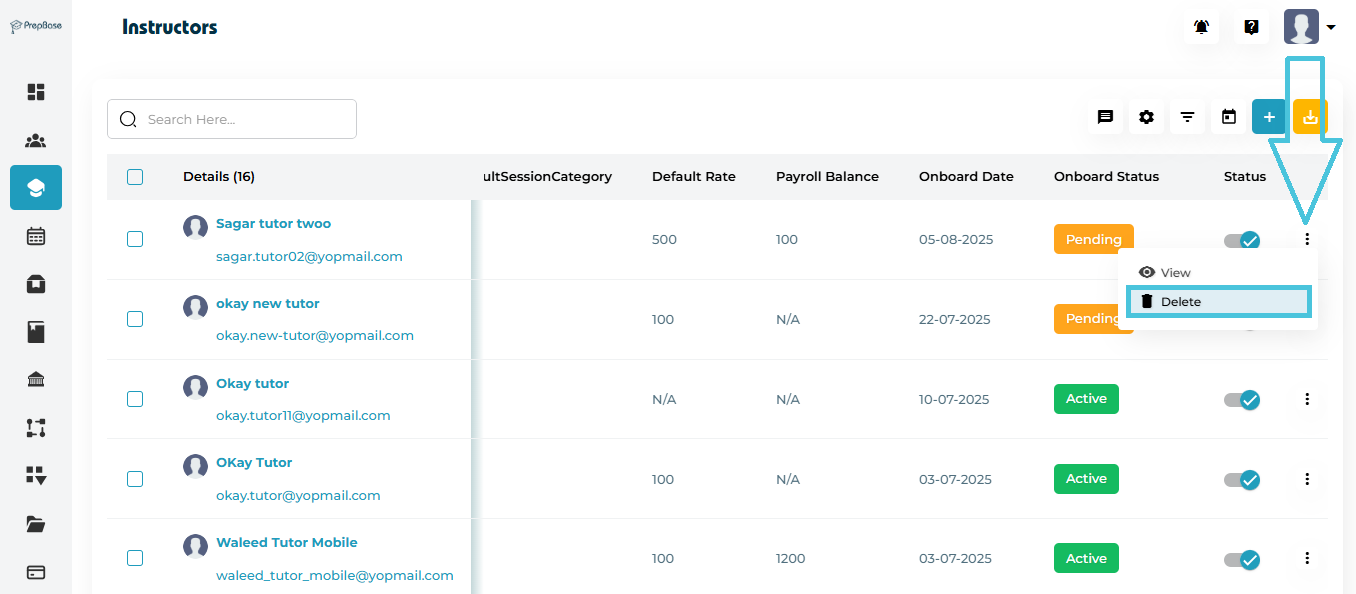
Click the three-dot menu (⋮) next to the instructor.
Select Delete.
Sends the same email to all selected instructors. Opens the email composer with selected instructors as recipients.
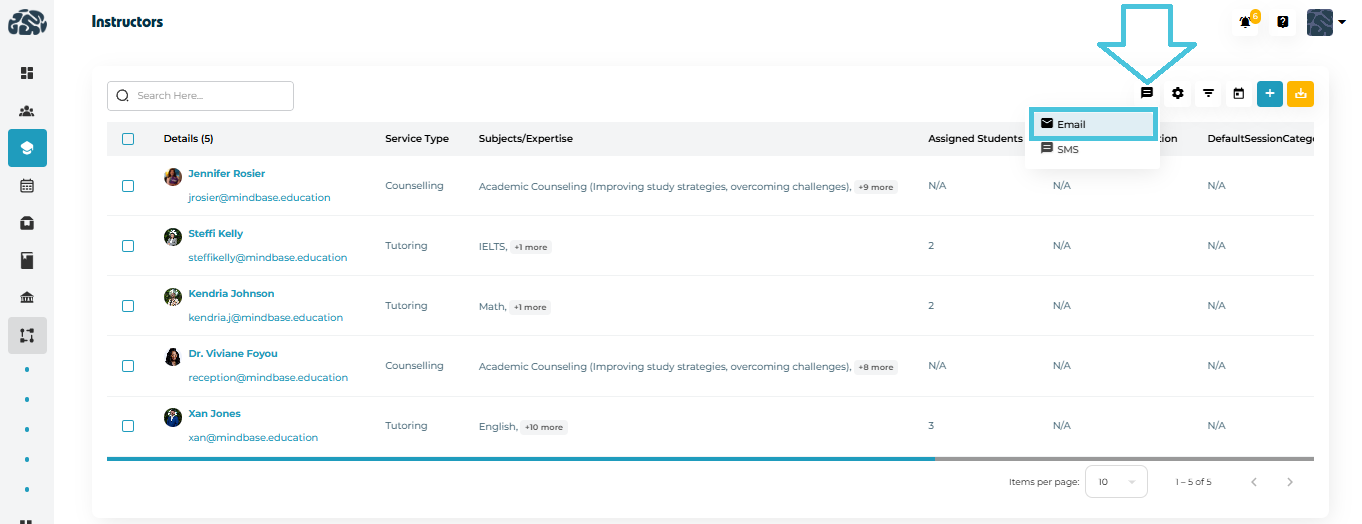
Bulk Email
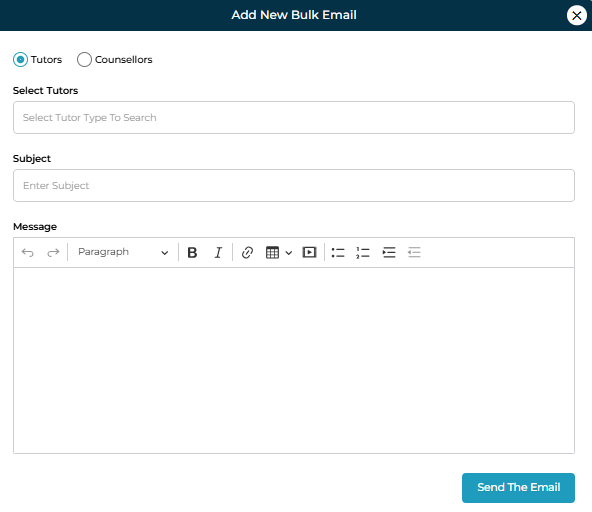
Steps:
- click
 → Email.
 After selecting Tutor or Counselor.
Enter Subject and Message (rich text editor).
Click Send Email → success message appears.
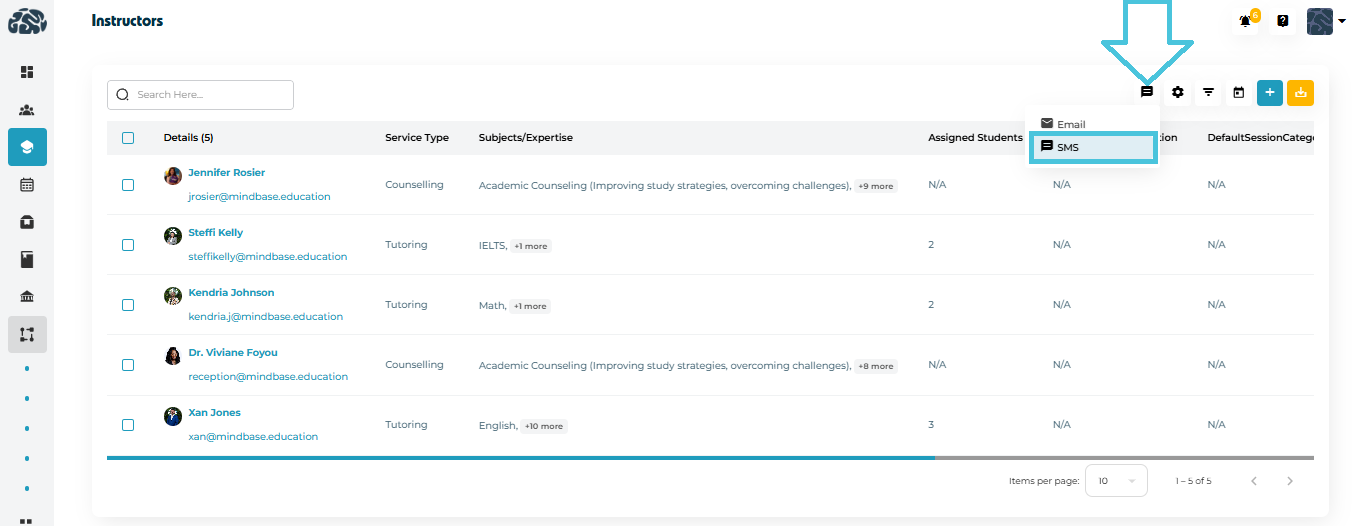
Sends a text message to all selected instructors using the phone numbers saved in their profiles.
Bulk SMS

Steps:
- click → SMS.
After selecting Tutor or Counselor.
Enter Subject and Message (rich text editor).
Click Send SMS → success message appears.
Important: All bulk actions require you to select instructor via checkboxes first.
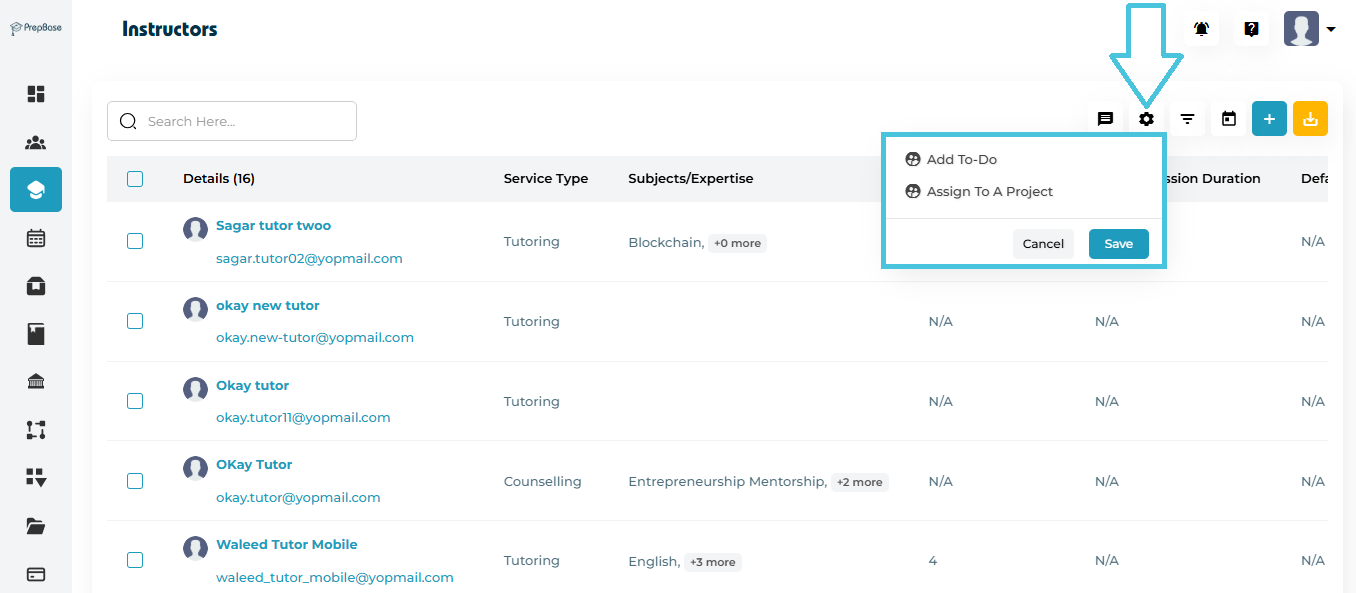
| Action | Description |
|---|---|
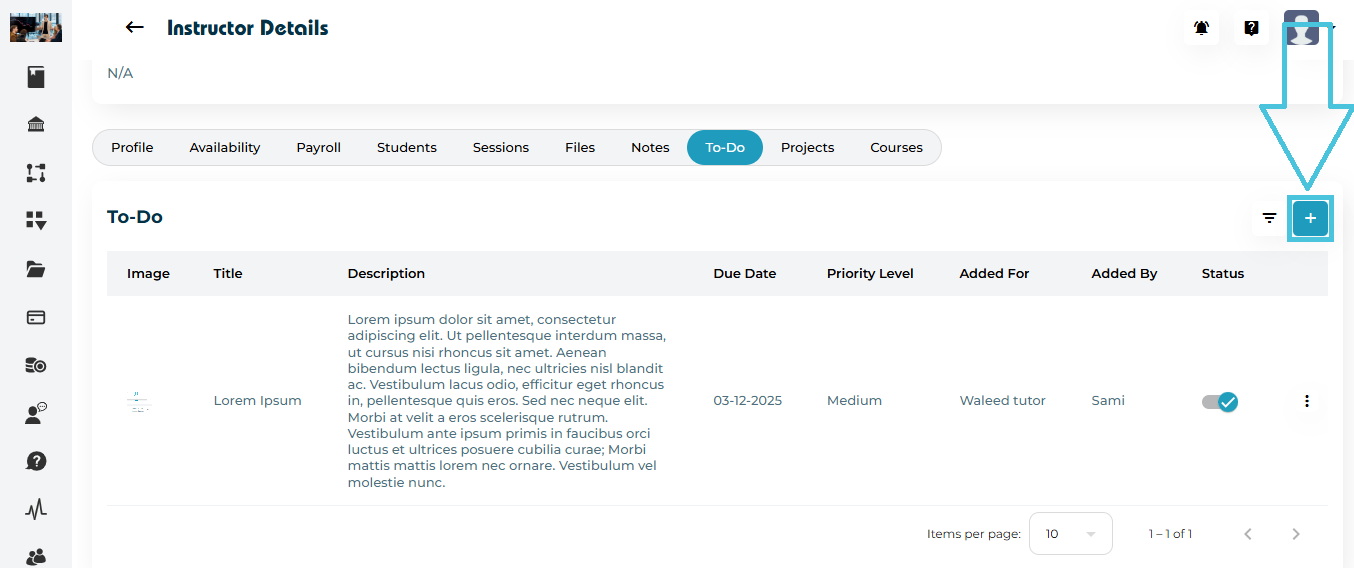
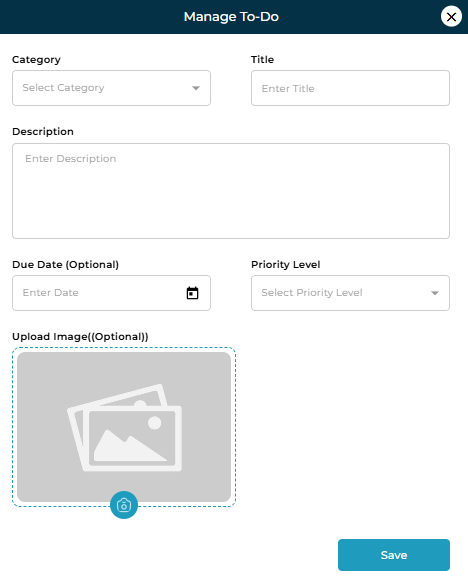
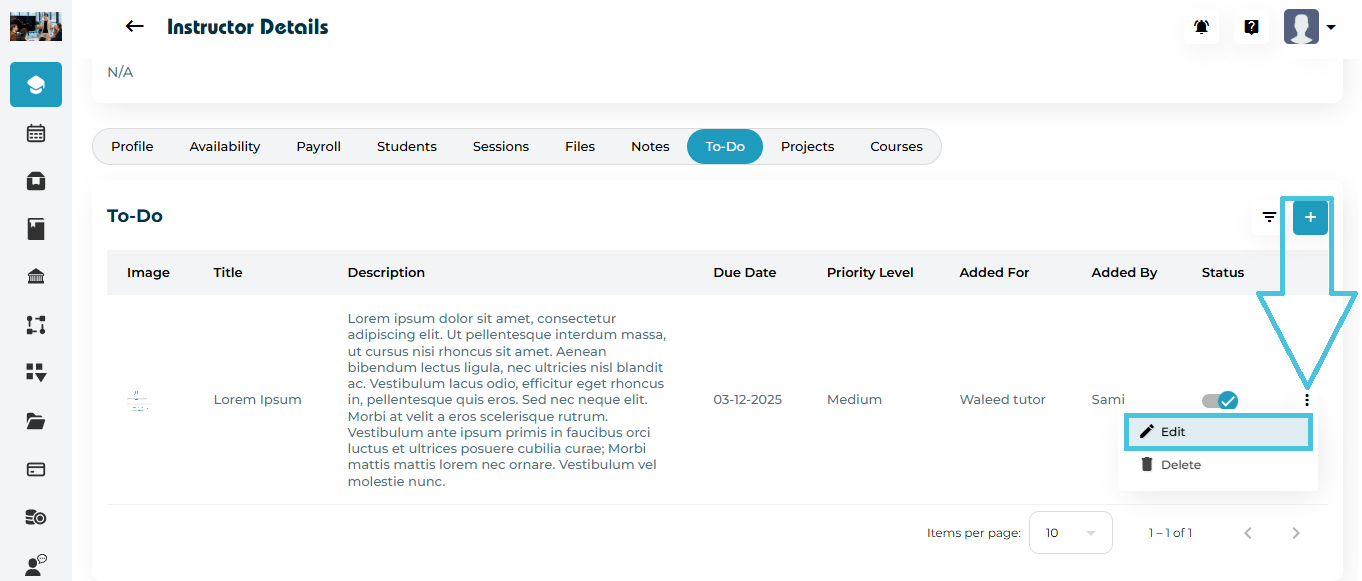
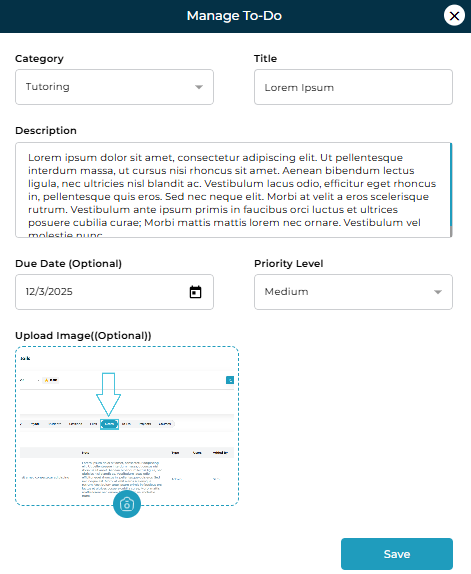
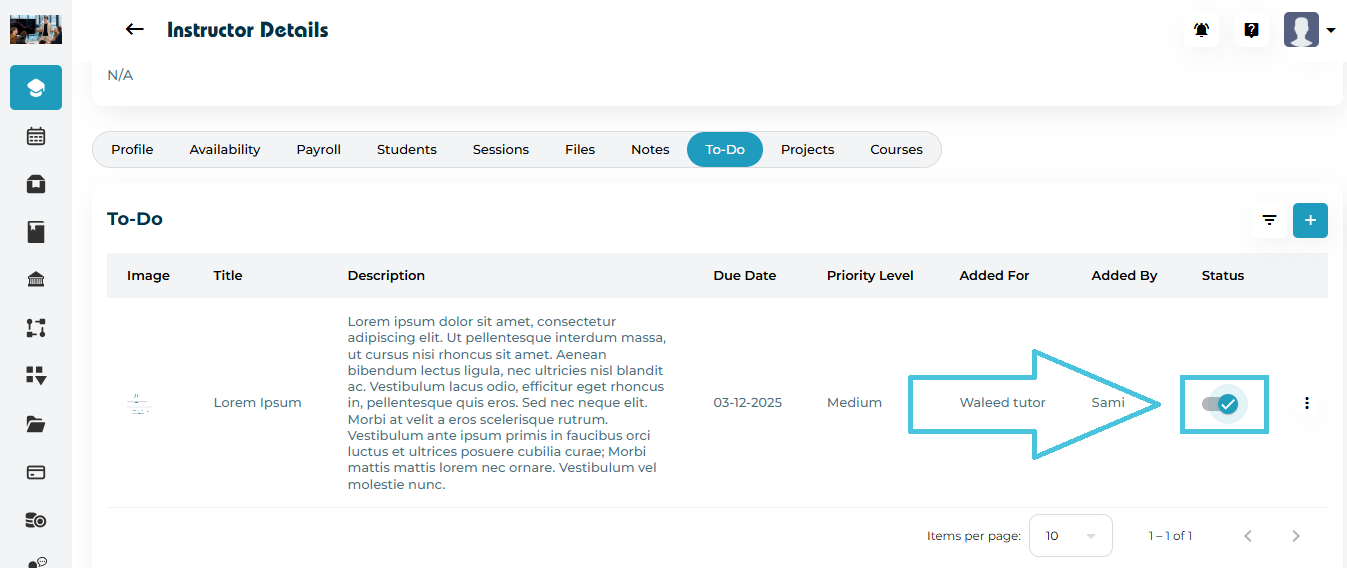
| Add To-Do | Creates a task for all selected instructors. Opens a popup where admins enter the task title, due date, and priority. Click Save, and a success message confirms completion. The to-do appears under each instructor’s To-Do section. |
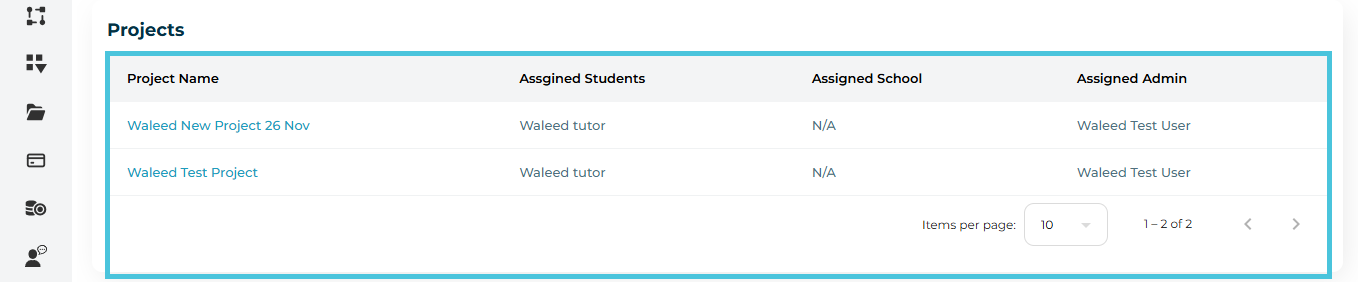
| Assign to a Project | Assigns selected instructors to a specific project. Opens a popup to select the project, then click Save. A success message confirms the assignment, and the project becomes visible under each instructor’s Projects section. |
Steps for Any Instructor Bulk Action
Select one or more instructors using the checkboxes.
Click the Bulk Actions / Settings icon.
Choose the required action (e.g., Add To-Do, Assign to Project).
Complete the popup details and click Save.
Wait for the success confirmation message.
Verify the update in the relevant instructor section.
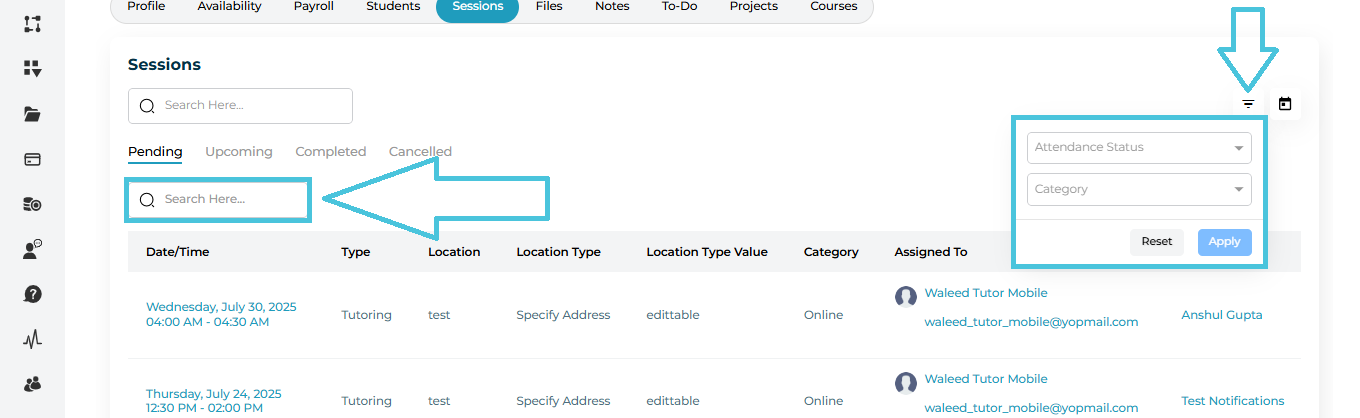
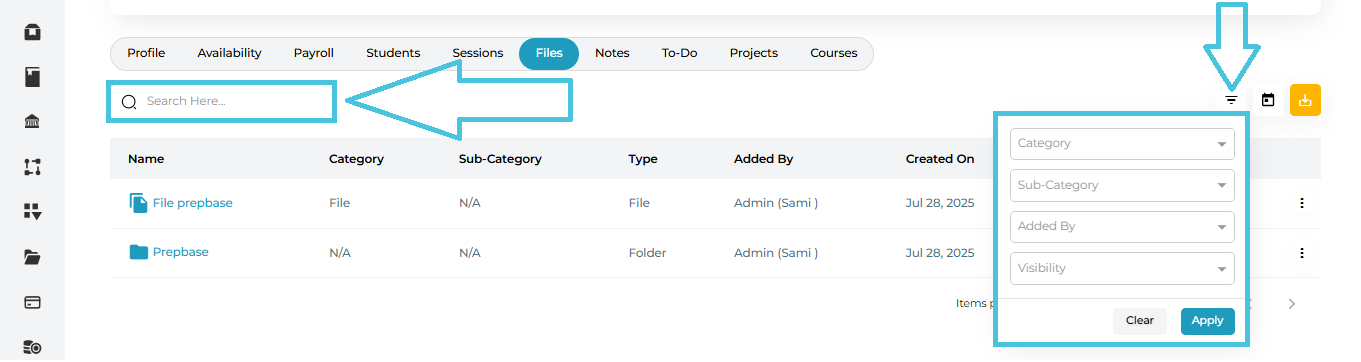
Filters the instructor list by role (Tutor / Counselor) and status. This helps narrow down the list before applying bulk actions and ensures actions are applied only to relevant profiles.
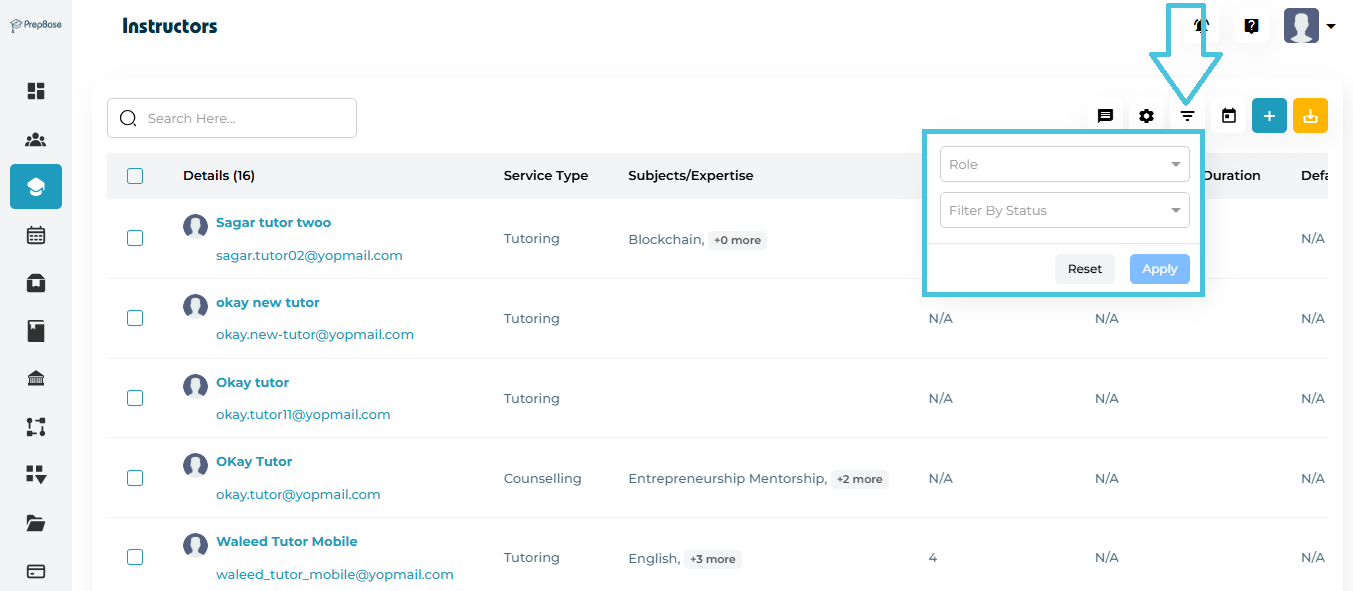
Steps
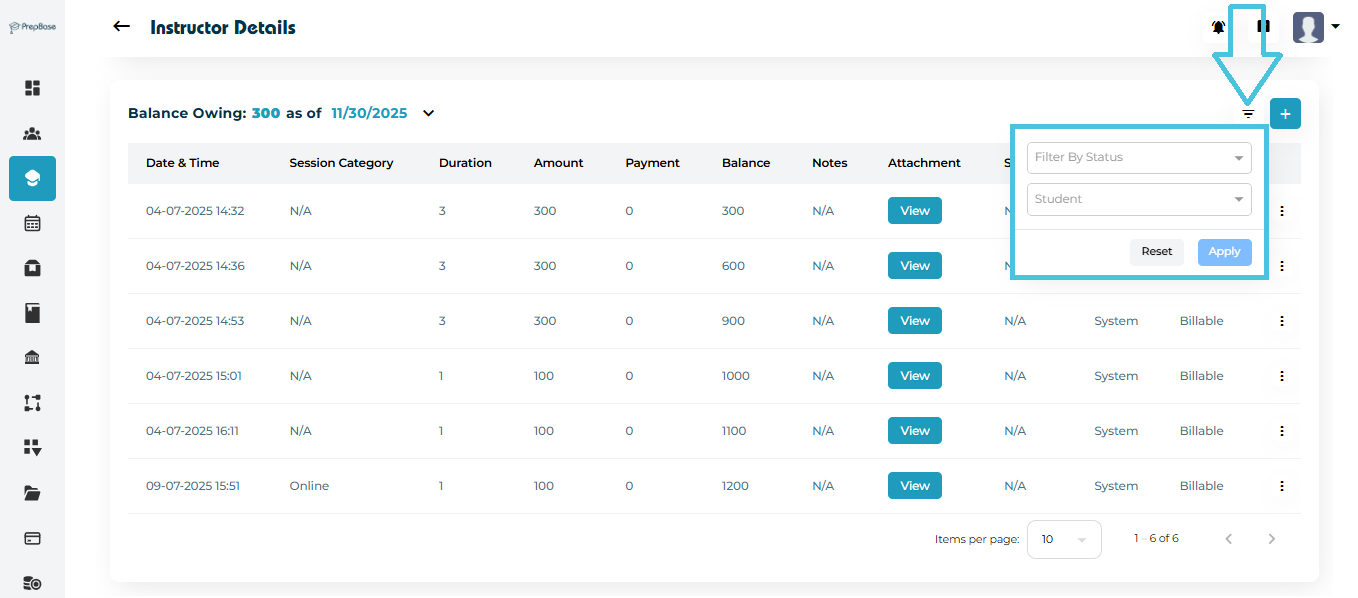
Click Filters.
Select the criteria to filter by Role or Status.
Click Apply to update the list (use Reset to clear).
Filters instructors based on a selected date range using the calendar picker. Useful for targeting instructors created or updated within a specific timeframe.
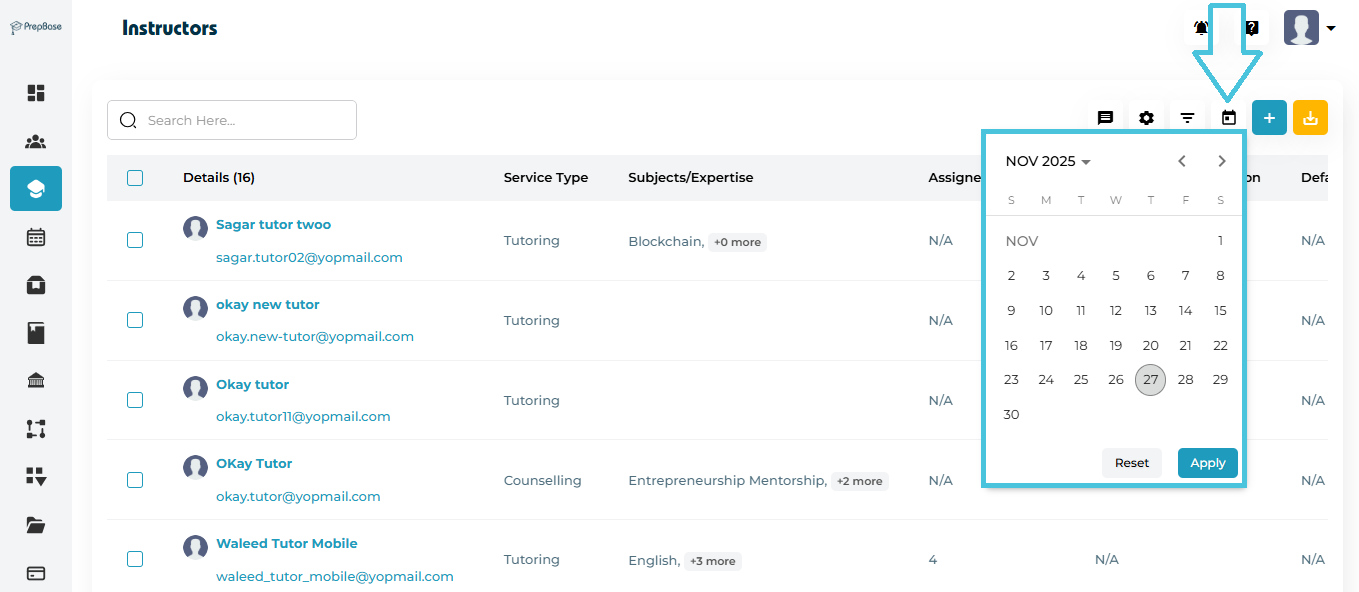
Steps:
- For date range, click Calendar, pick dates, then Apply.
Click Apply to update results or Reset to clear filters.
Exports the current instructor list into a CSV file. The export respects applied filters and selections, allowing admins to download only the relevant instructor data for reporting or external use.
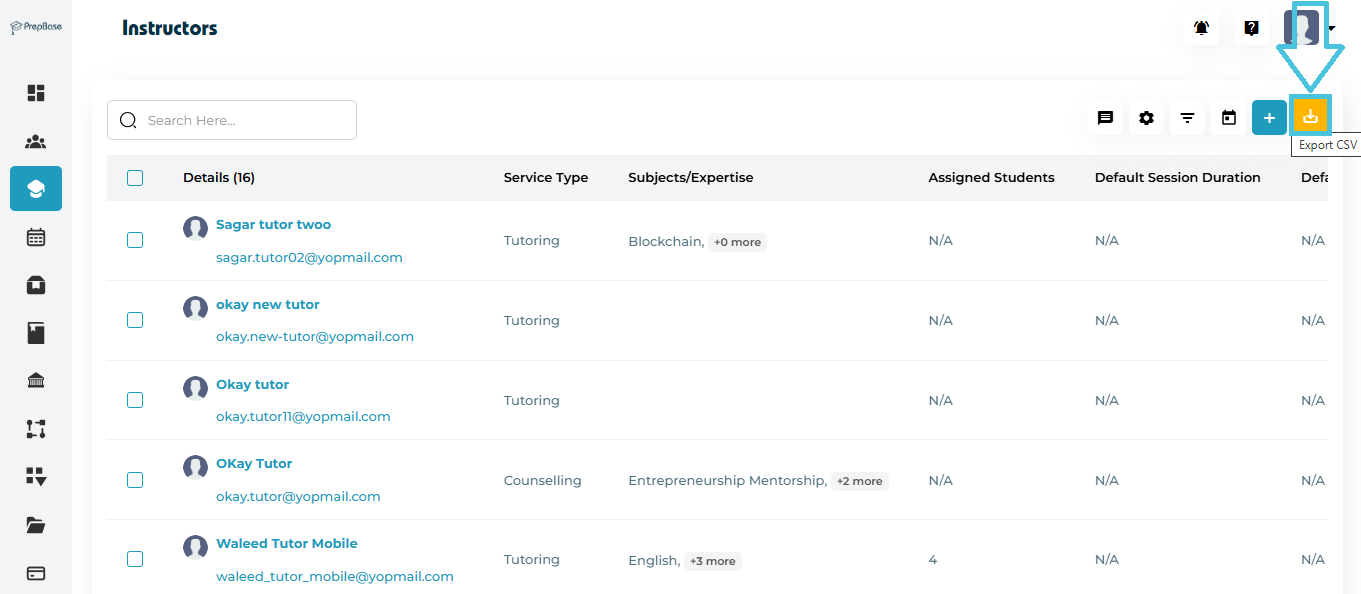
Steps:
Apply any filters you need (optional).
Click
 Export CSV.
The system downloads the current view as a CSV file.
Steps:
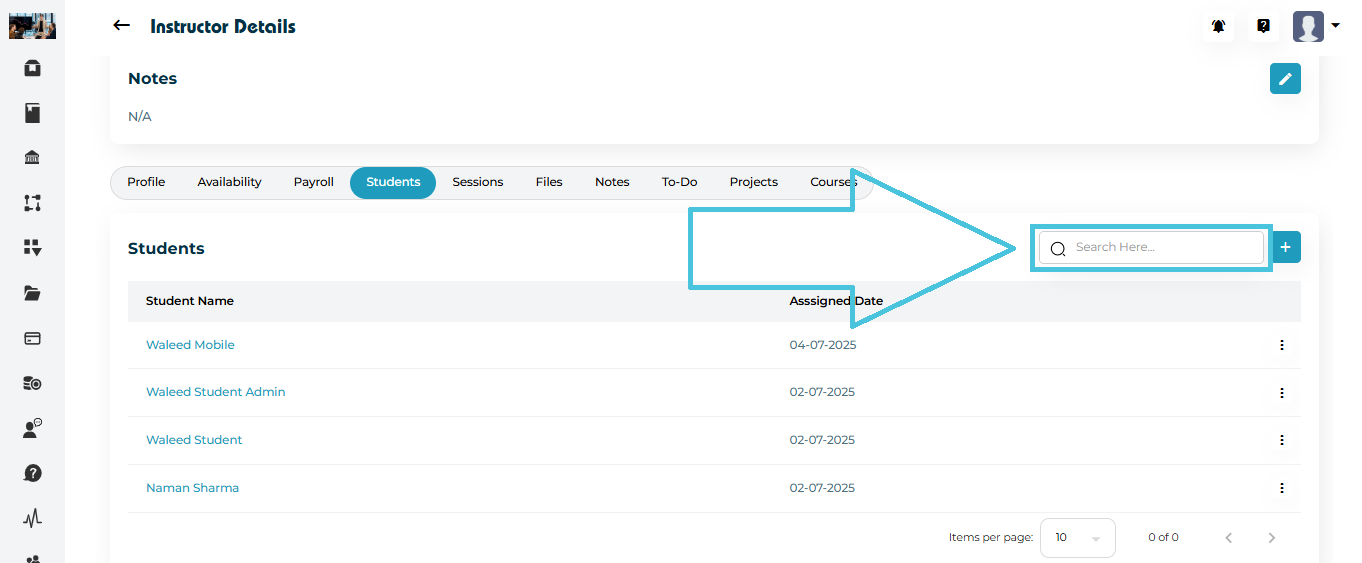
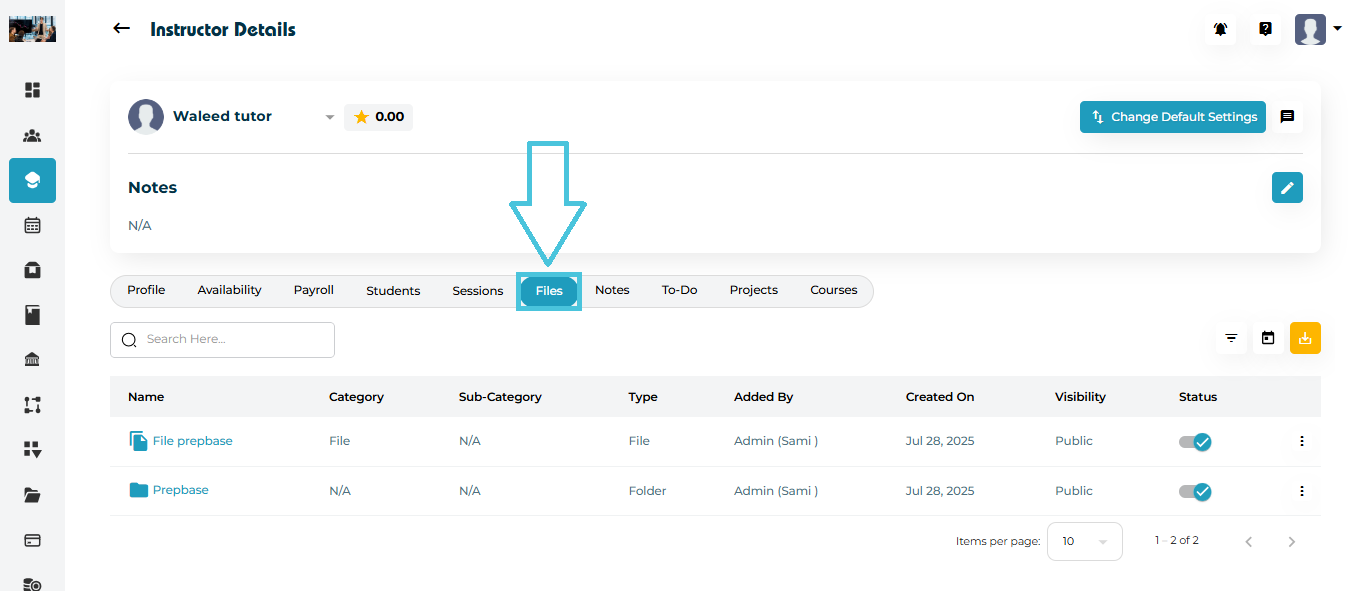
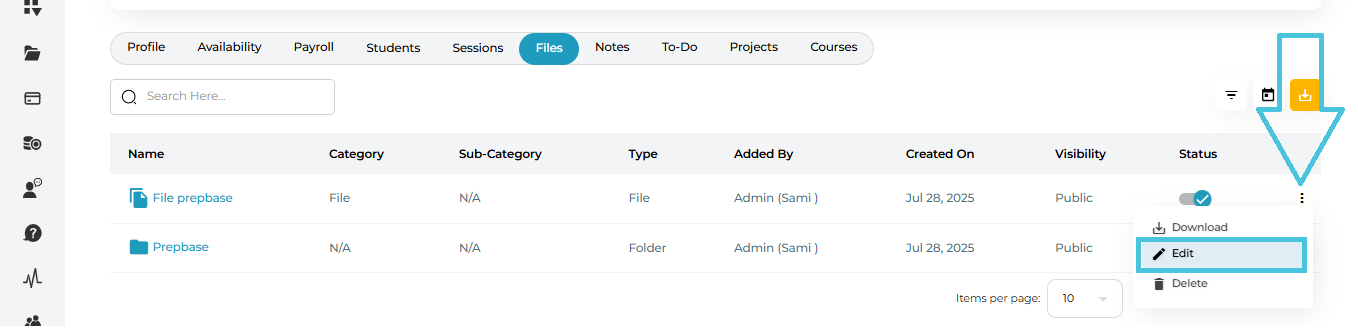
Navigate to the Instructor’s module from the left-hand sidebar.
Locate the instructor in the list using the search bar or scrolling.
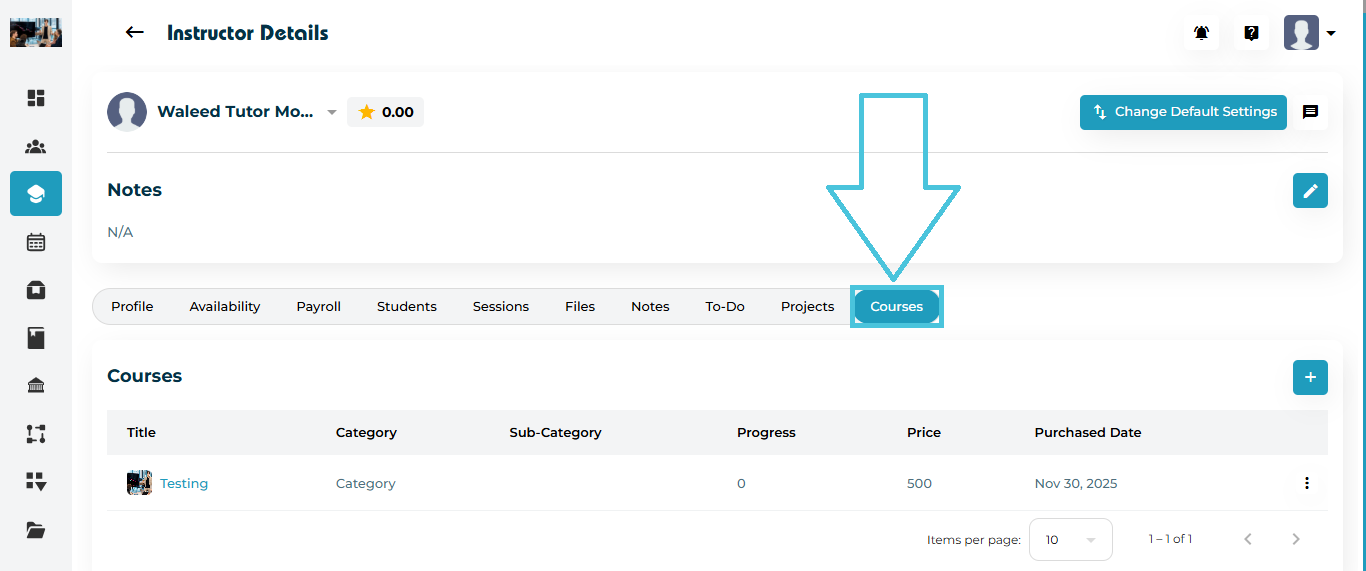
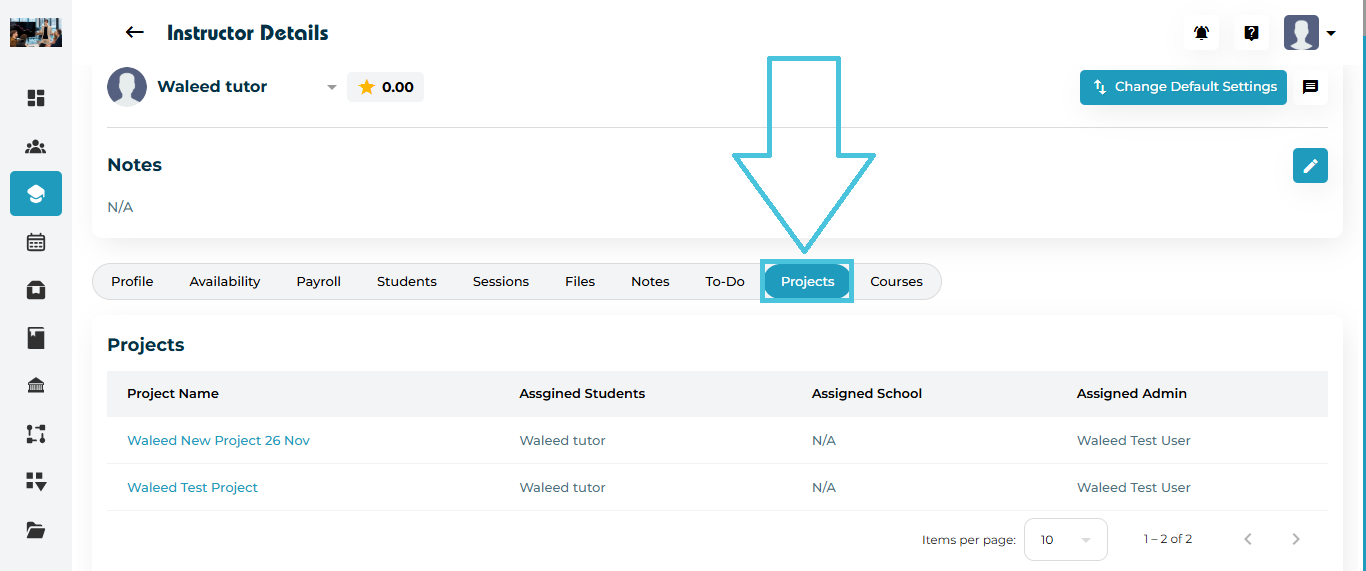
To open the Instructor profile:
Option 1: Click the instructor’s name under the Details column.
Option 2: Click the ⋮ (three-dot) icon at the end of the row and select View.
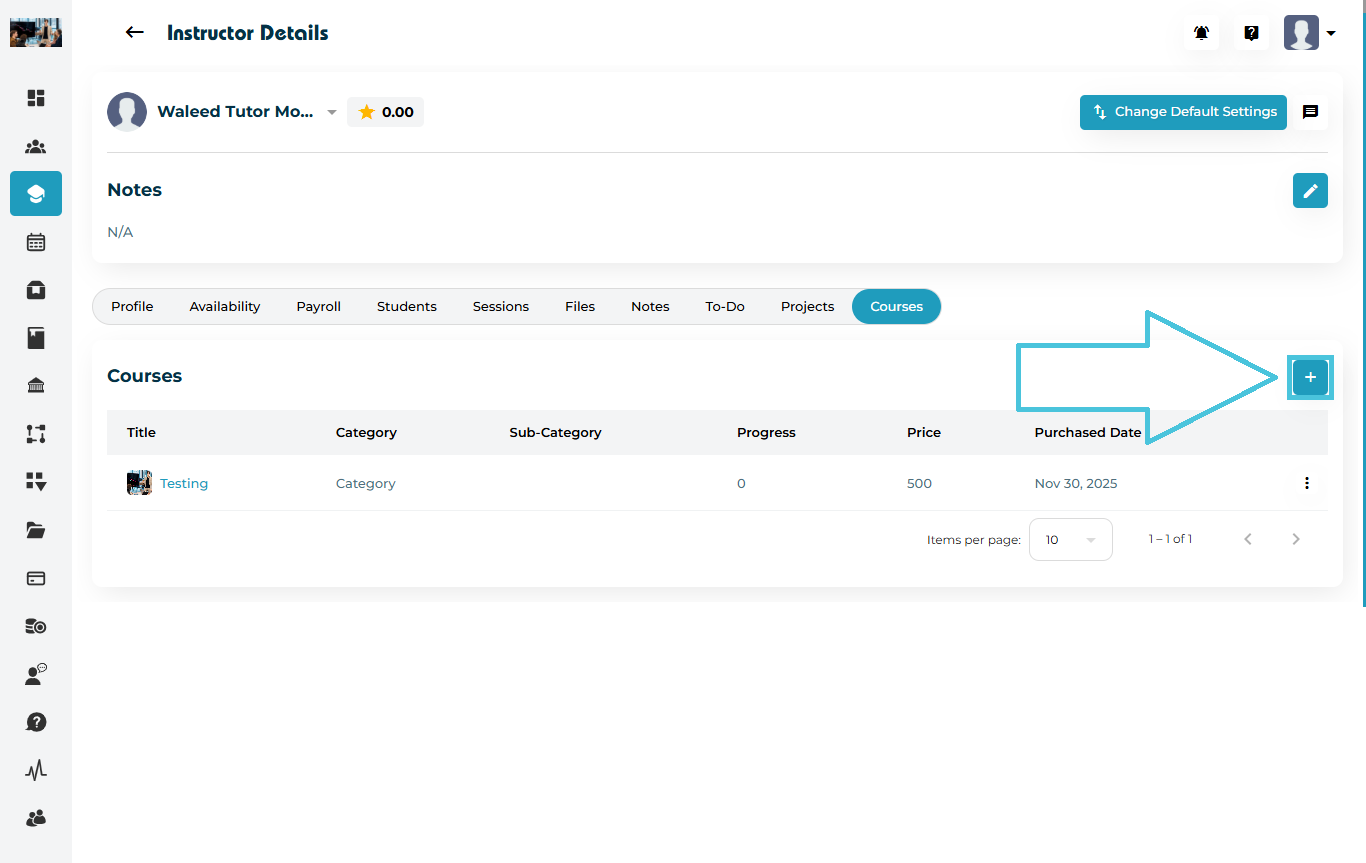
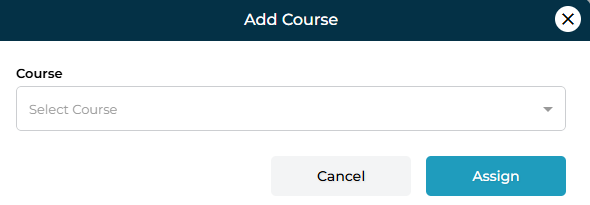
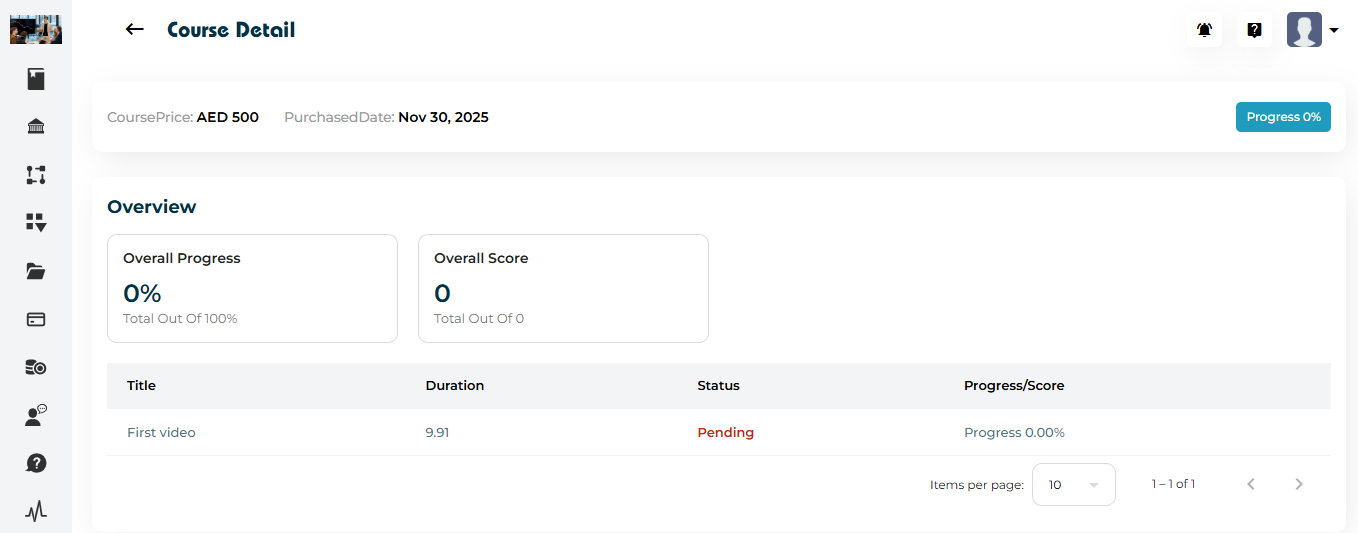
The system loads the Instructor Details page with all profile and activity tabs.
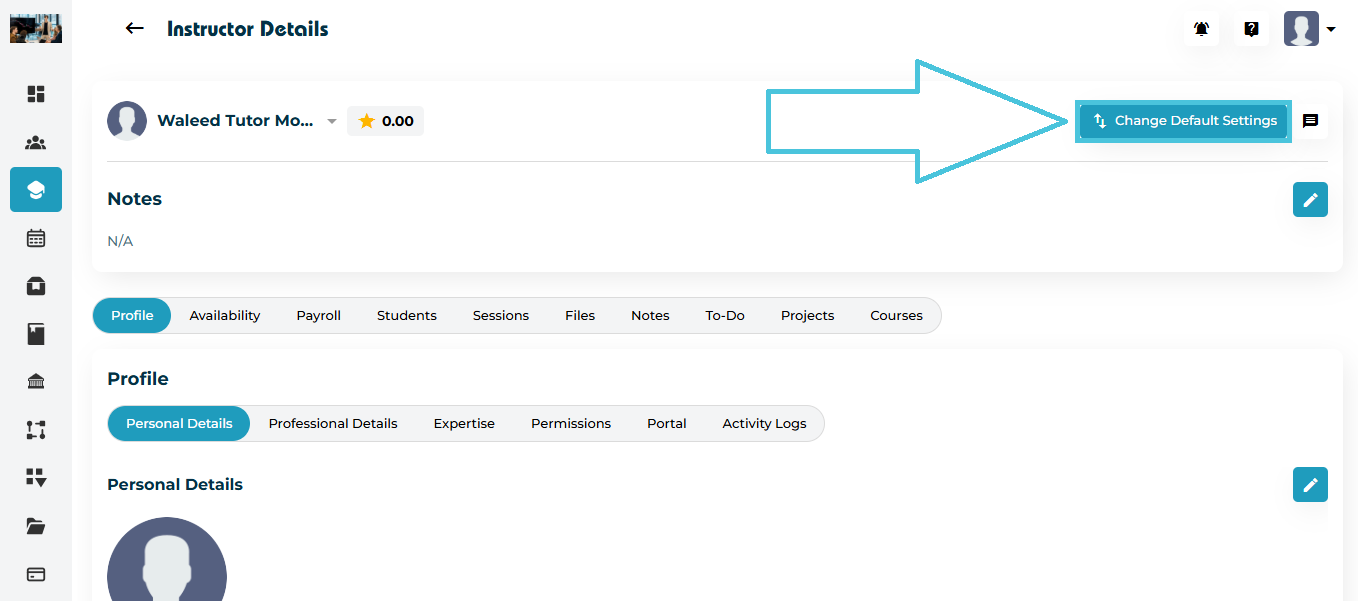
The Instructor Name Dropdown allows admins to quickly switch between different instructor profiles without returning to the main list.
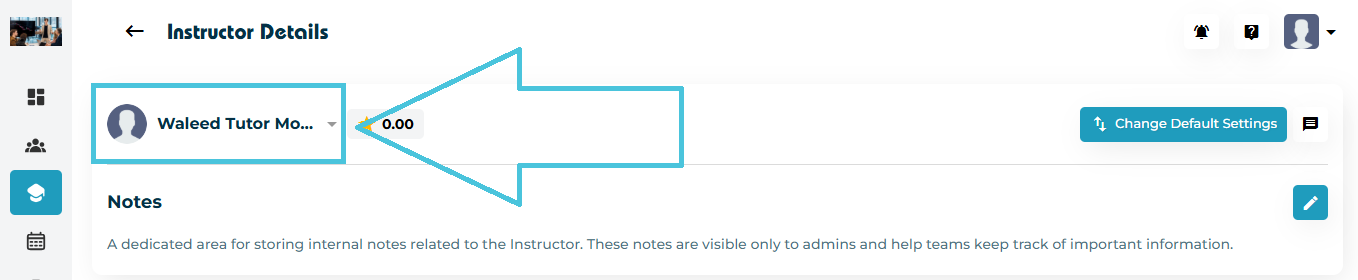
How it helps
Enables fast navigation across instructor profiles
Useful when reviewing or updating multiple instructors consecutively
Loads the selected instructor’s full profile instantly
The Instructor Rating displays the current performance rating of the instructor.
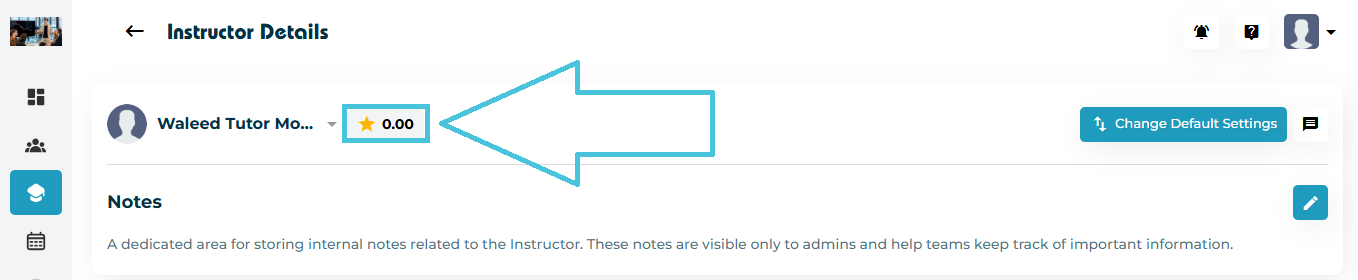
What this shows
Displays the average rating calculated from student feedback submitted after session completion.
Helps admins quickly assess instructor performance
Used for internal reference and quality monitoring
If no rating data is available, the rating appears as 0.00 by default.
The Email / SMS shortcuts allow admins to communicate directly with the instructor from their profile.
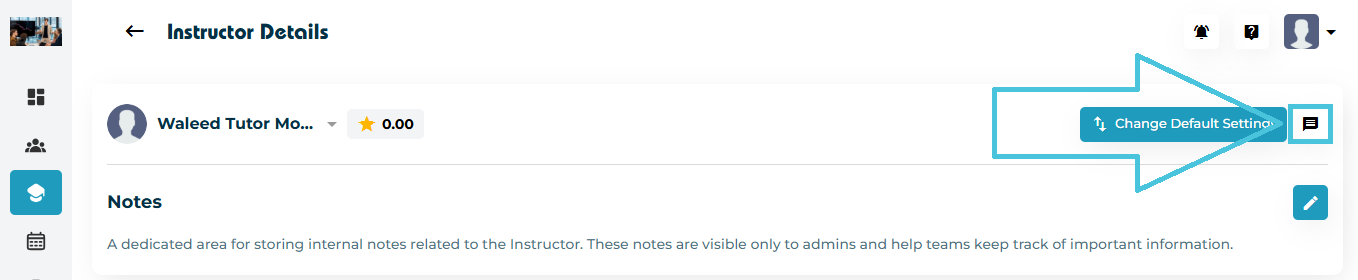
What this enables
Send emails without leaving the Instructor Details page
Send SMS messages for quick or urgent communication
Ensures centralized and consistent communication
All messages are sent using the contact details stored in the instructor’s profile.
Every instructor can have preset default values for:
Default Session Category
Default Session Duration
Time Zone
Virtual Meeting Link (Optional)
Steps:
1. Click Change Default Settings:
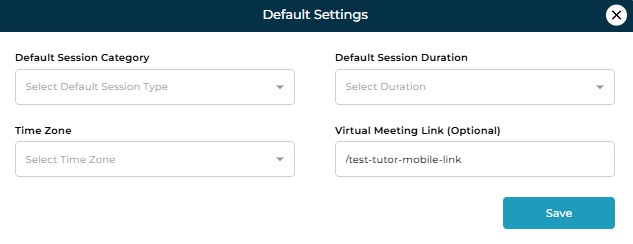
2. Update values in the form:
3. Click Save.
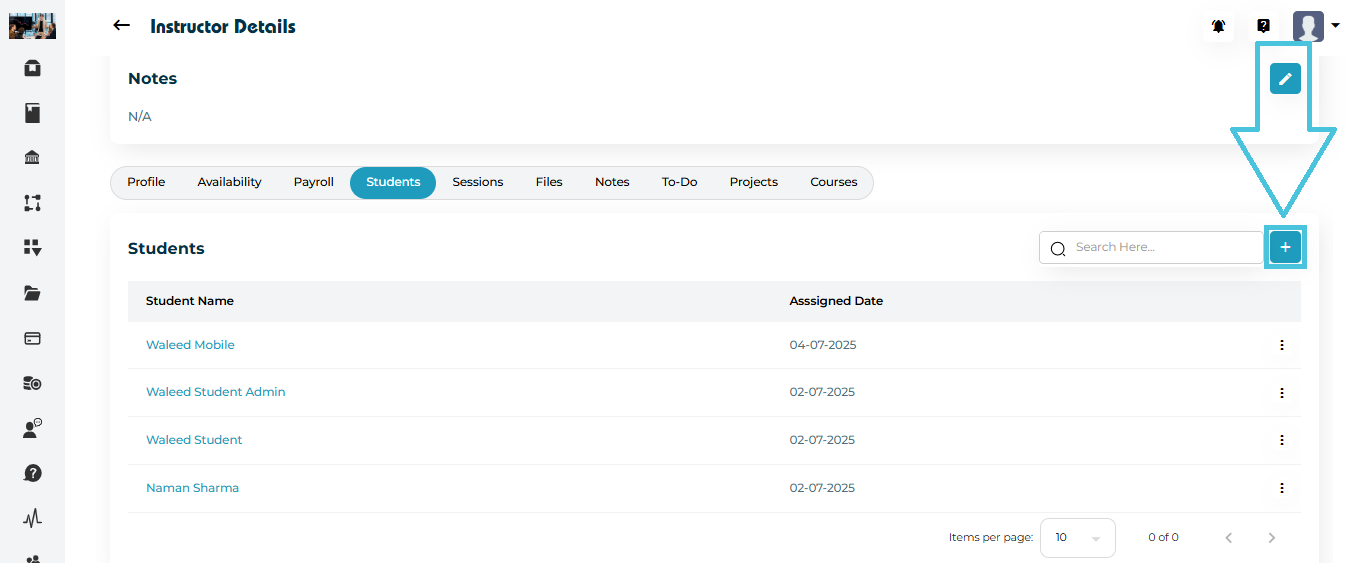
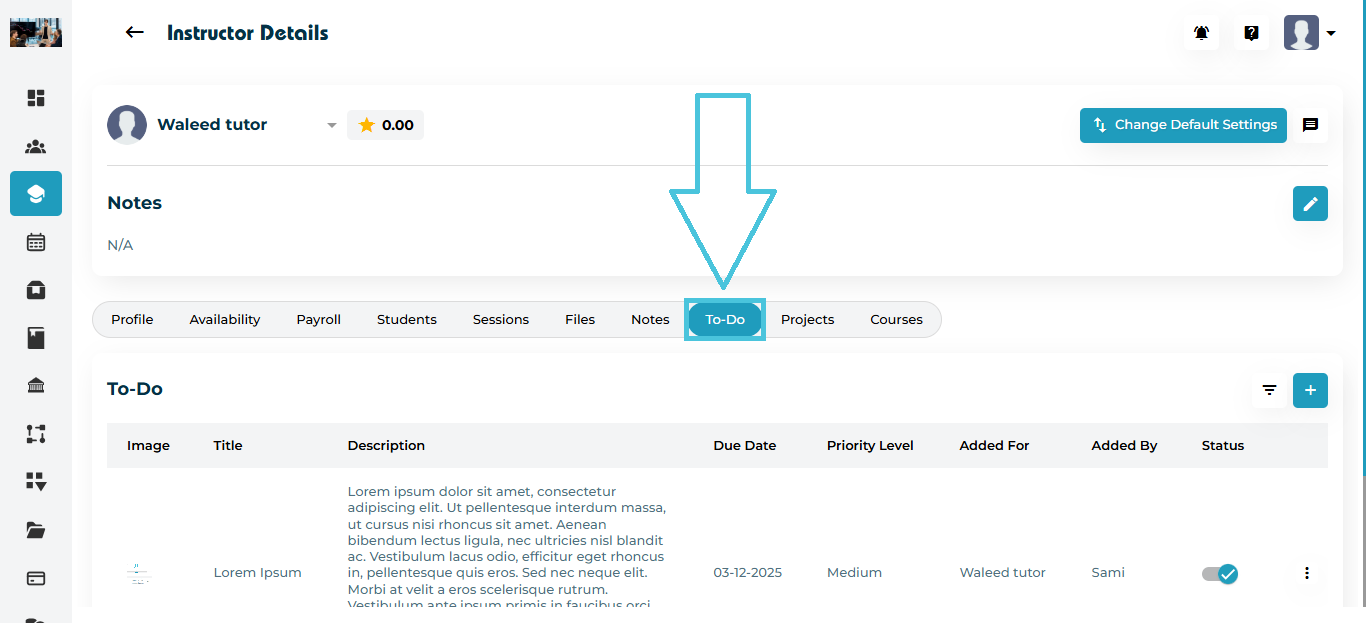
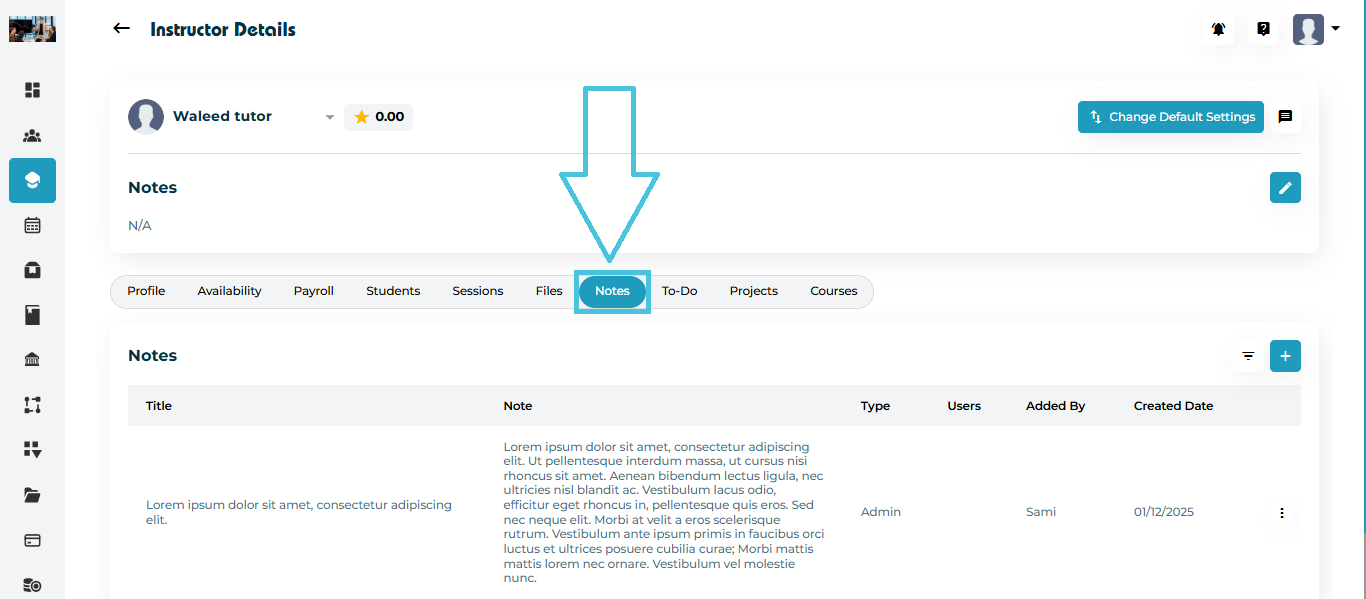
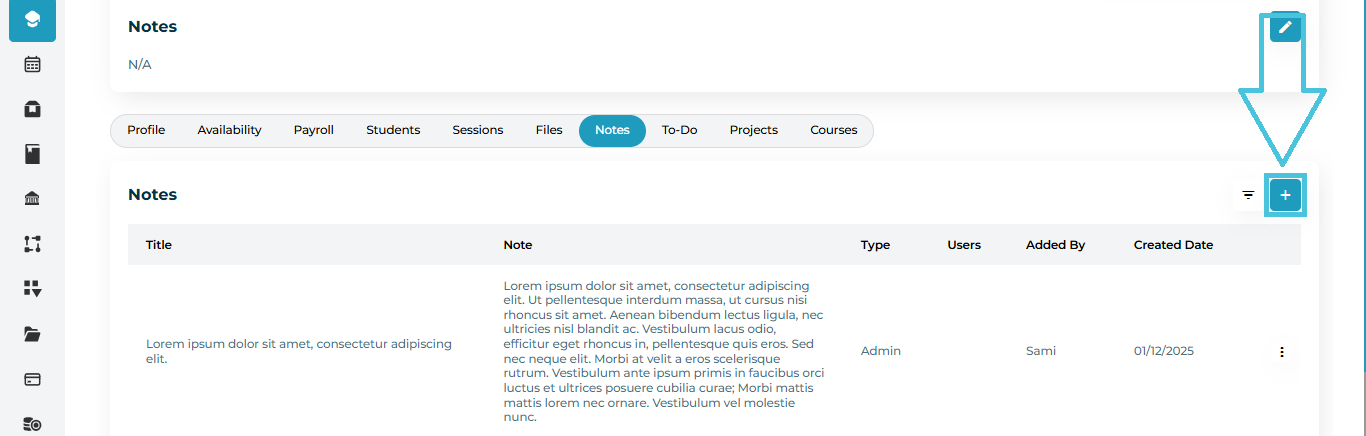
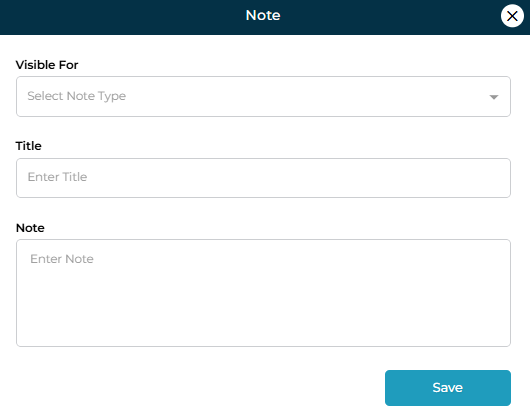
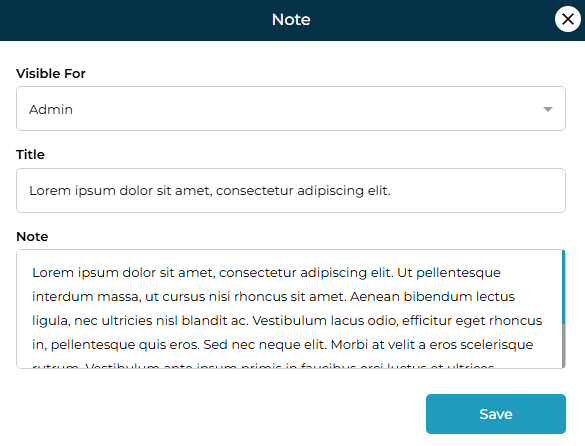
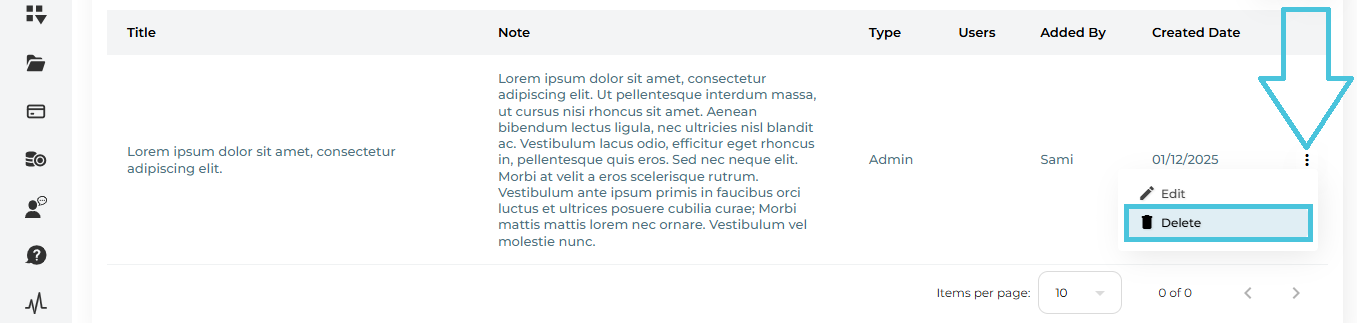
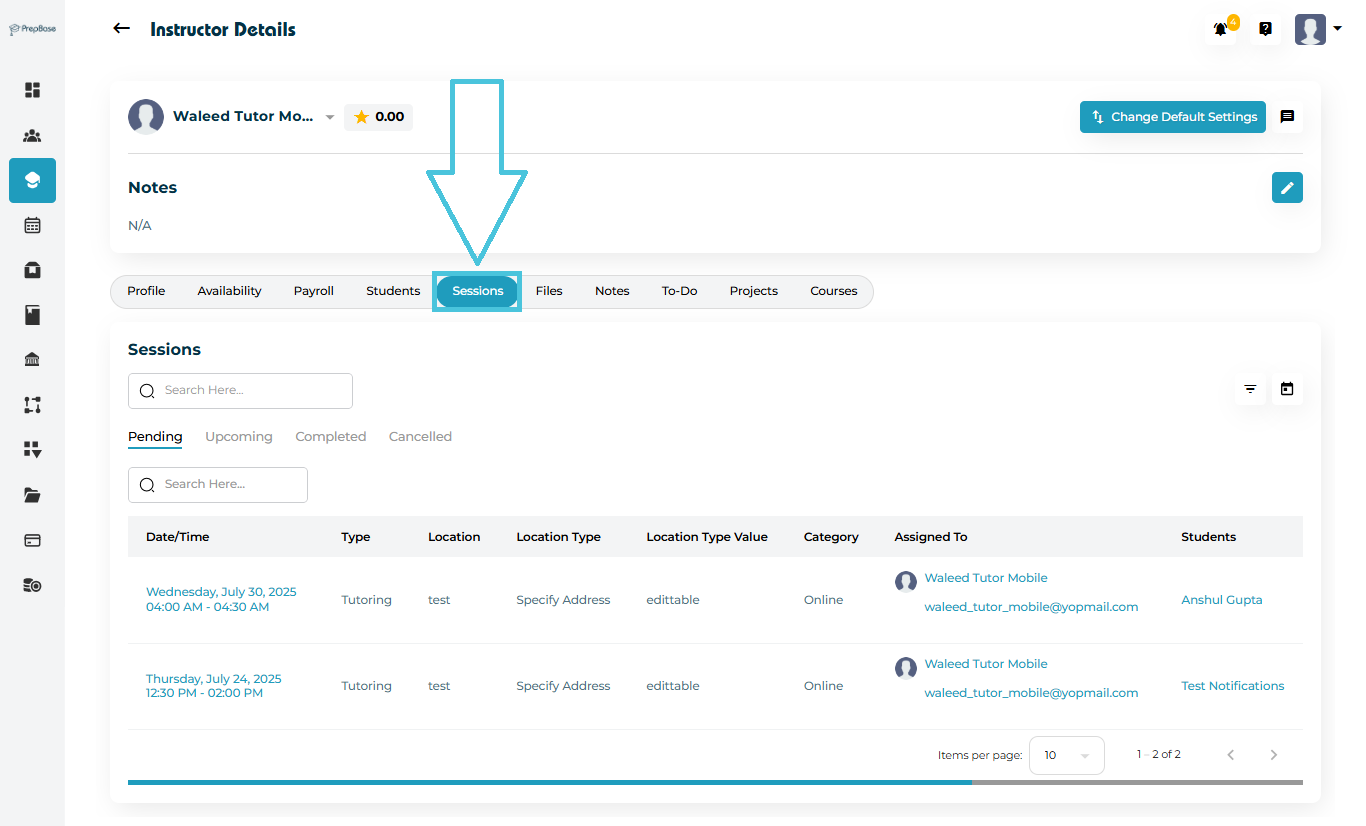
The Notes section is a dedicated area for storing internal notes related to the instructor.
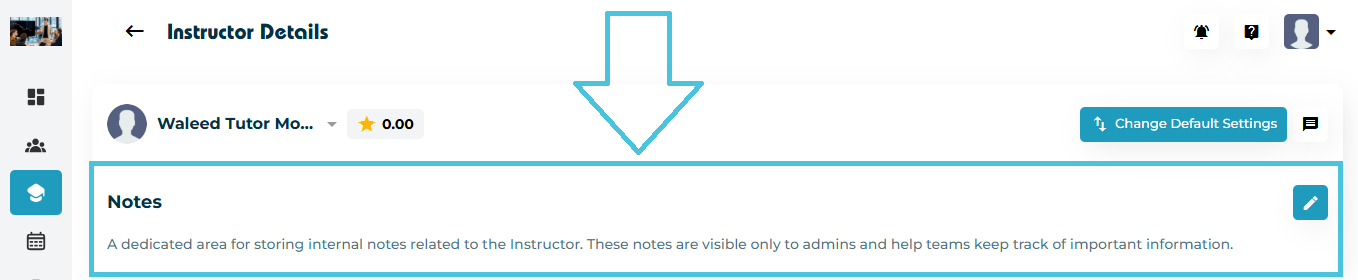
Key details
Notes are visible only to admins
Used to record important observations, follow-ups, or internal remarks
Supports long-term tracking of instructor-related information
Admins can add or edit notes at any time using the Edit (✎) icon.
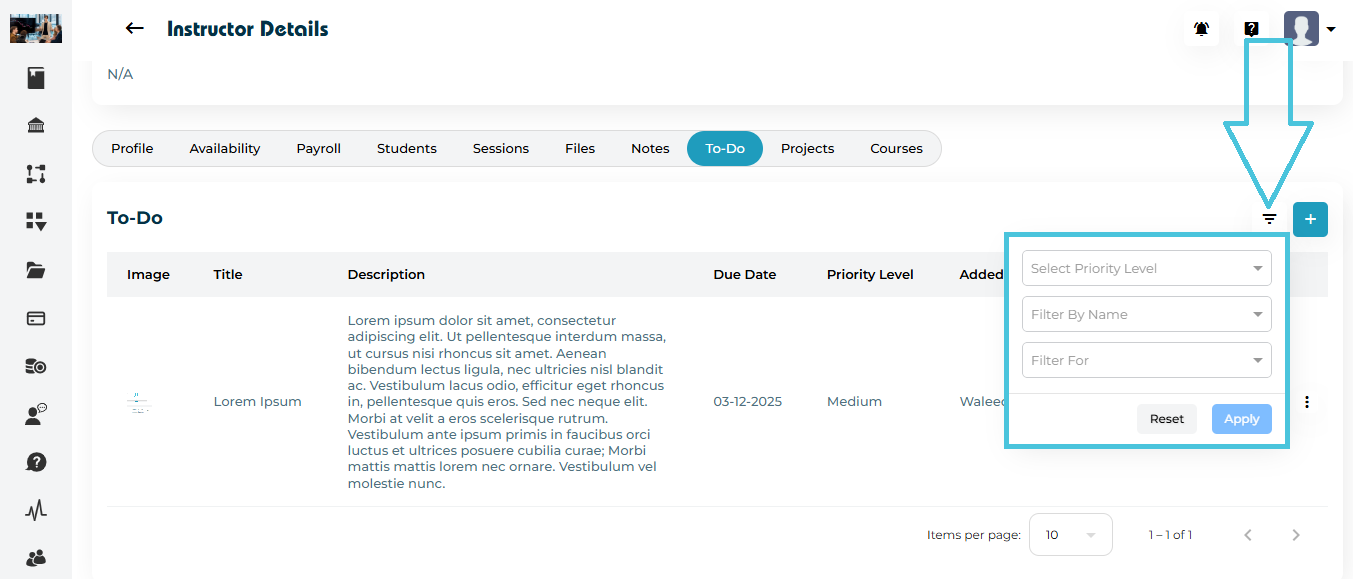

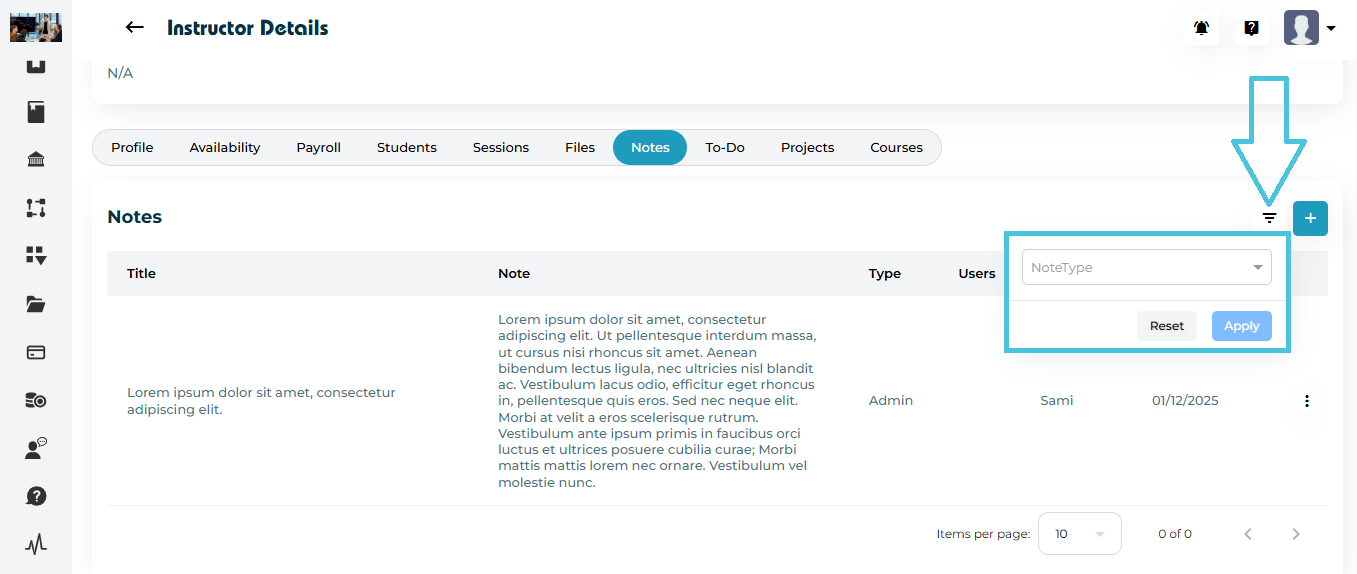
 Click Apply to filter results