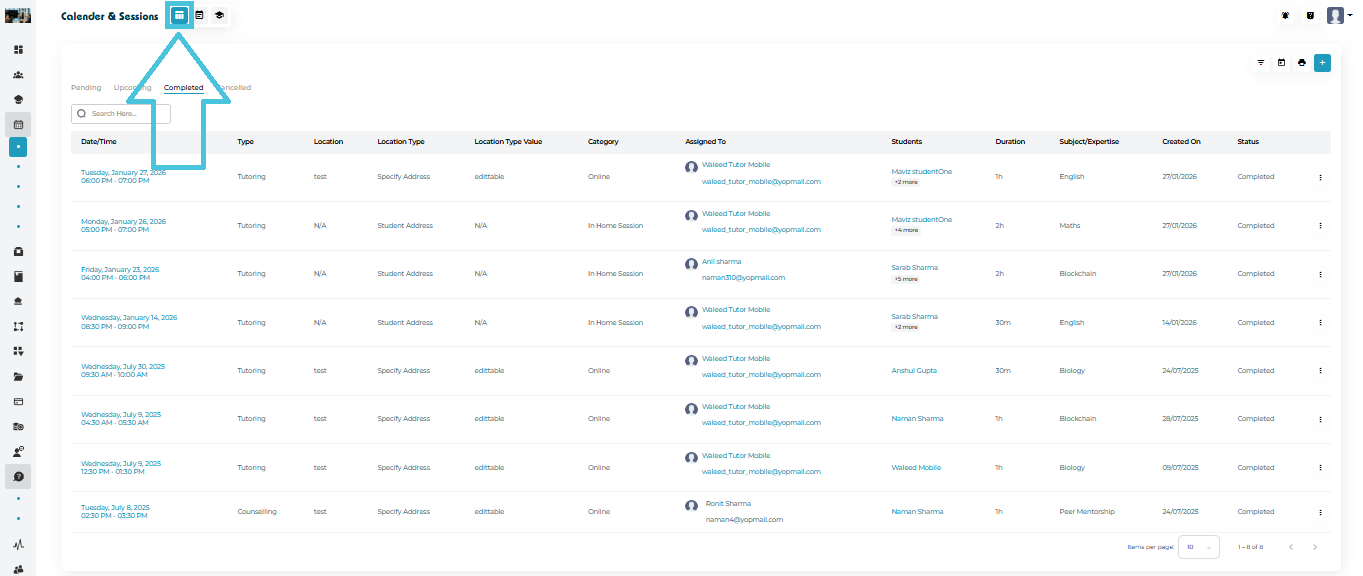
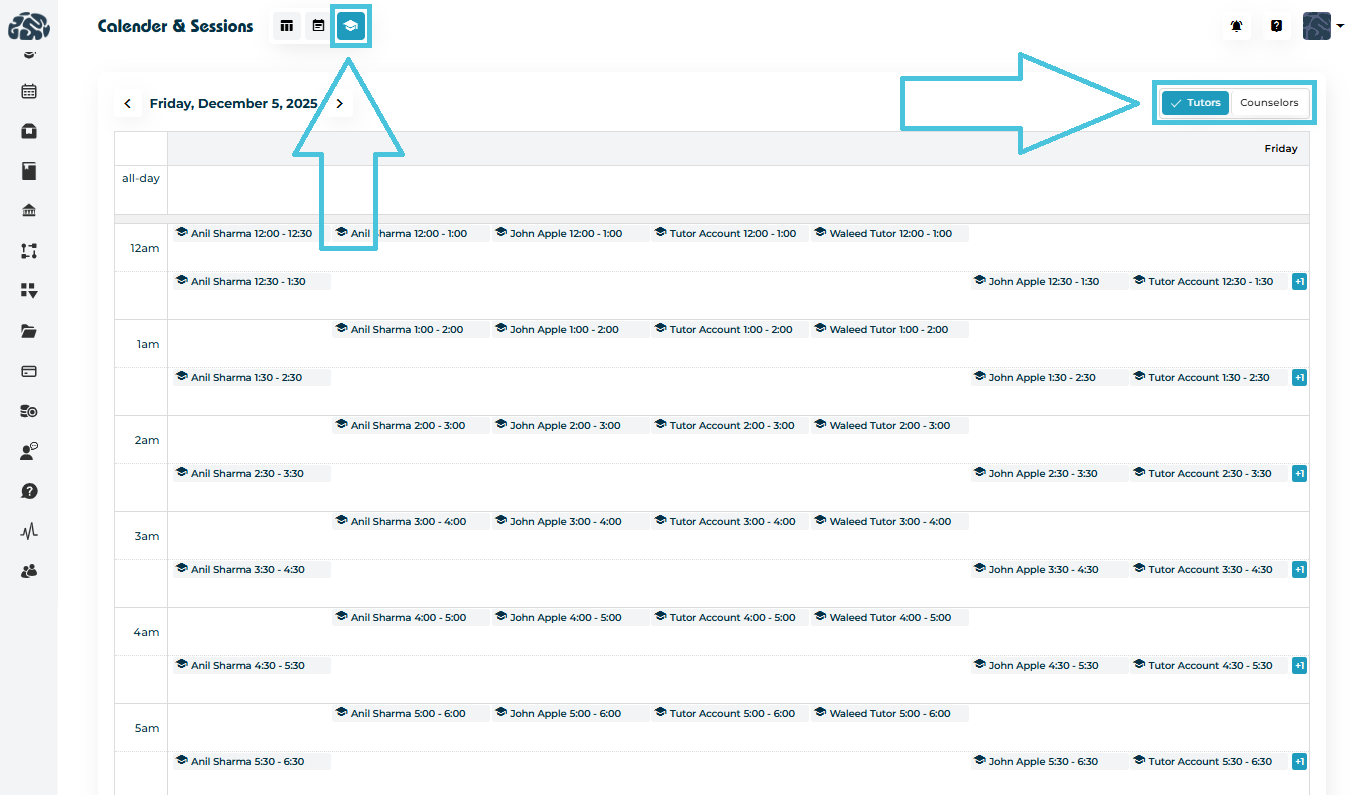
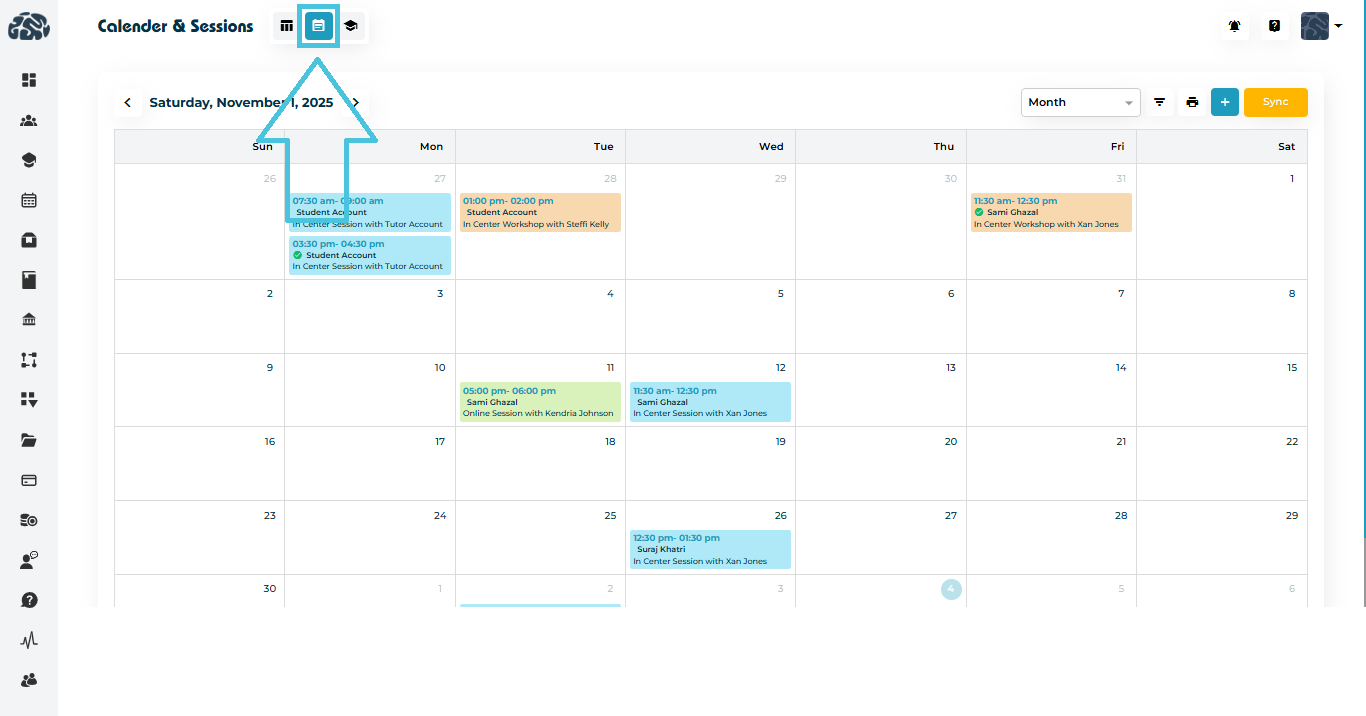
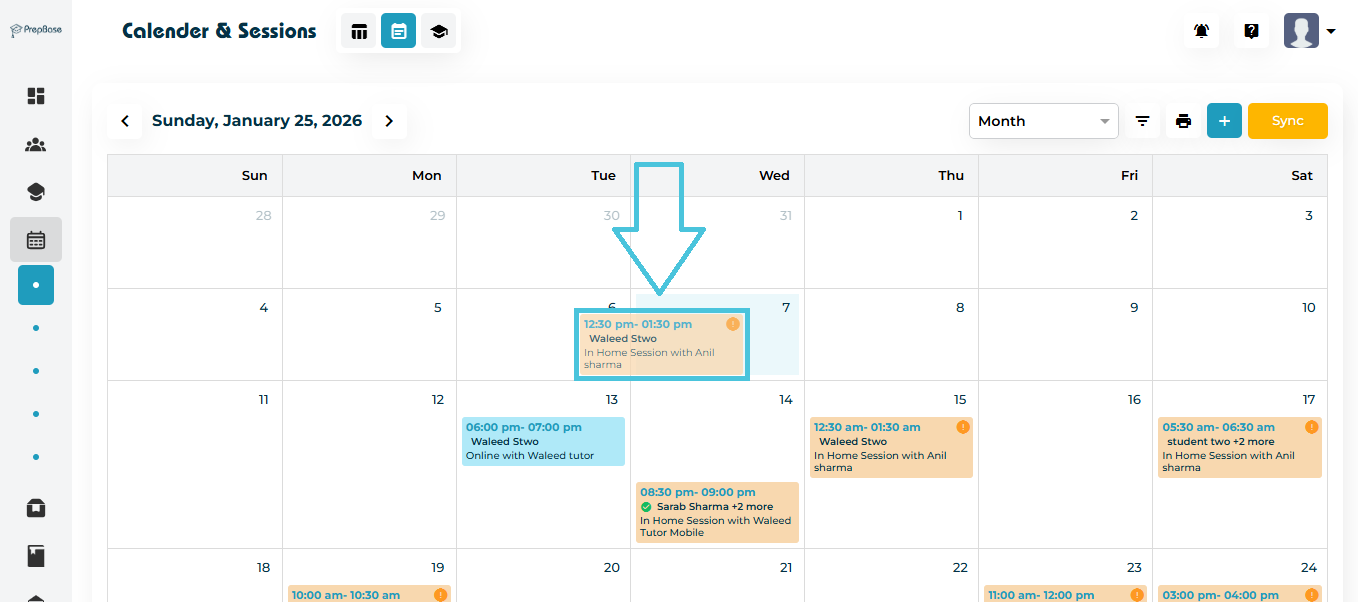
The Calendar View provides a visual, interactive overview of all scheduled sessions and events across students, instructors, and counselors. It allows admins to quickly understand availability, manage schedules efficiently, and make real-time adjustments without leaving the calendar interface.
This view is designed for day-to-day operational control, especially when managing a high volume of sessions.
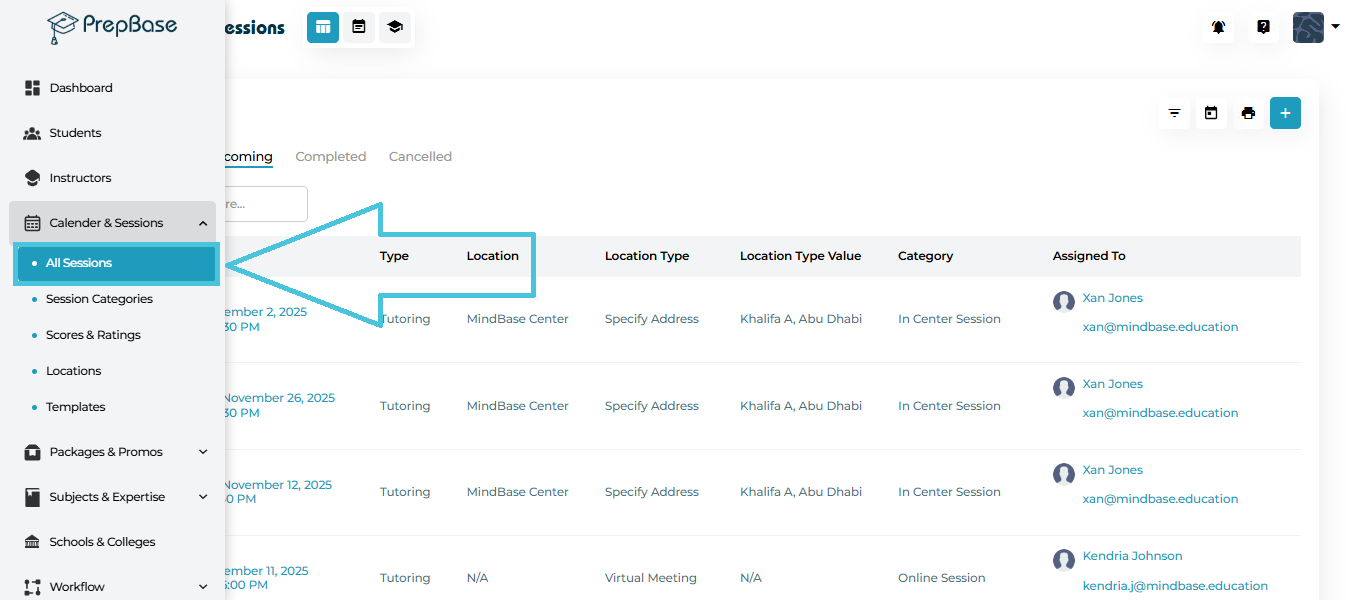
Available Calendar Views
Admins can switch between multiple calendar layouts depending on their scheduling needs:
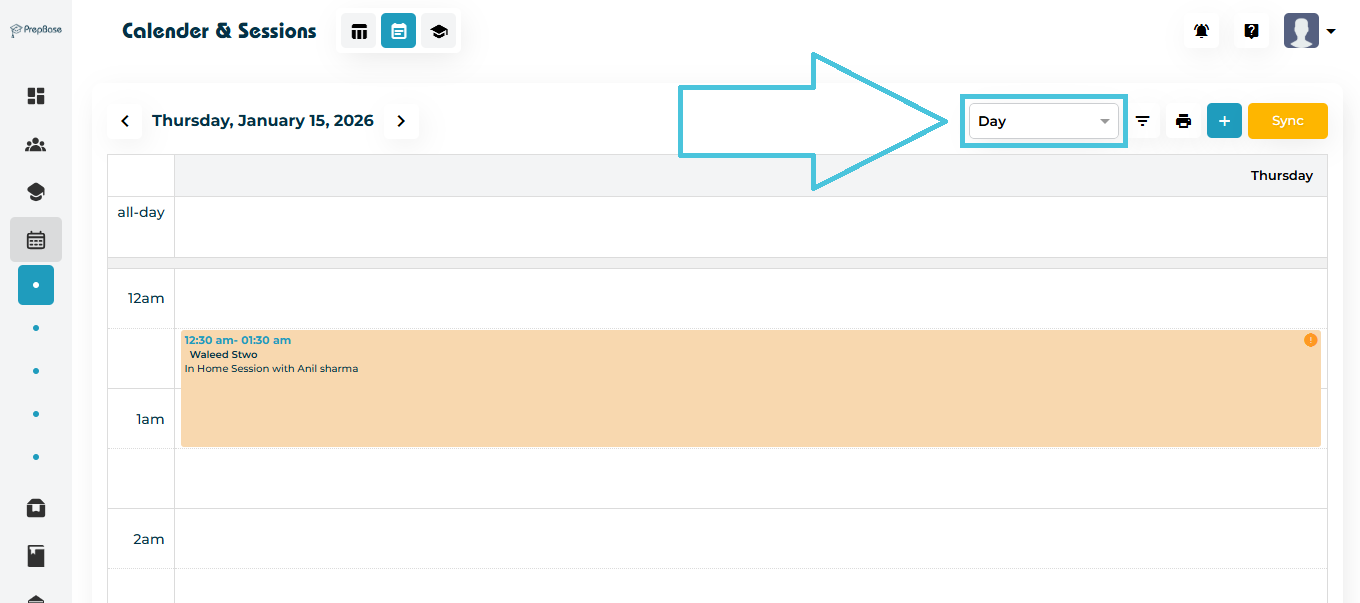
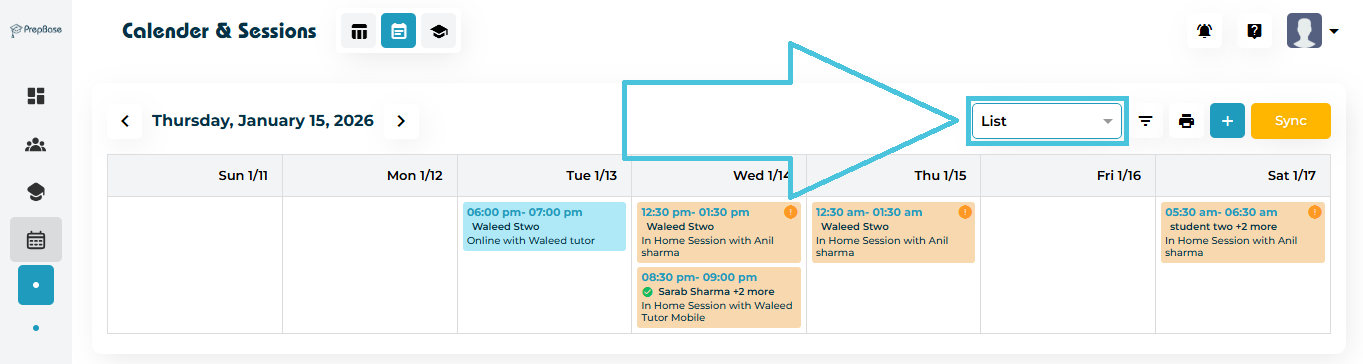
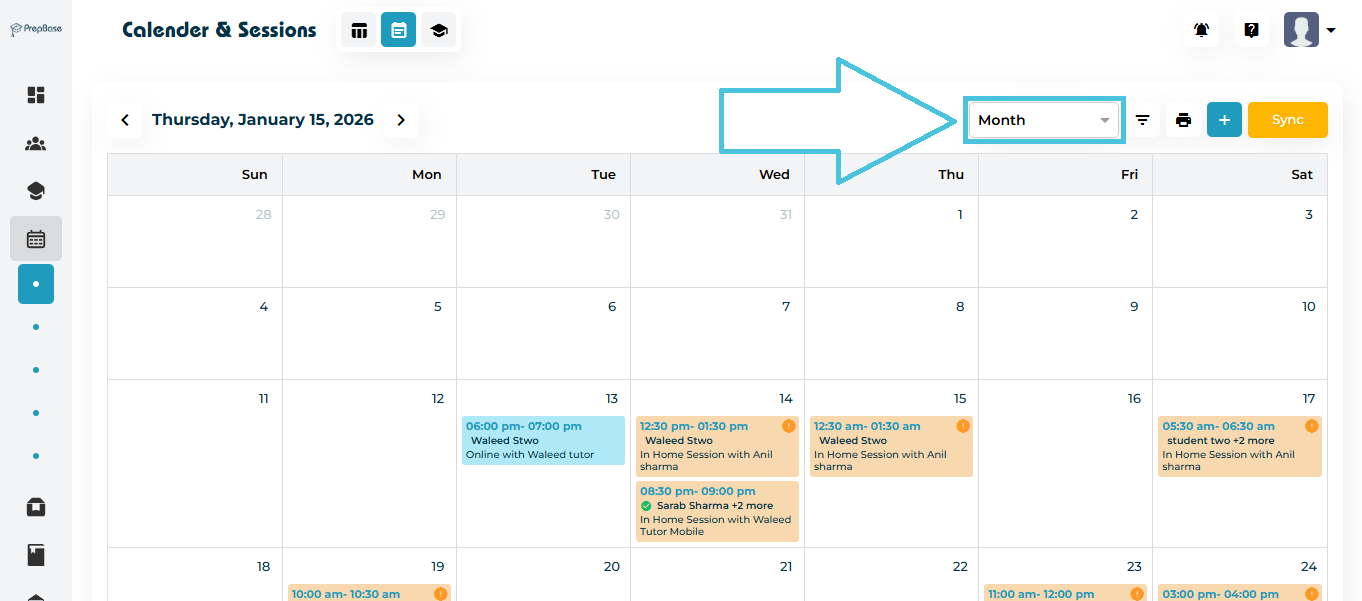
Each view updates dynamically based on applied filters.
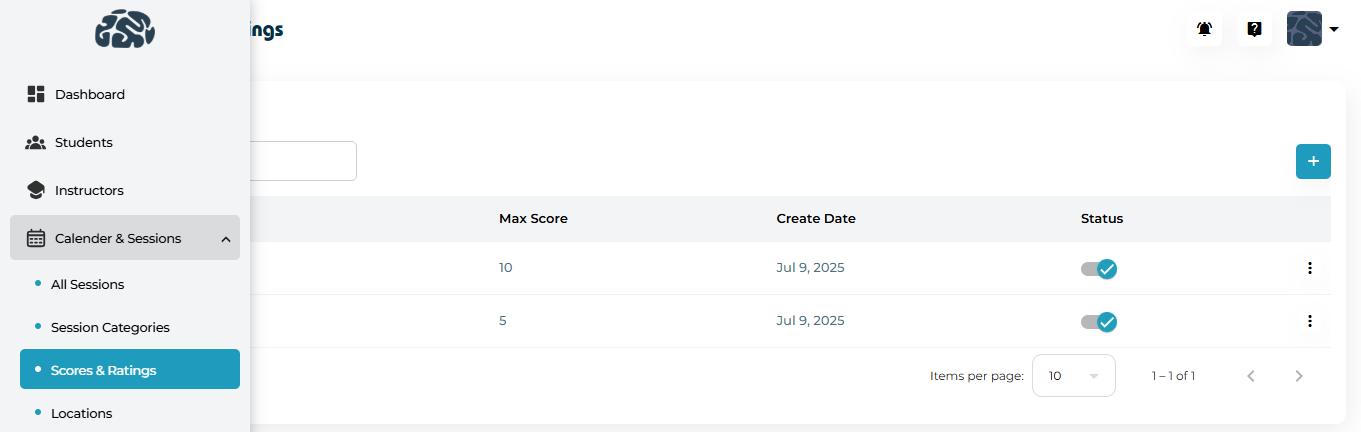
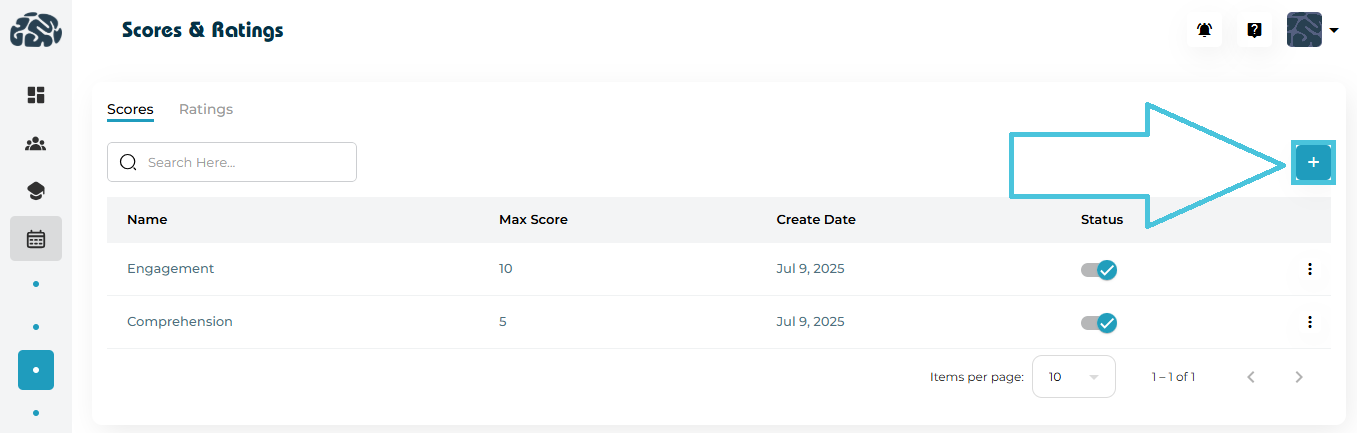
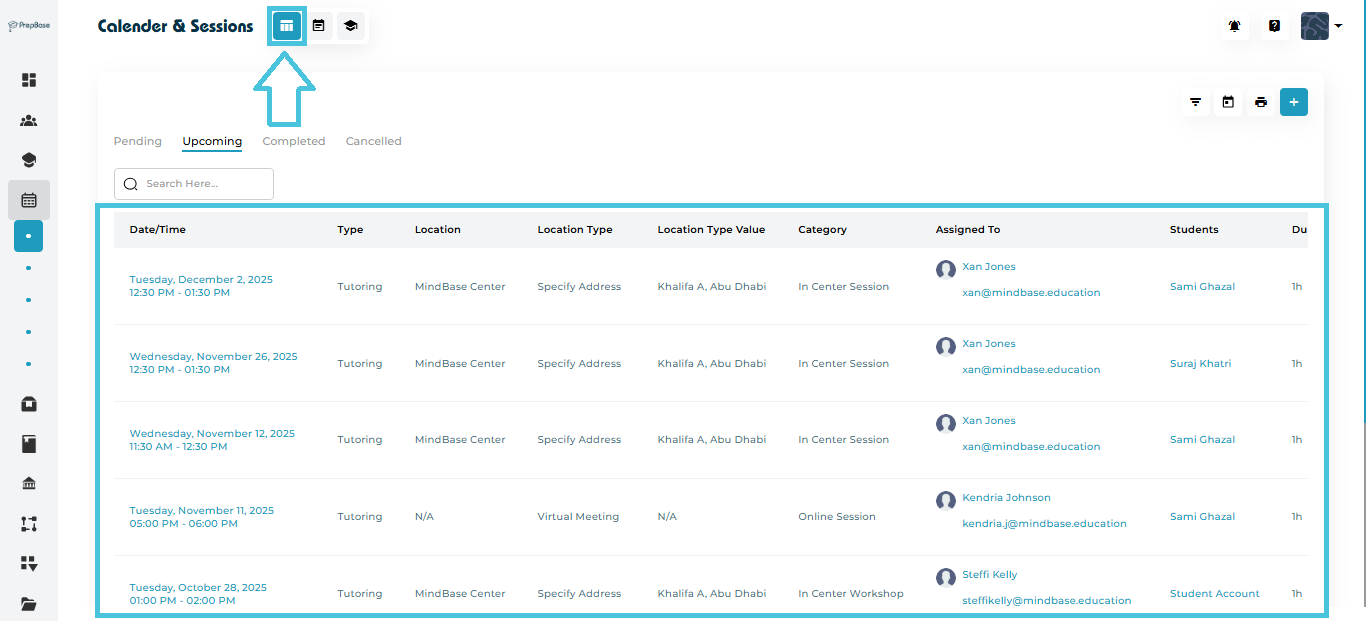
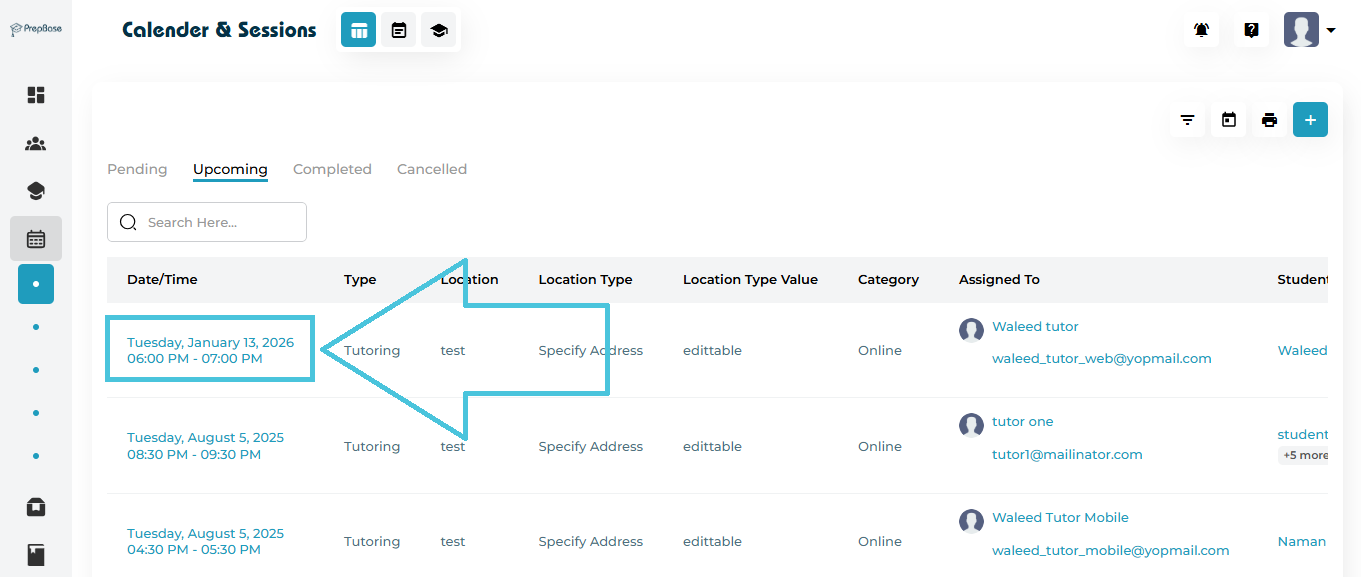
Session Cards in Calendar View
Each session displayed on the calendar appears as a session card, which includes:
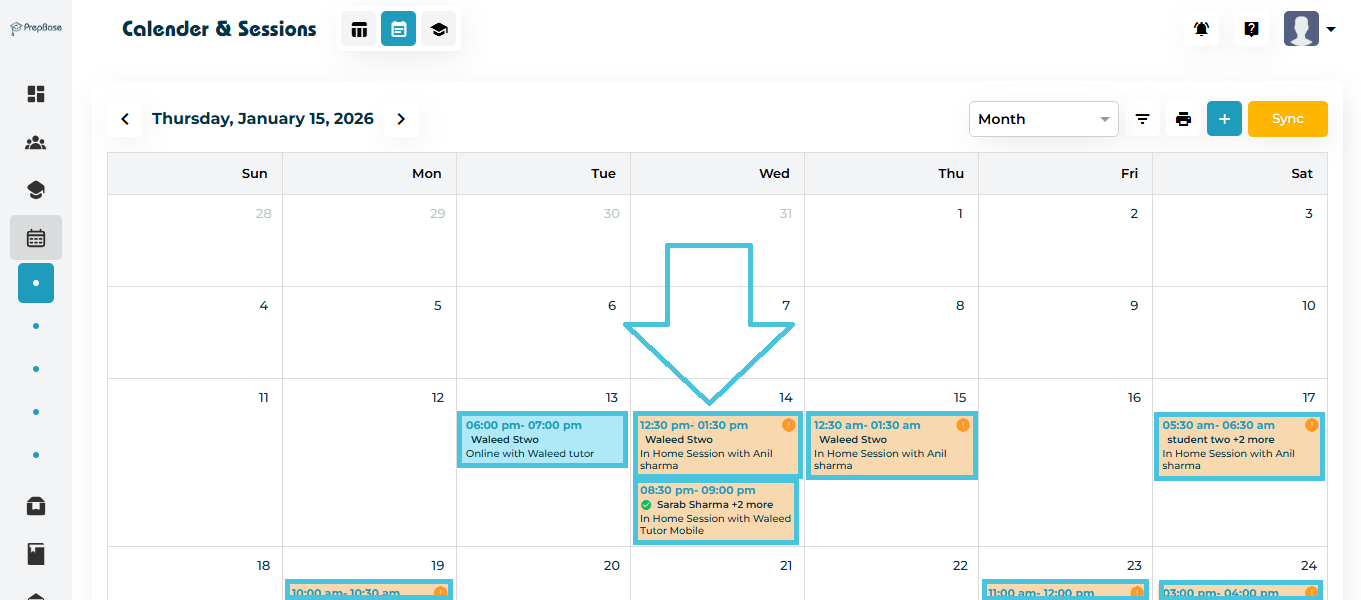
Student name
Assigned instructor
Session category
Start and end time
IMPORTANT NOTES:
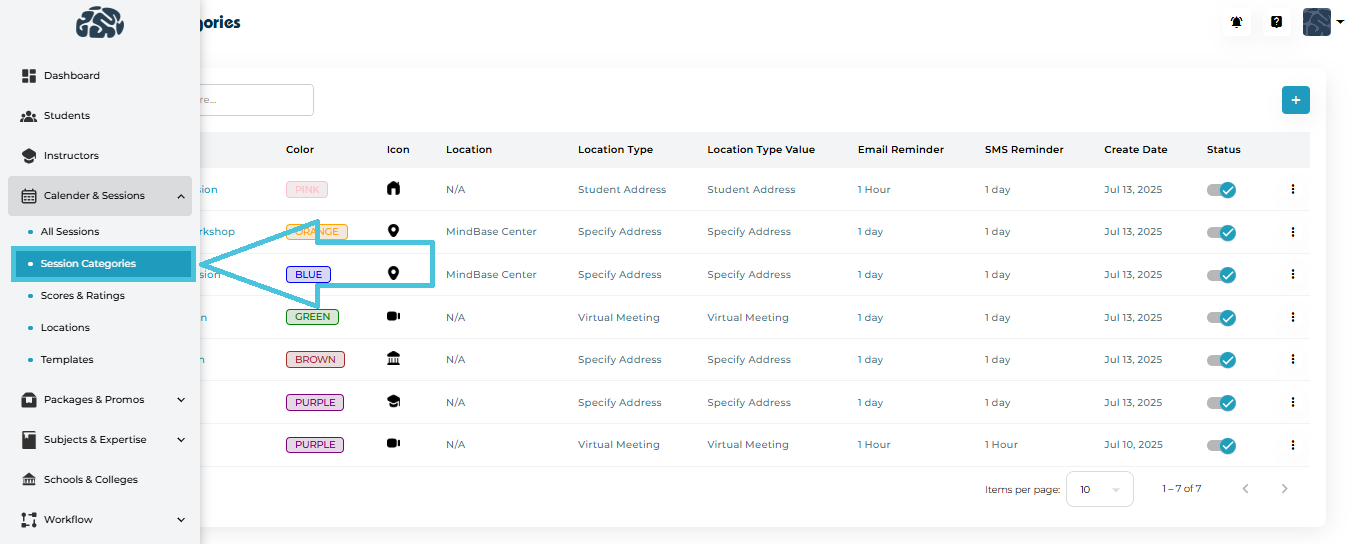
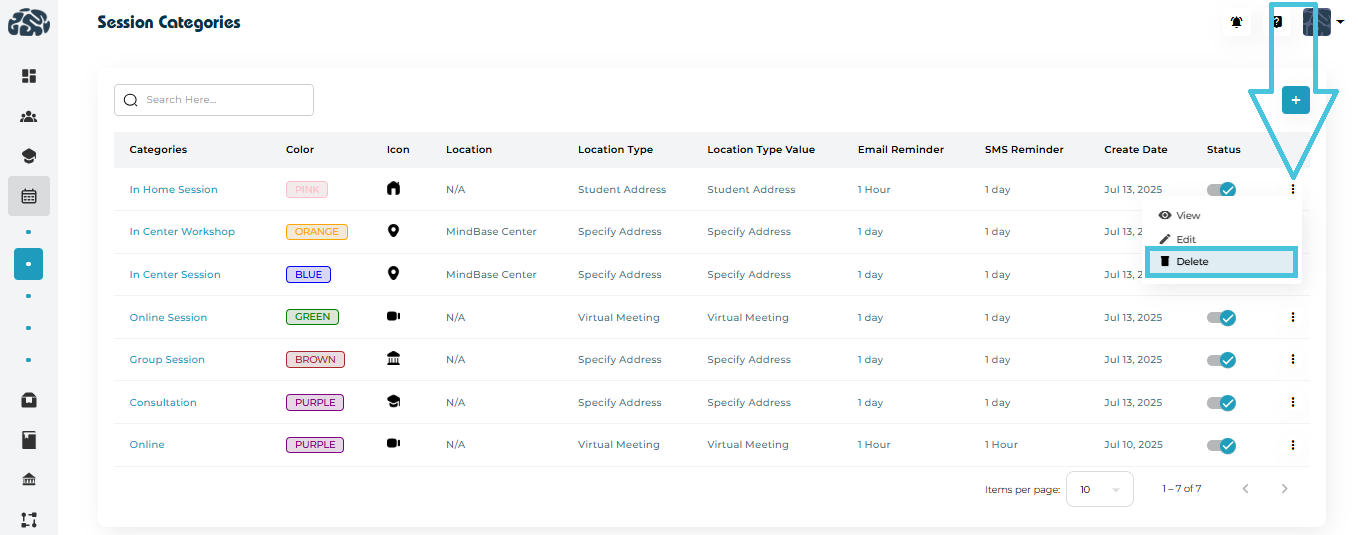
1- Color-coding is based on the admin selection while creating the Session Category.
2- The ORANGE EXCLAMATION MARK icon represents Pending Sessions.
3- Once attendance is taken the name of the student will display a green checkmark if present and a red X if absent.
4- Cancelled sessions are greyed out on the calendar view.
5- Dragging the session card to another date wil automatically reschedule the session at the same time for the new date.
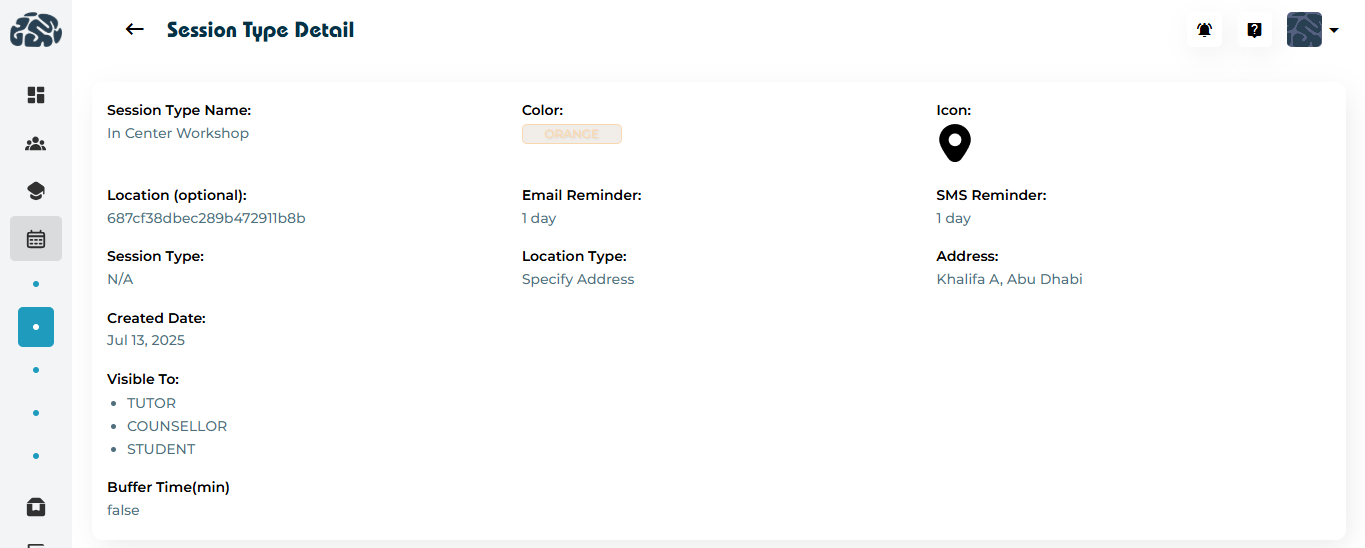
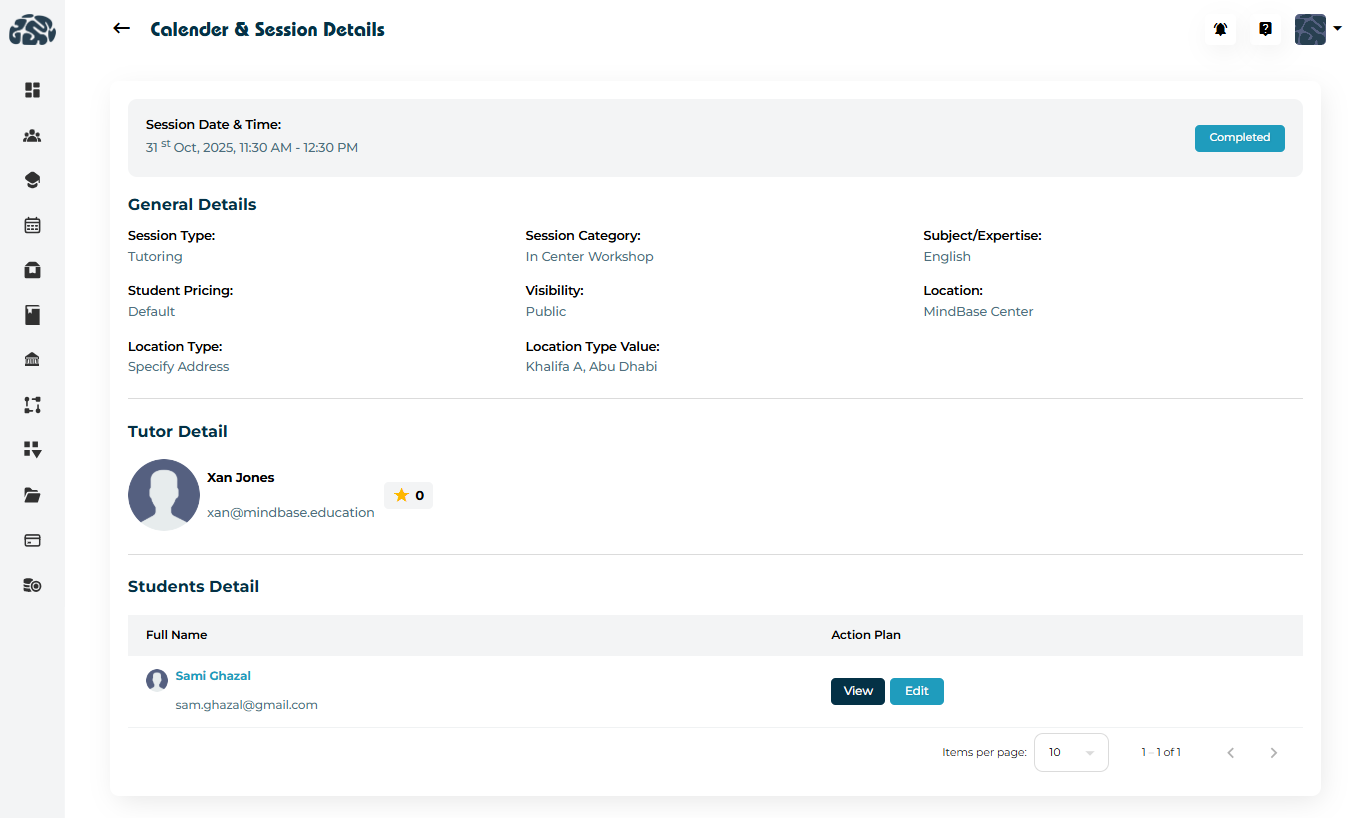
Session Card Details
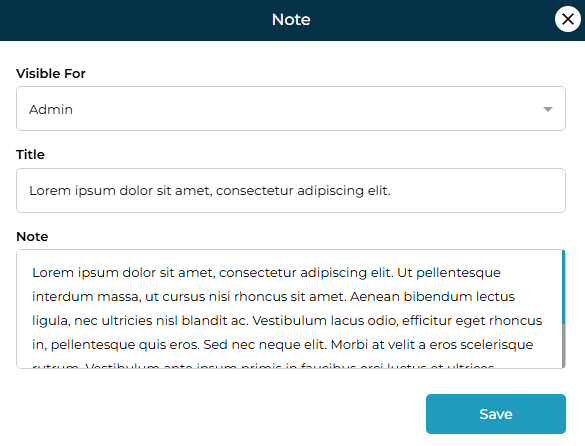
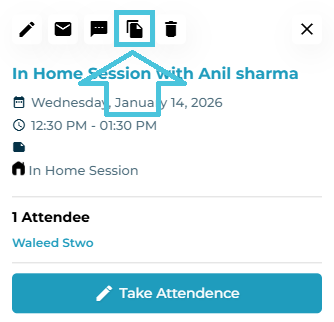
When an admin clicks on any session card in the Calendar View, a detailed session panel opens. This panel provides a quick overview of the session along with multiple action buttons for managing the session without leaving the calendar.
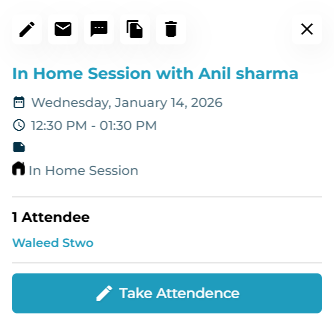
Session Information Displayed
The session card details panel displays the following information:
Session title (Session category and instructor name)
Scheduled date
Session time (start and end)
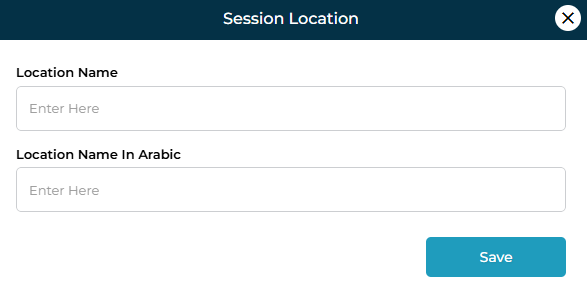
- Location type value and location address if applicable
Session category
- Public or private notes
Number of attendees
List of assigned students
This allows admins to quickly review session details before taking any action.
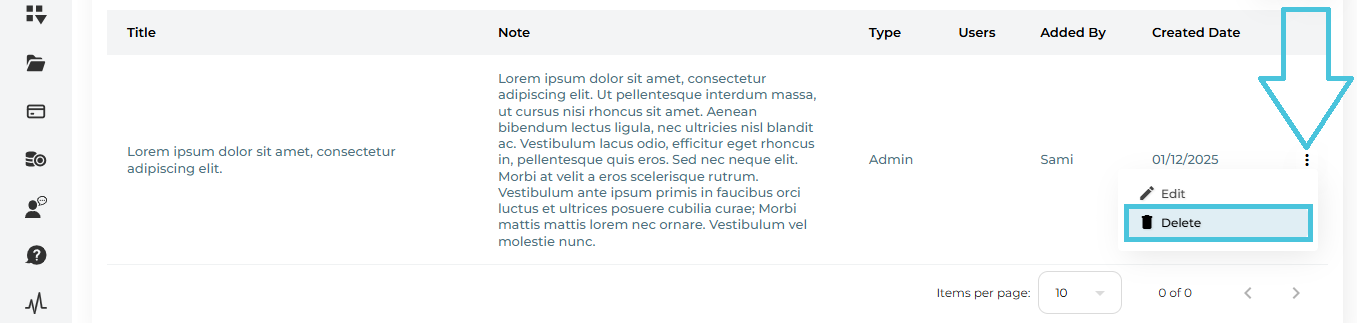
Session Card Action Buttons
At the top of the session card details panel, multiple action icons are available. Each button performs a specific function.
Action Buttons Explained
| Button | Description |
|---|
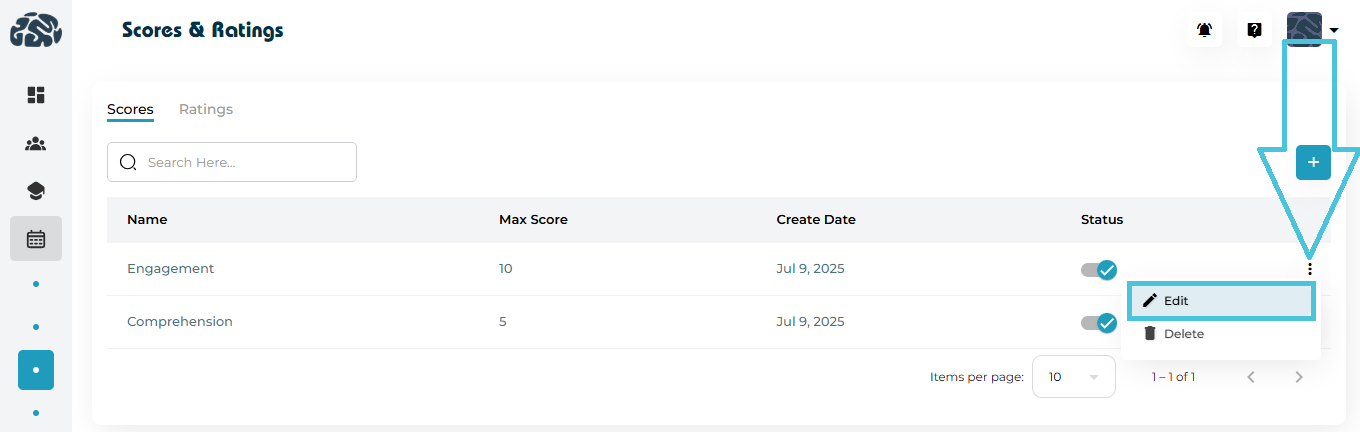
| Edit Session | Opens the Edit Session form, allowing admins to modify session details such as date, time, tduration, or students. |
| Email | Sends an email related to the session to the assigned student(s). |
| SMS | Sends an SMS notification related to the session. |
| Duplicate Session | Creates a copy of the session with the same details by specifying the target date and time, allowing quick replication of similar sessions. |
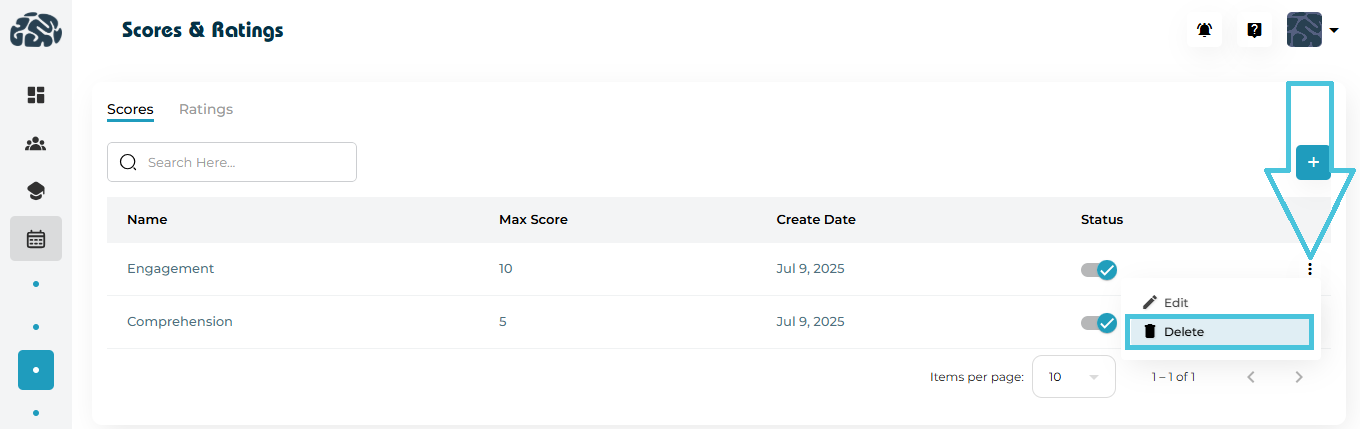
| Delete Session | Permanently deletes the session from the system after confirmation. |
| Close | Closes the session card details panel and returns to the calendar view. |
These actions allow admins to manage sessions efficiently without navigating away from the calendar.
Taking Attendance from Calendar View
Admins can take attendance directly from the session card details panel. 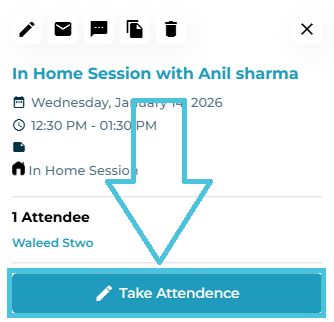
Student Attendance List
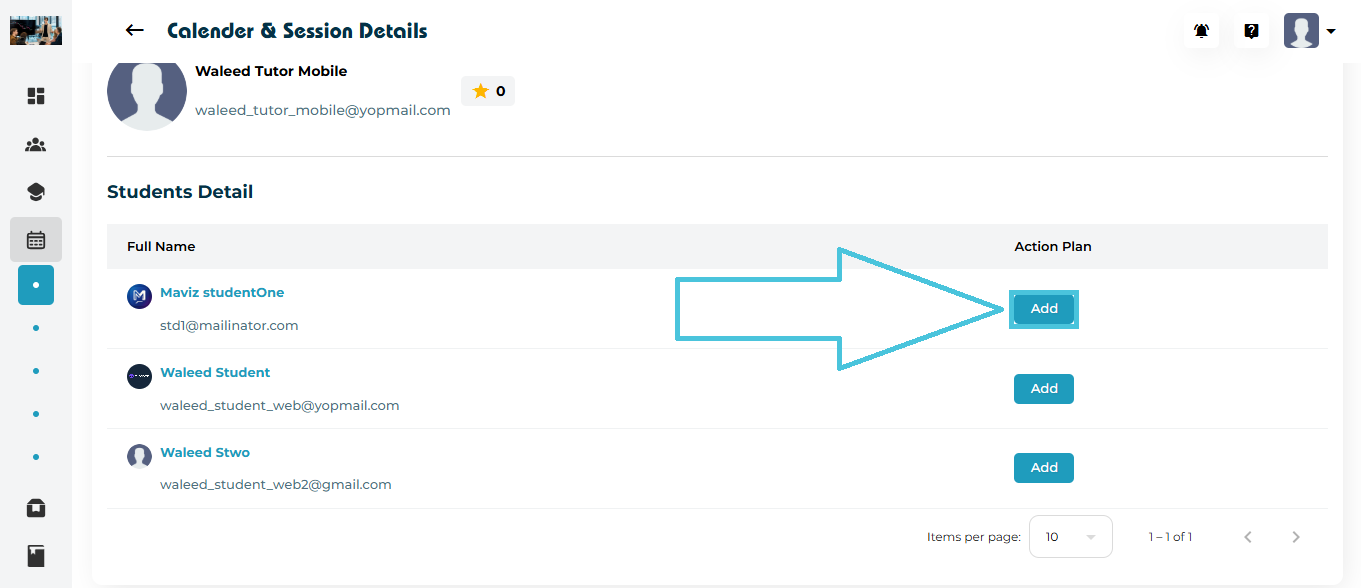
When the Take Attendance button is clicked from a session card in the Calendar View, the Student Attendance List panel opens. This screen allows admins to mark attendance and manage action plans for each student associated with the session.
Attendance Screen Overview
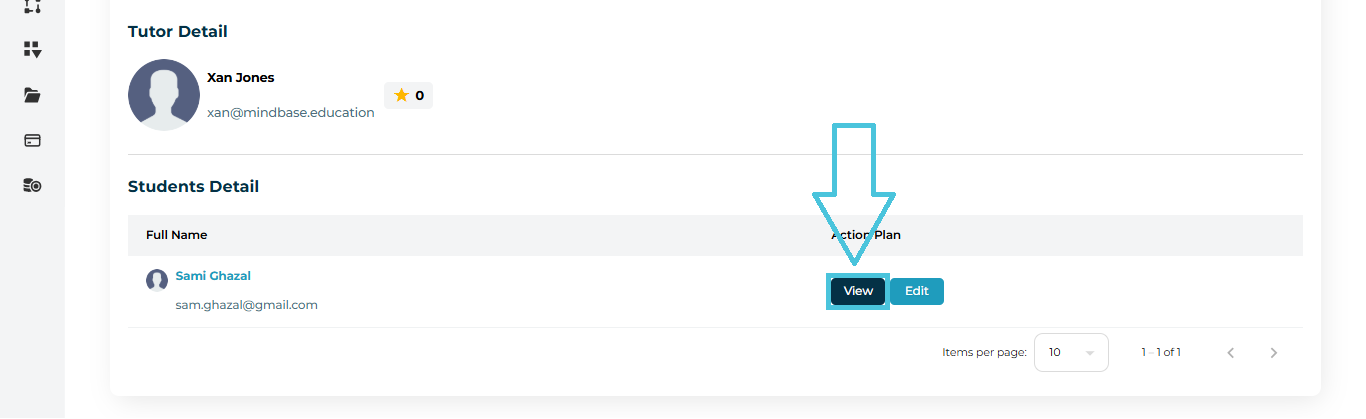
The Student Attendance List displays all students linked to the session in a tabular format. Each row represents one student and provides controls to record attendance and manage the student’s action plan.
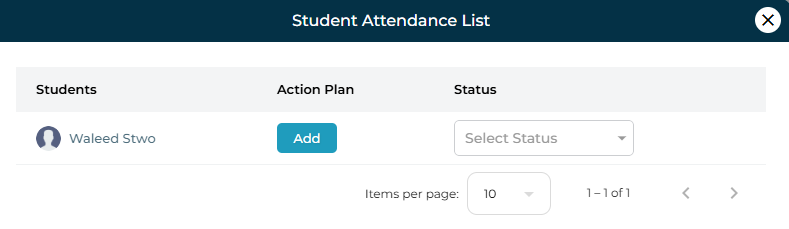
Attendance Table Columns Explained
| Column | Description |
|---|
| Students | Displays the student’s name associated with the session. |
| Action Plan | Allows admins to add or manage the action plan for the student. |
| Status | Used to mark the attendance status of the student for the session. |
Marking Attendance
To mark attendance for a student:
Locate the student in the list
Open the Status dropdown
Select the appropriate attendance status (e.g., Present or Absent)
Attendance is saved instantly once selected.
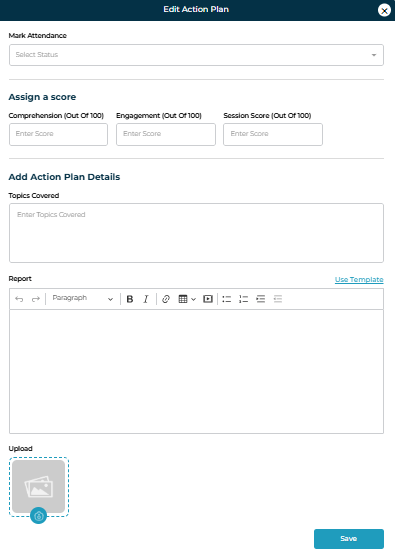
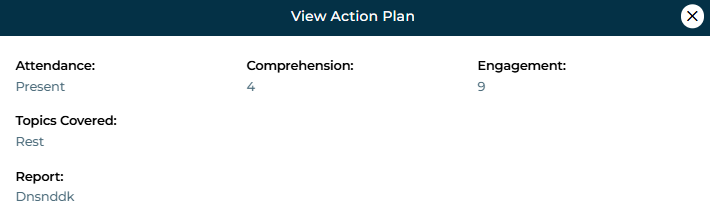
Adding an Action Plan from Attendance Screen
The Add button under the Action Plan column allows admins to create an action plan directly while marking attendance.
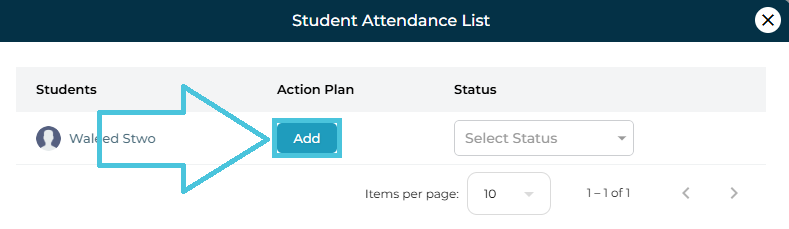
This ensures session outcomes are captured immediately after attendance is recorded.
Duplicate Session
The Duplicate Session action allows admins to quickly create a copy of an existing session without re-entering all session details. This is especially useful for scheduling recurring or similar sessions.
How to Duplicate a Session
Open Calendar View
Click on the session card you want to duplicate
Click the Duplicate Session (copy) icon from the session card actions
This opens the Duplicate Session confirmation window.

Duplicate Session Confirmation
The confirmation window displays a message confirming the session being cloned and allows admins to define the new schedule.
Duplicate Session Fields
| Field | Description |
|---|
| Target Date | Select the date on which the duplicated session should be scheduled. |
| Target Time | Select the start time for the duplicated session. |
Completing the Duplication
Once duplicated:
Only the date and time are changed based on the selected target values
The duplicated session immediately appears in:
Drag & Drop Scheduling
The calendar supports drag-and-drop functionality for faster schedule adjustments:
This eliminates the need to open the session edit form for minor scheduling changes.
⚠️ Drag & drop respects instructor availability and conflict rules where applicable.
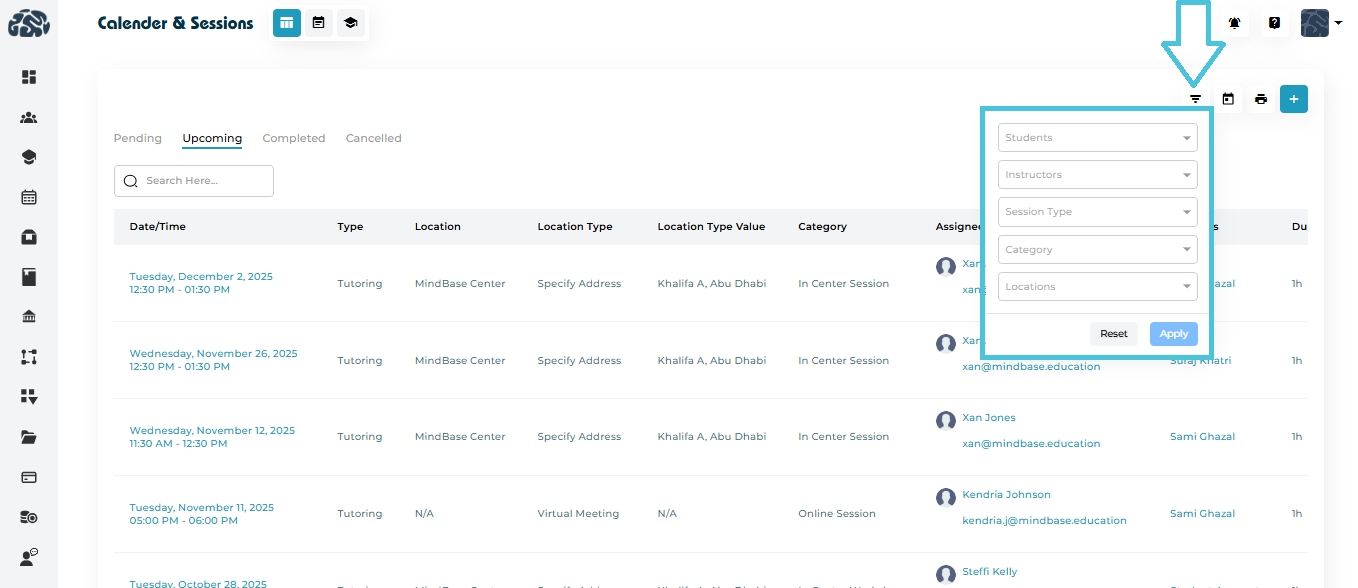
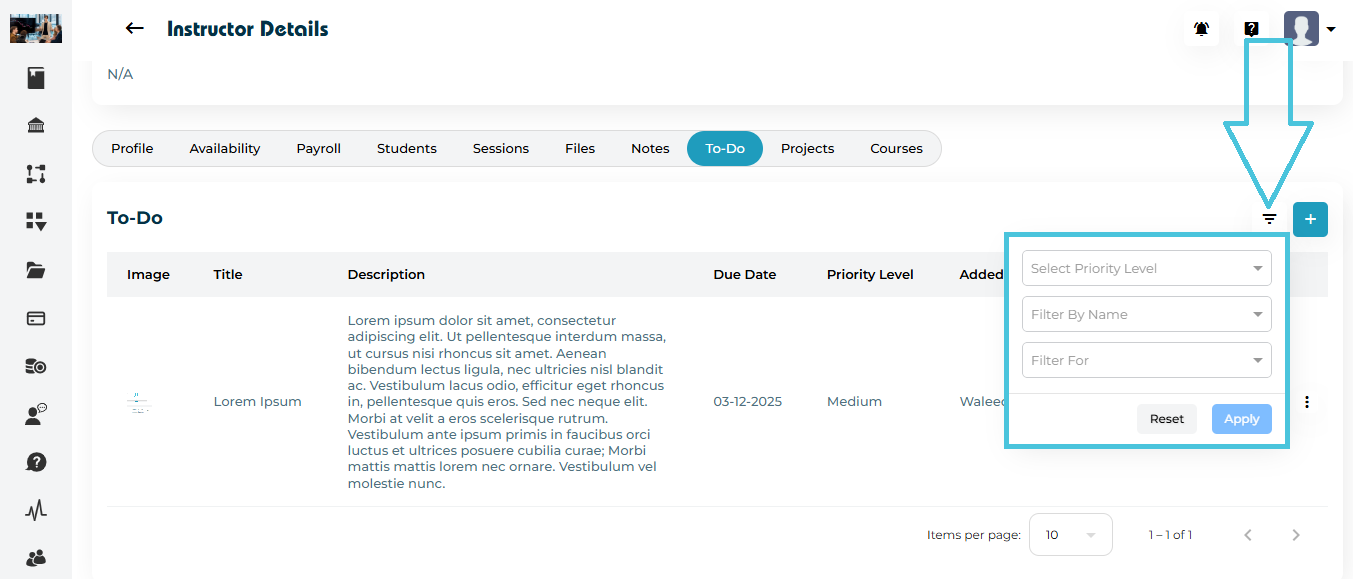
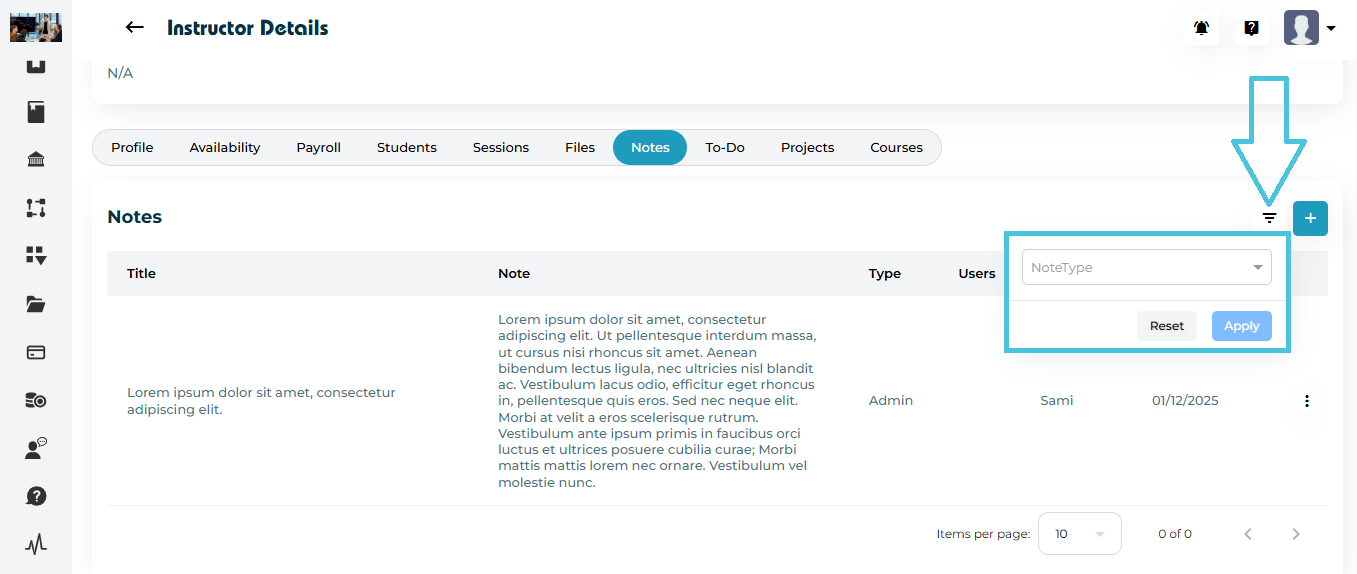
Calendar Filters
The filter panel allows admins to narrow down visible sessions based on specific criteria, such as:
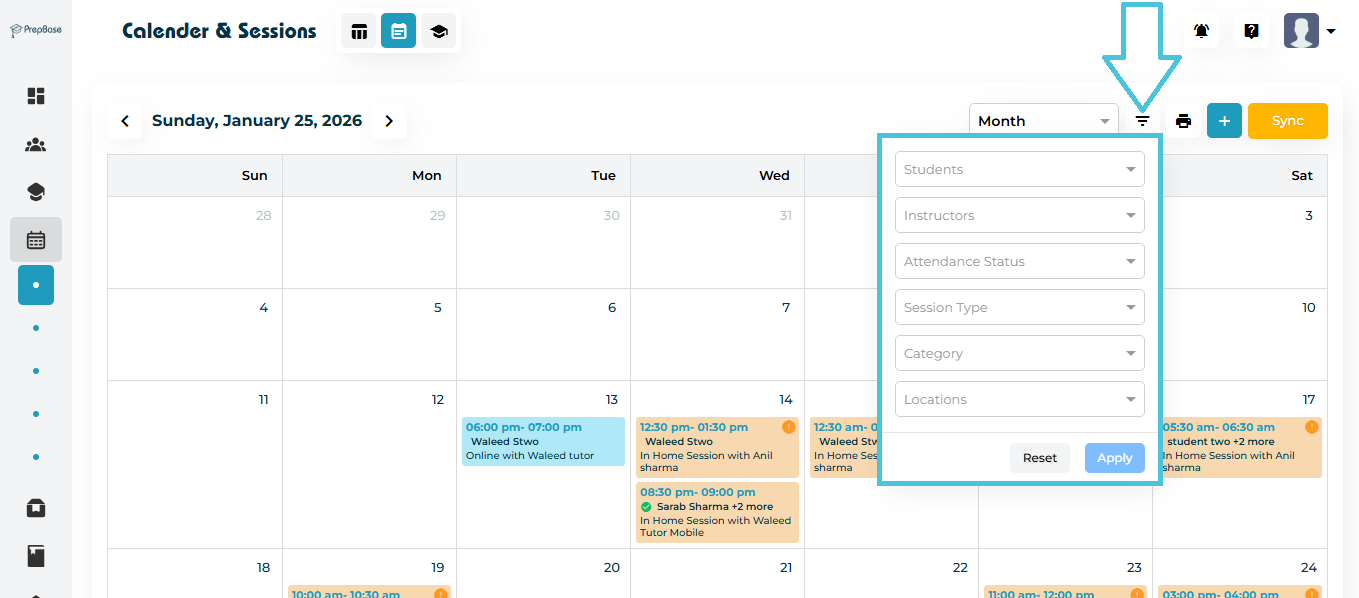
Student
Instructor
- Attendance status
Session type
Session category
Session location
Filters can be applied individually or in combination, helping admins focus on exactly what they need to manage.
Filters apply instantly and update the calendar view in real time.
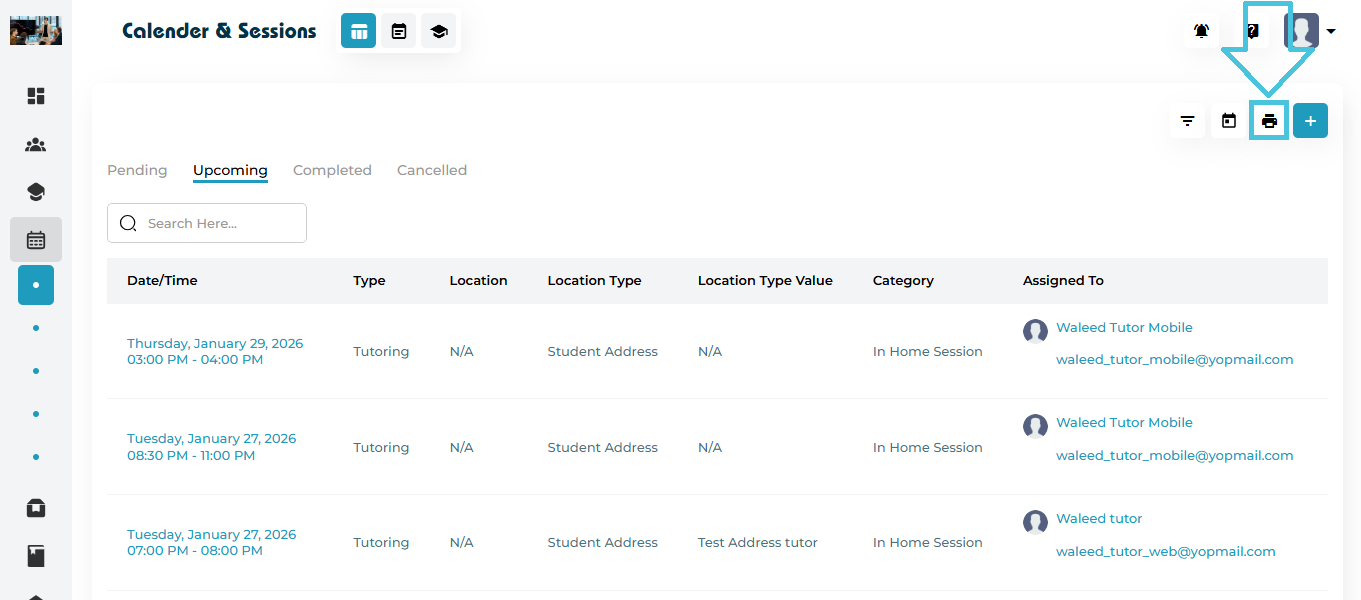
Print Calendar (Export Schedule)
The Print button (printer icon) lets admins generate a print-friendly copy of the currently visible calendar schedule. This is useful when you need a hard copy for coordination, meetings, or offline review.

What this action does
Opens the calendar in a print preview format
Captures the same date range and view you are currently using (e.g., Month / Week / Day)
Prints the schedule based on the filters currently applied (so you only print what you’re viewing)
Note: For best results, apply filters before printing so only relevant sessions appear
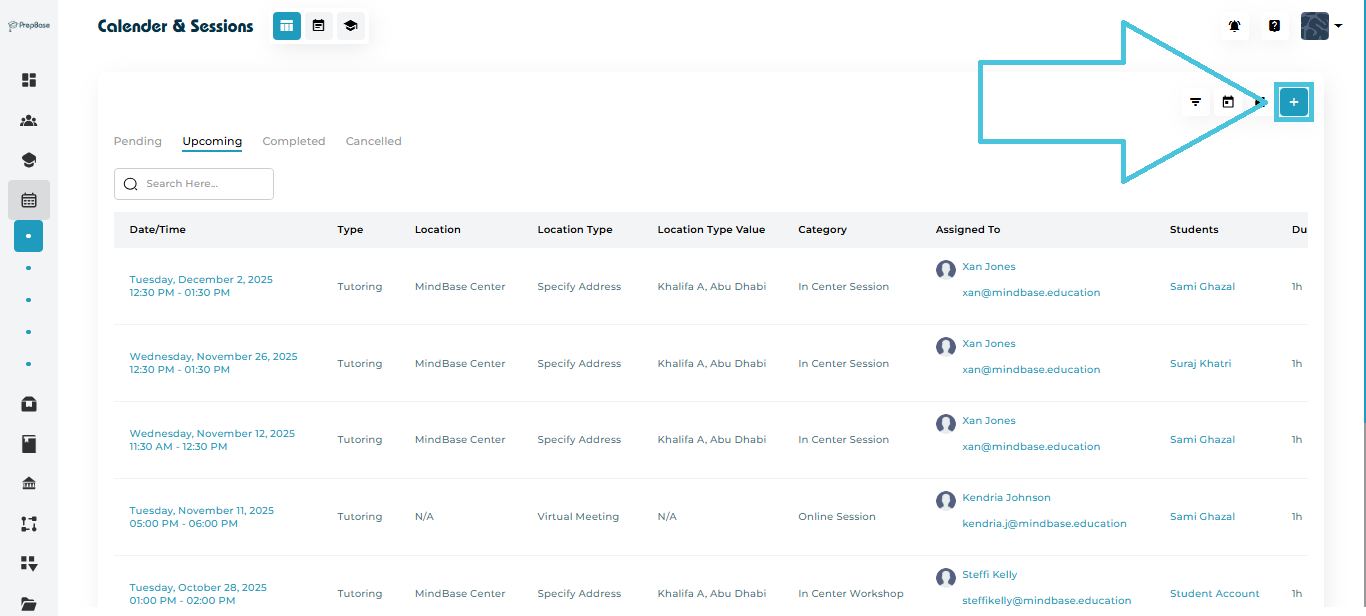
Quick Actions from Calendar
From the calendar itself, admins can perform several actions without navigating away:
This ensures accurate scheduling data at all times.
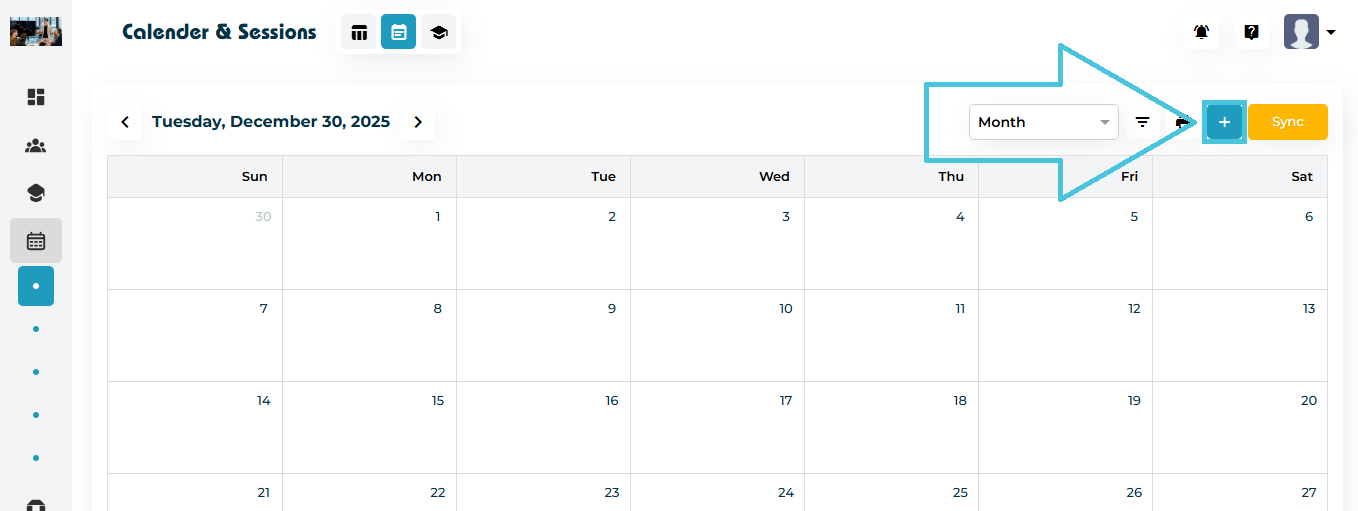
Sync Sessions With Your Own Calendar
In the Month/Week/Day views, a Sync button appears on the top right.

This allows administrators or instructors to sync their sessions with an external calendar (Google Calendar, Outlook, Apple Calendar, etc.), ensuring seamless personal schedule management.


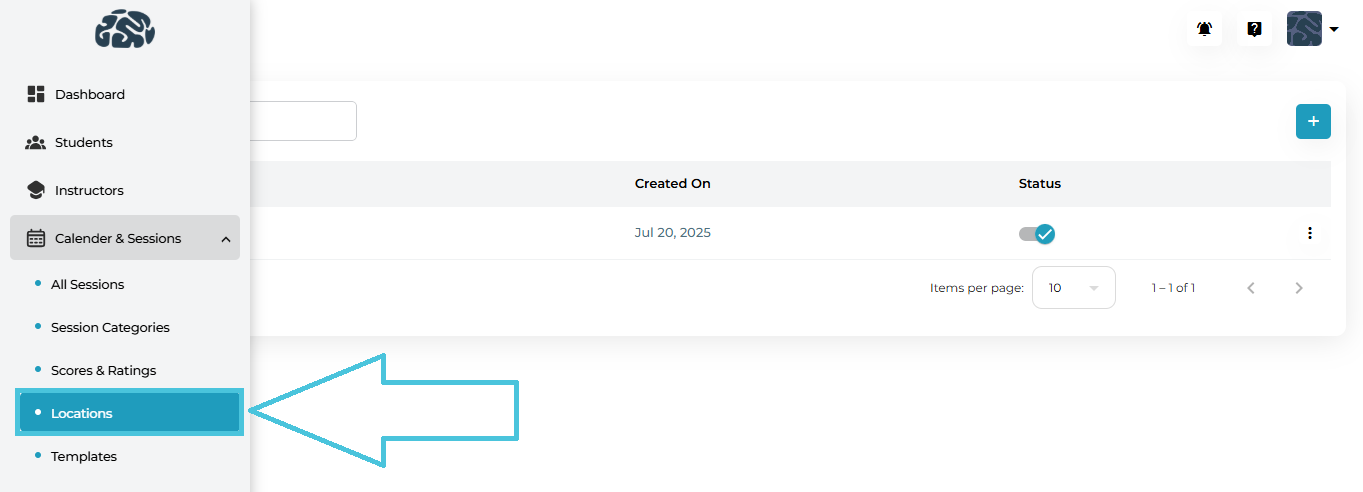
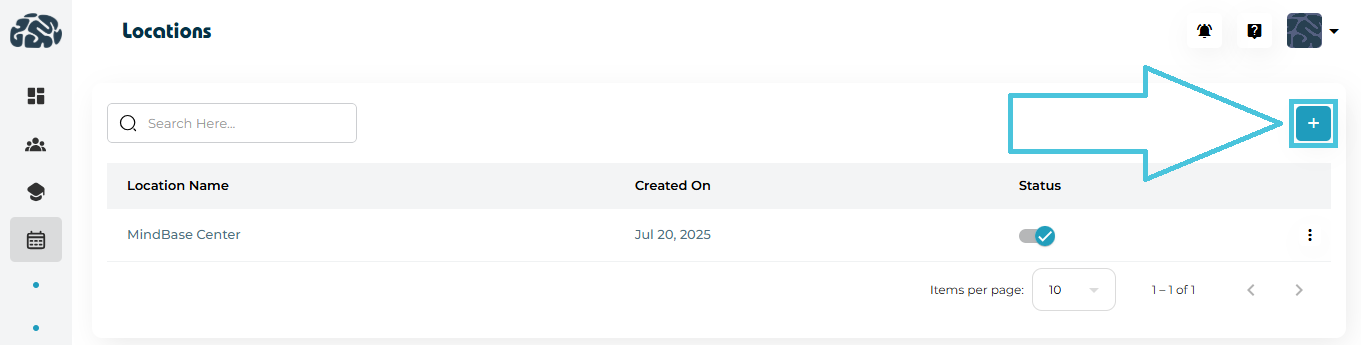
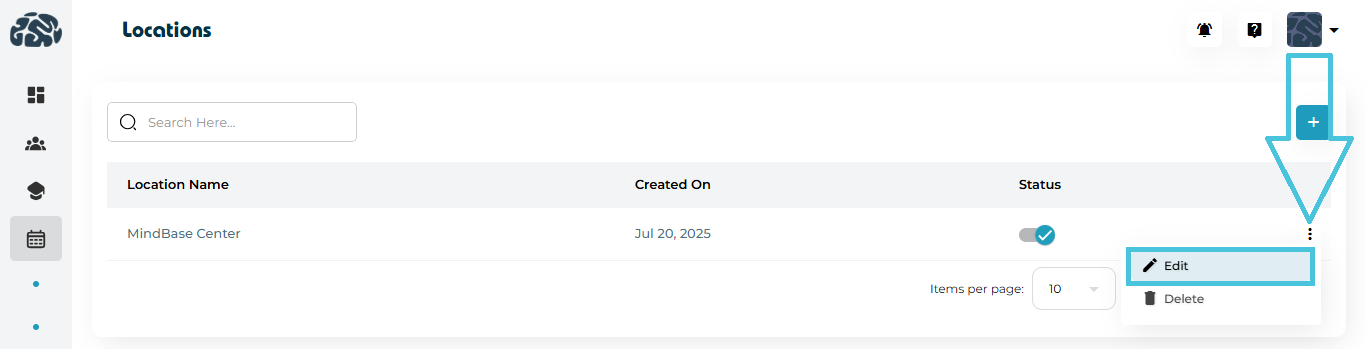
 Navigate to: