This section contains your organization’s basic information and contact details.
Fields Overview
| Field | Description |
|---|---|
| Company Name | The official name of your organization. |
| Organization Name | The internal identifier or display name used across the PrepBase system. |
| Web URL | The unique domain where your students, parents, tutors and counselors can log in or sign up. Example: https://yourorganizationname.admin.prep-base.com.🔹 Note: Replace “yourorginzationname” with your organization’s PrepBase subdomain — do not copy this example link as-is. |
| Country | The country where your organization operates. |
| Address | Physical or mailing address of your organization. |
| Primary contact email for system communication. | |
| Phone Number | Organization’s contact phone number. |
| Time Zone | The default time zone applied across your PrepBase dashboards and sessions. |

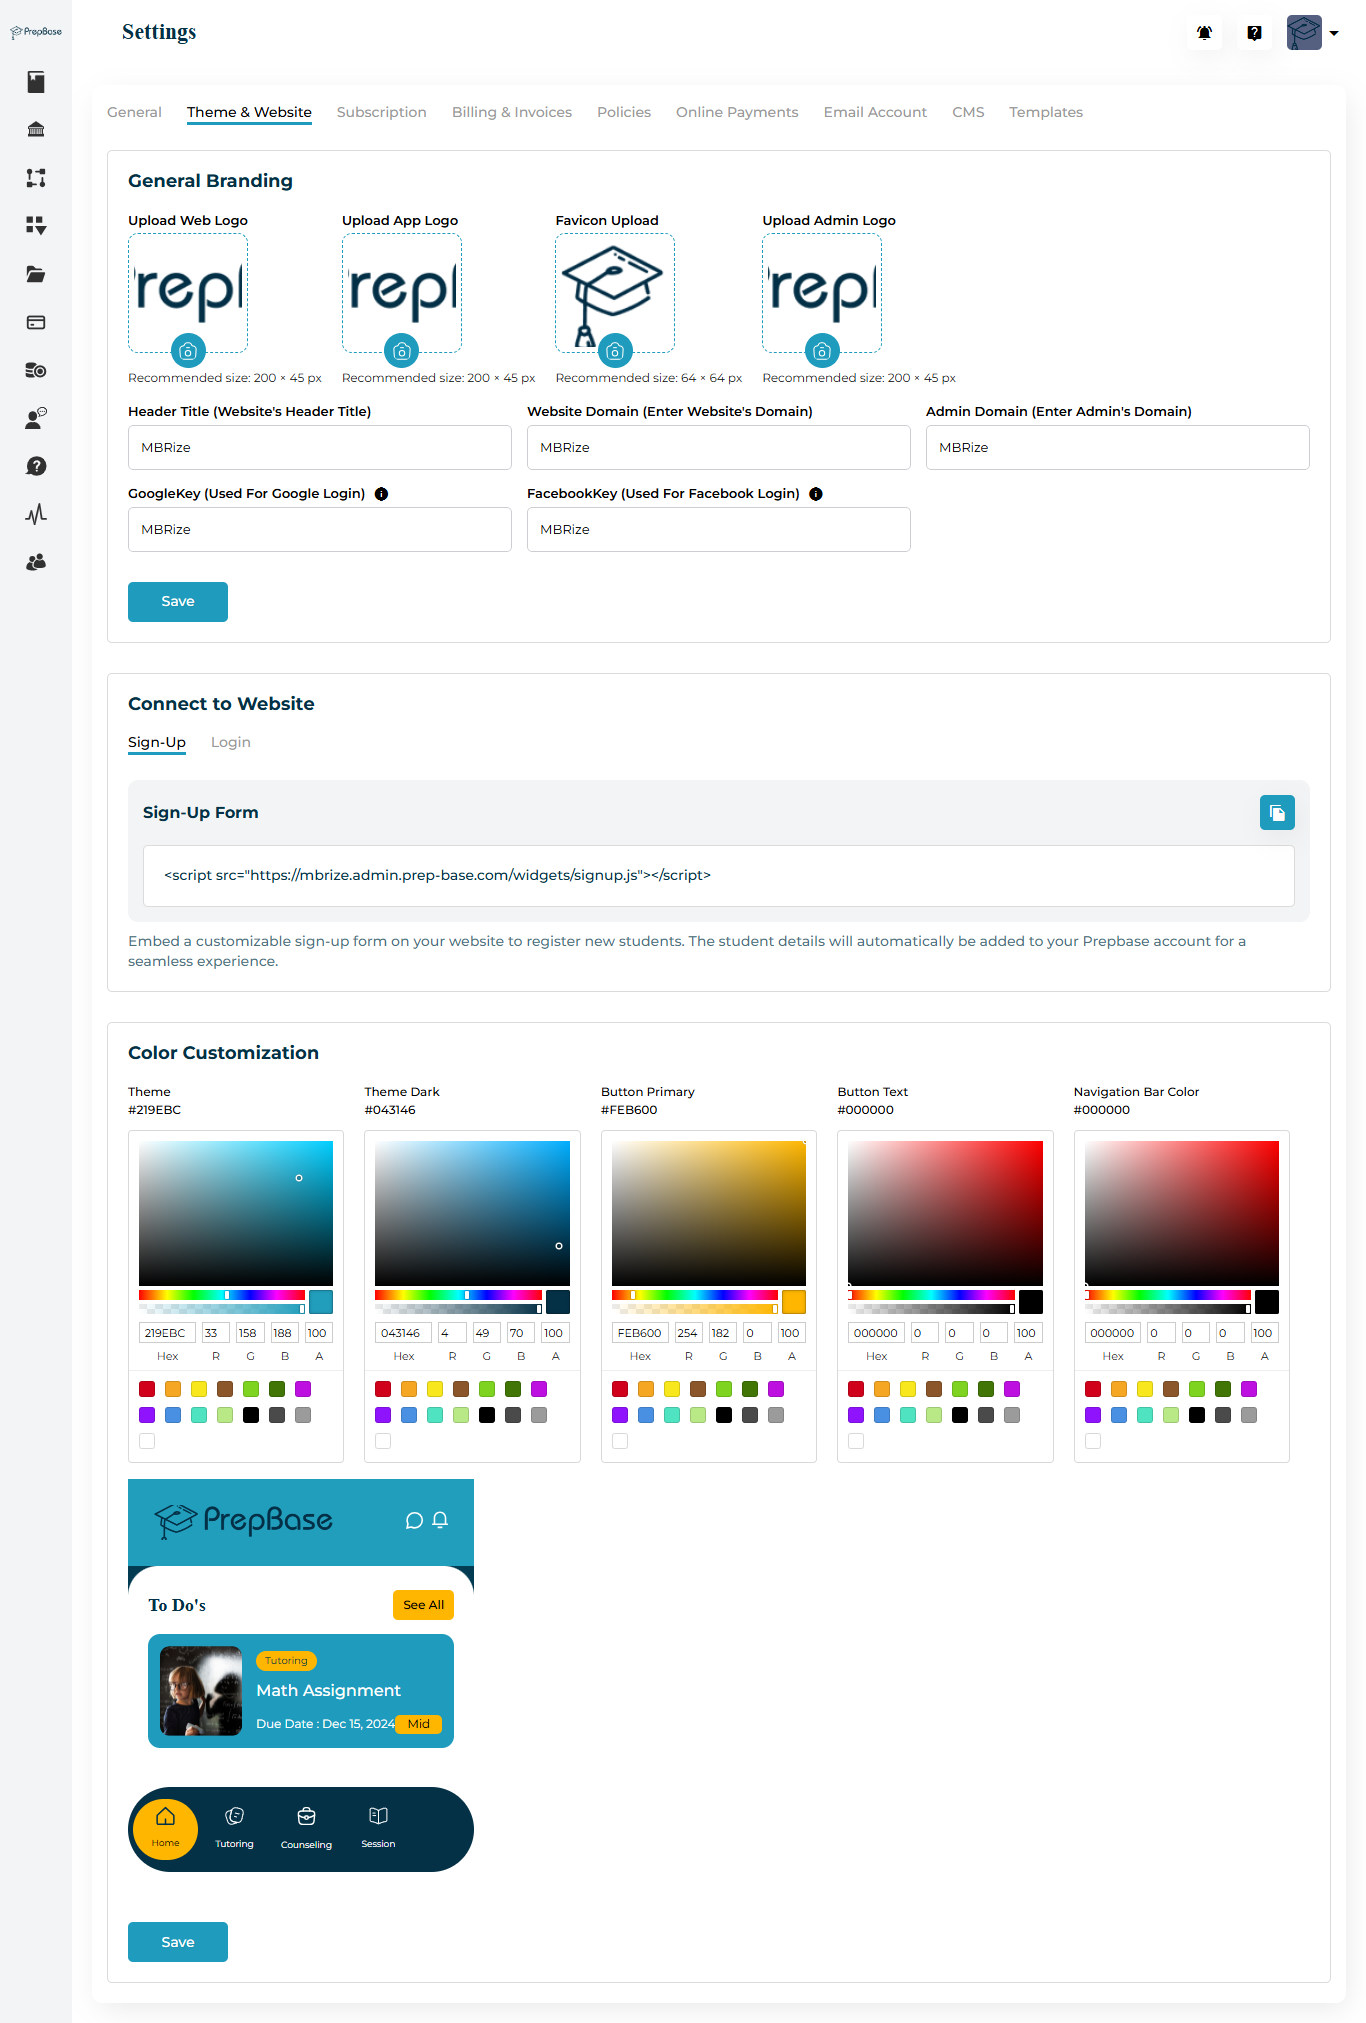
This section allows you to personalize your PrepBase interface with custom branding and color themes that reflect your organization’s identity.
Branding Options
| Asset | Where It Appears | Recommended Size |
|---|---|---|
| Upload Web Logo | Shown on the website header, help center pages, and system emails using the web theme. | 200×45 px (transparent PNG/SVG) |
| Upload App Logo | Appears on student, tutor & counselor dashboards. If upgraded to branded mobile apps, it becomes the main logo in the app header. | 200×45 px |
| Favicon Upload | Displays as the small browser tab icon for all portals. | 64×64 px (square PNG/ICO) |
| Upload Admin Logo | Shown at the top-left corner of the admin dashboard (back office). | 200×45 px |
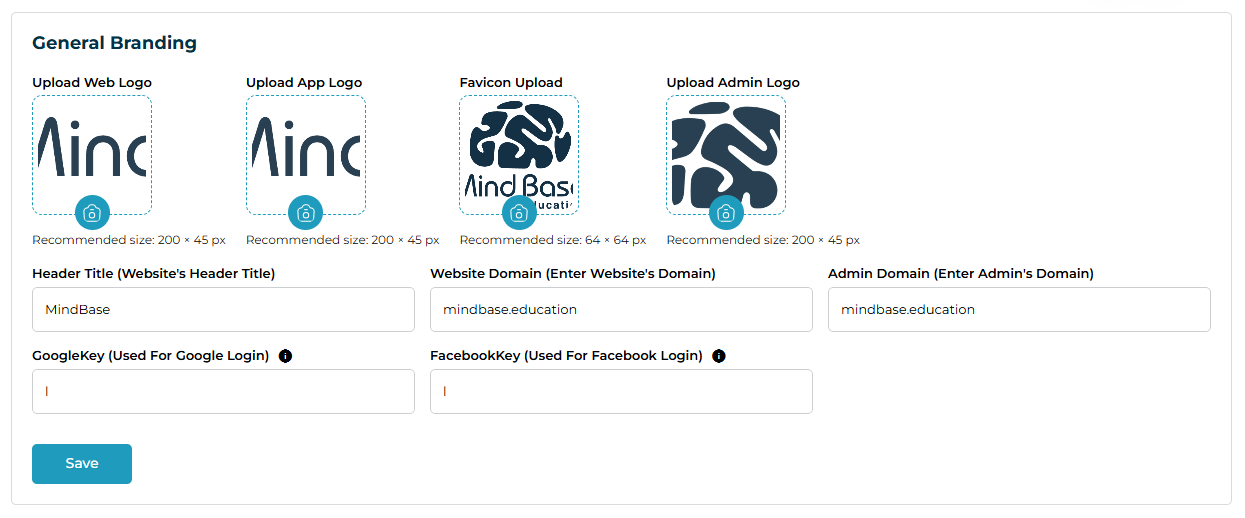
Social Login Keys
You can enable Google or Facebook login for your students and tutors & counselors by entering their respective API keys.
| Key | Where to Get | What to Enter |
|---|---|---|
| GoogleKey | 1. Visit Google Cloud Console → APIs & Services → Credentials → Create Credentials → OAuth Client ID (Web). 2. Add this redirect URI: https://yourorganizationname.admin.prep-base.com/auth/google/callback | Paste the Client ID into the GoogleKey field. |
| FacebookKey | 1. Go to Facebook for Developers → Create App → Facebook Login (Web). 2. Add this redirect URI: https://yourorganizationname.admin.prep-base.com/auth/facebook/callback | Paste the App ID into the FacebookKey field. |
Connect to Website
When you enter your Website Domain, PrepBase automatically generates a Sign-Up / Login widget script such as: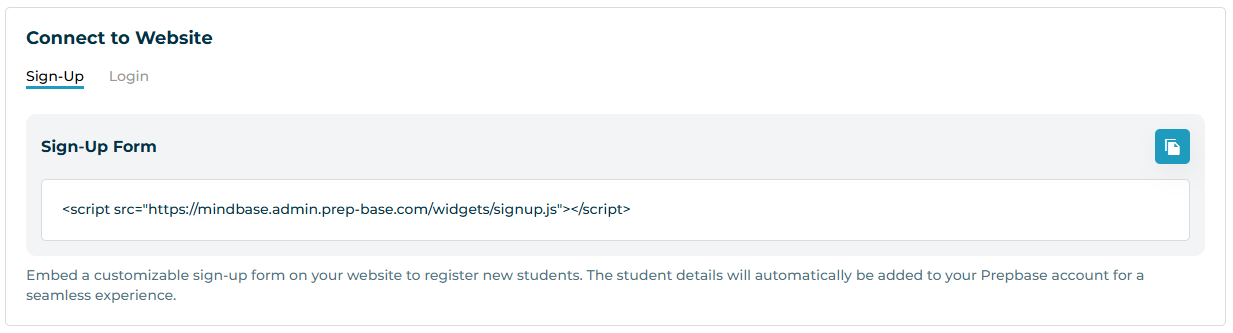
To use this widget on your public website:
WordPress users → add the script in a Custom HTML block or the footer scripts area.
Elementor users → drag an HTML widget onto your sign-up page and paste the script.
Custom-built sites → paste the script before the closing
</body>tag or exactly where you want the sign-up form to appear.
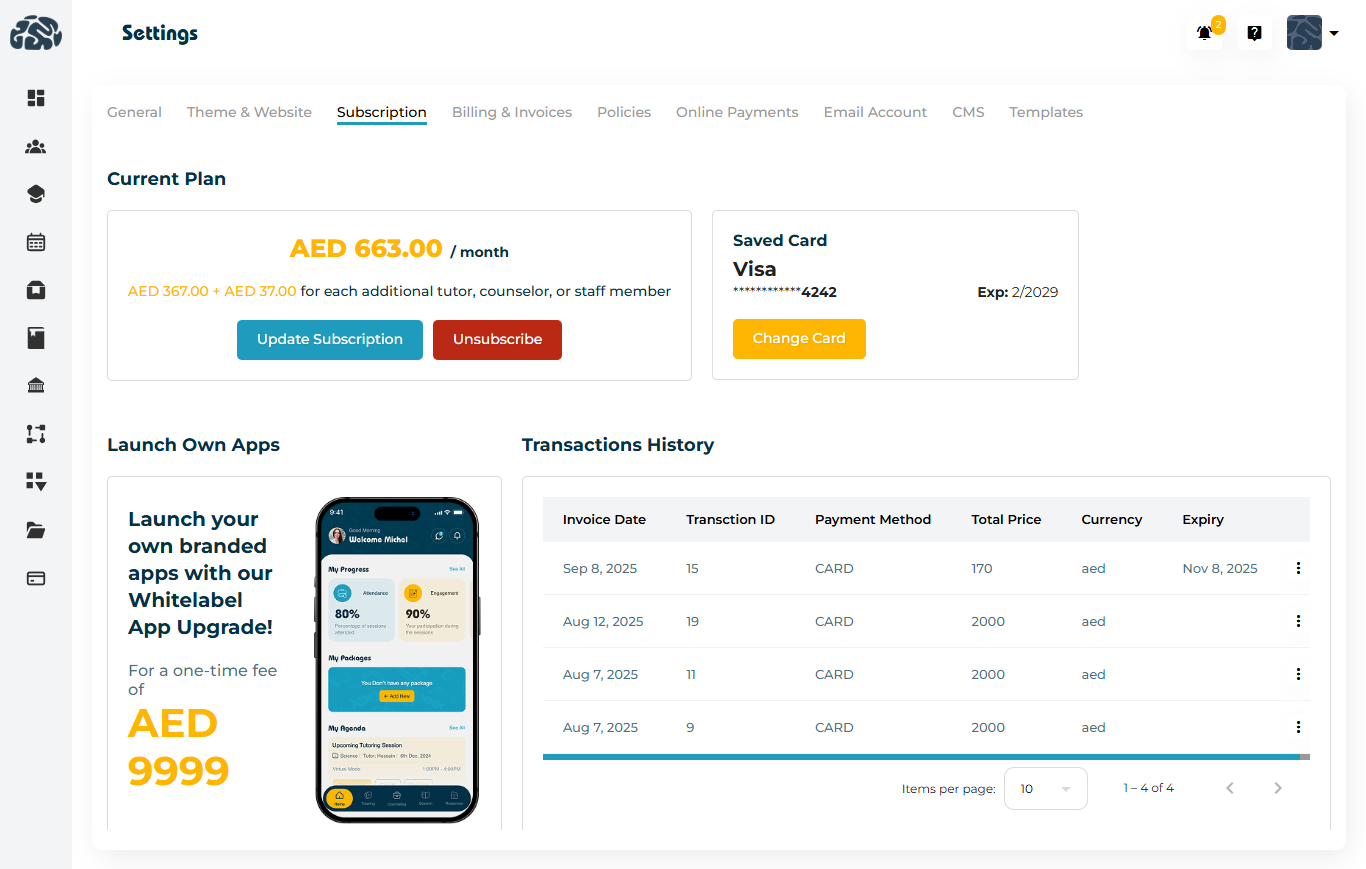
The Subscription section in PrepBase allows administrators to view, manage, and update their active plan.
It controls how billing cycles, user seats, upgrades, and payment confirmations work across your organization.
Understanding the Subscription Flow
PrepBase follows a Software-as-a-Service (SaaS) model — meaning your organization’s subscription is active based on a recurring payment plan.
Here’s a simple breakdown of how the process works:
| Step | Description |
|---|---|
| 1. Free Trial Signup | New organizations begin with a free trial to explore PrepBase features. During this period, all modules remain accessible. |
| 2. Trial Expiry | Once the trial ends: – If a payment card is added → payment is charged automatically. – If no card is added or payment fails → account status becomes Pending, and access is restricted until the payment is confirmed. |
| 3. Successful Payment | Once payment succeeds, the system automatically: – Activates your account – Generates an invoice reflecting charges based on the number of users (seats) – Adjusts amounts automatically for prorated changes. |
| 4. Changing Seats Mid-Cycle | If you add or remove users during a billing month, PrepBase recalculates the charges. The change appears as a prorated adjustment on your next invoice. |
| 5. Upgrades vs. Downgrades | – Upgrades take effect immediately — the system charges the difference right away. – Downgrades are scheduled for the next renewal period, ensuring uninterrupted service. |
| 6. Subscription & Cancellation Confirmation | Whenever you start, modify, or cancel a subscription, PrepBase sends a confirmation email to your registered admin email address. |
| 7. Canceling a Plan | If you cancel mid-cycle, your PrepBase account stays active until the end of your paid period. Once the billing period ends, access is automatically paused. |
| 8. Payment Validity Period | Each subscription remains active until the end of the paid cycle — usually 30 days from the payment date. Renewal charges are applied automatically at the start of the next cycle. |
Example Scenario
Suppose your school subscribes to PrepBase on March 1st with 10 users:
Mid-month, you add 2 more tutors & counselors — PrepBase automatically prorates the cost for the remaining days of the month.
If you remove a user, the reduction applies to your next month’s invoice — no refunds are issued mid-cycle.
If you upgrade your plan (e.g., to include the Whitelabel App), the additional cost is billed instantly, and PrepBase’s team will contact you to collect setup requirements.
Transactions History – Field Descriptions
| Field | Description |
|---|---|
| Invoice Date | The date on which the system generated the invoice. This helps users track when each billing cycle started. |
| Transaction ID | A unique identifier assigned to every payment. It is used to verify or reference a specific transaction. |
| Payment Method | The method used to complete the payment — for example, CARD, Apple Pay, Google Pay, or any other supported gateway. |
| Total Price | The total billed amount for that invoice. This includes the subscription plan price. |
| Currency | The currency in which the payment was processed. |
| Expiry | The date until which this invoice remains valid. It also indicates the next renewal or billing date. |
Subscription invoices are automatically generated and visible under Billing & Invoices.
You can update your saved card or payment details anytime within the Subscription tab.
When upgrading to the Whitelabel Mobile App, PrepBase’s team will reach out to guide you through branding and publishing requirements after successful payment.
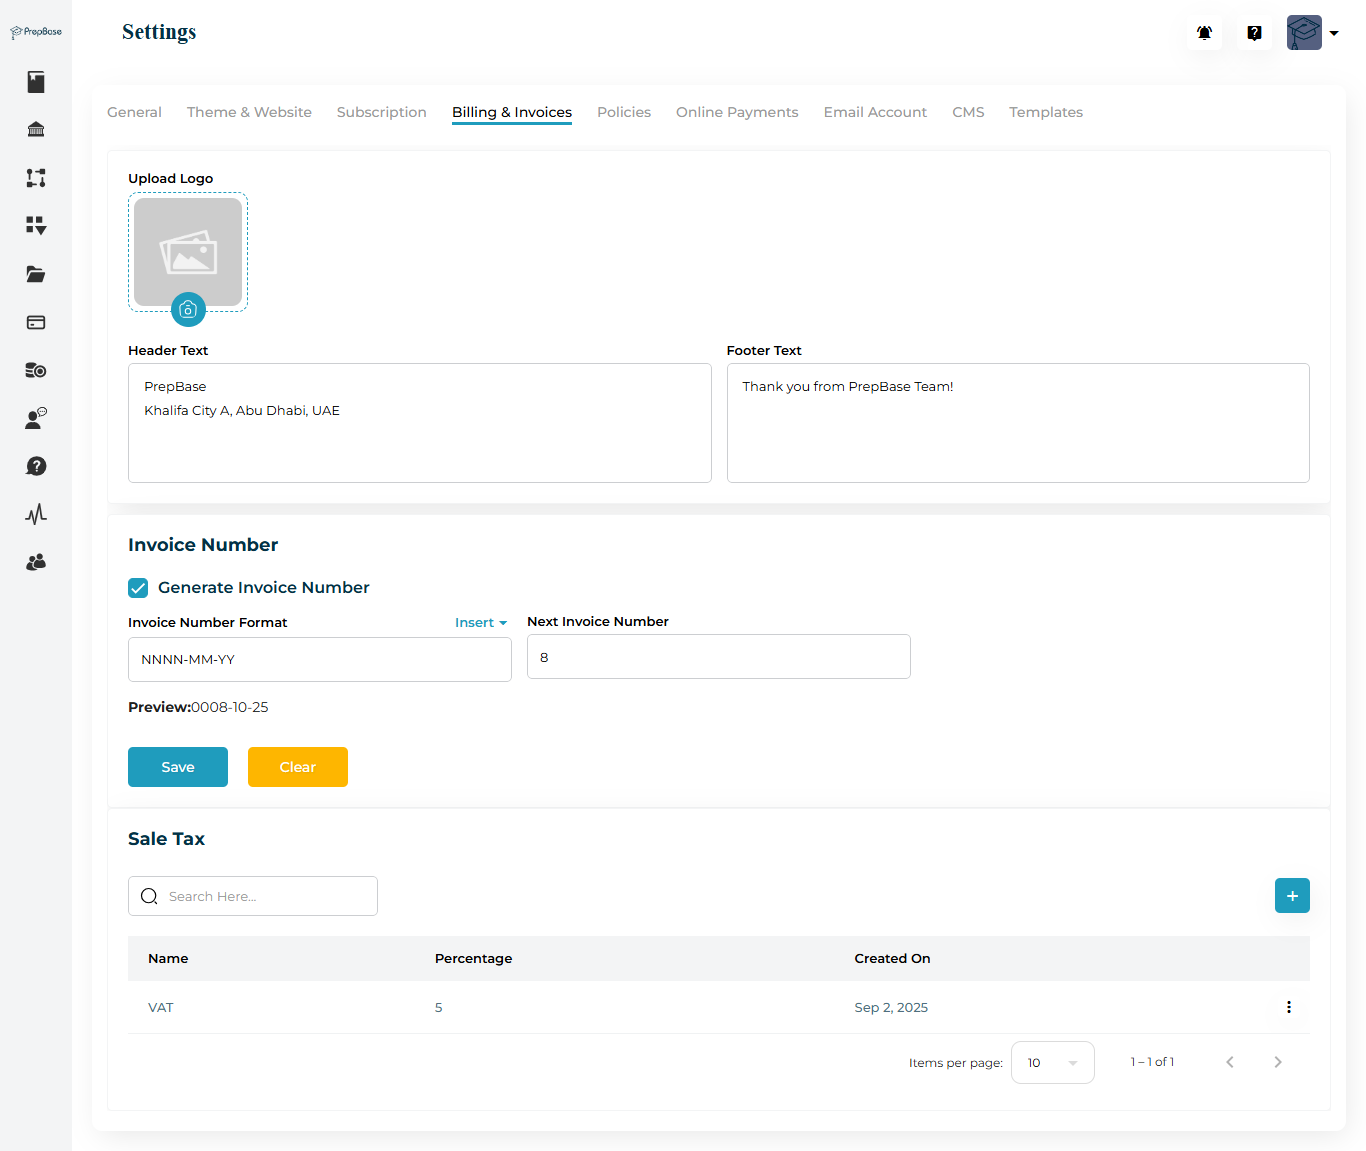
This section defines how your invoices are generated and displayed.
Invoice Setup
| Field | Description |
|---|---|
| Upload Logo | Add your organization’s logo to appear on invoices. |
| Header Text | Text displayed at the top of invoices. |
| Footer Text | A short thank-you or contact note shown at the bottom. |
Invoice Number Format
| Control | Explanation |
|---|---|
| Generate Invoice Number (Checkbox) | When checked, PrepBase automatically assigns an invoice number to each new invoice. |
| Invoice Number Format | Use a combination of placeholders to define your numbering pattern: • NNNN – sequential 4-digit invoice counter (auto-incremented). • MM – month (01–12). • YY – year (last 2 digits).Example: NNNN-MM-YY → 0008-10-25 |
| Next Invoice Number | Set the starting number for the NNNN sequence. It will increment automatically with each invoice. |
Note: You cannot preview an invoice number pattern until the settings are saved.
Sales Tax
| Field | Description |
|---|---|
| Tax Name | Define the tax label shown on invoices (e.g., VAT). |
| Percentage | Enter the tax rate (e.g., 5%). |
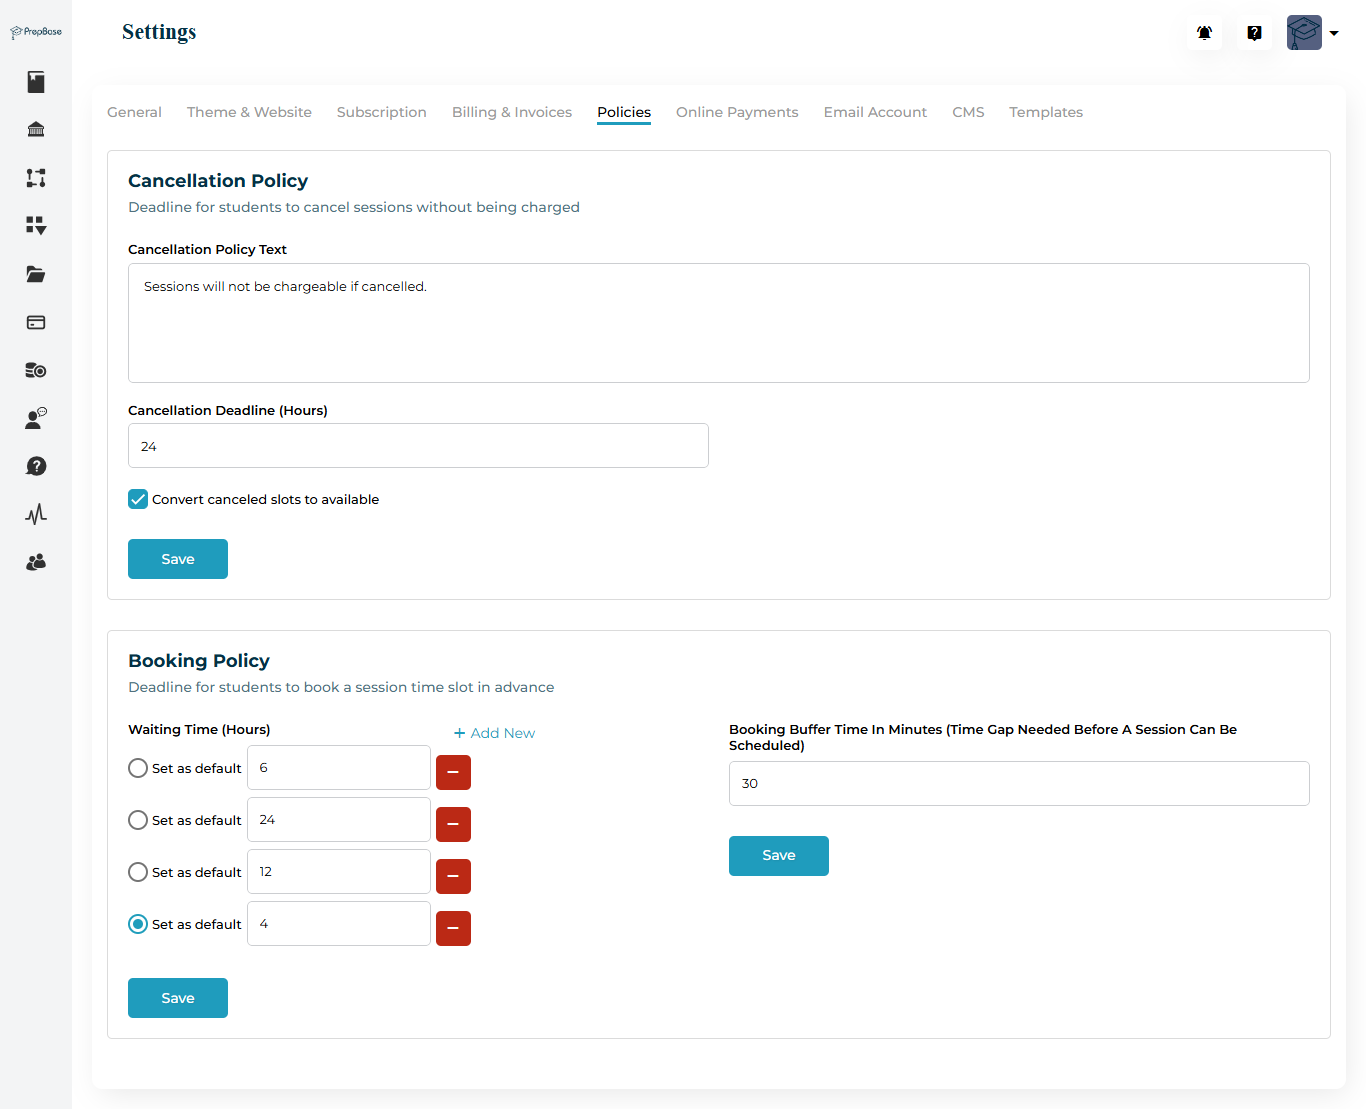
This section manages your platform’s session booking and cancellation rules.
Cancellation Policy
Cancellation Policy Text: Message shown when a student cancels.
Cancellation Deadline (Hours): How many hours before a session students can cancel without charge.
Convert Cancelled Slots to Available: Frees up cancelled slots for rebooking.
Booking Policy
Waiting Time (Hours): The minimum lead time required to schedule a session.
Booking Buffer Time (Minutes): Adds an automatic buffer before and after each session when it’s booked.
The buffer is attached to Session Categories, so when a session uses that category, PrepBase blocks the buffer period on both sides to prevent overlapping or back-to-back bookings.
Use this to allow transition or setup time between consecutive sessions.
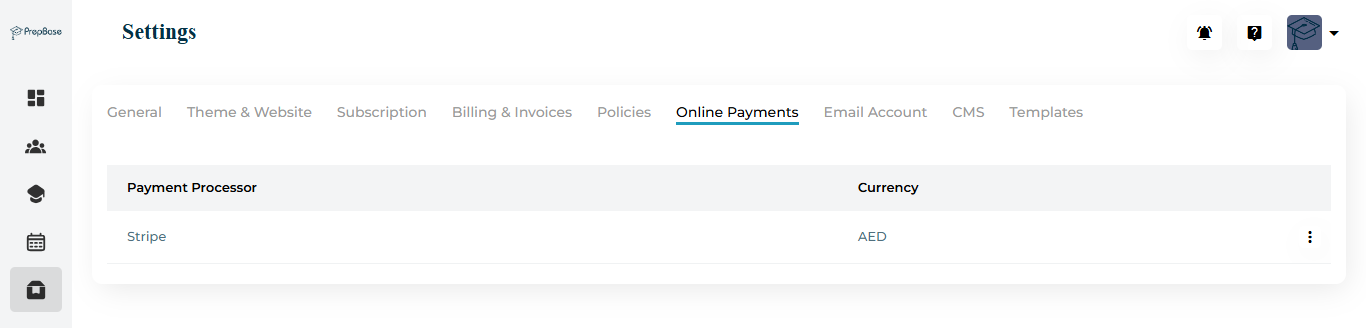
The Online Payments section lets you configure your payment processor.
| Field | Description |
|---|---|
| Payment Processor | Currently supports Stripe integration. |
| Currency | Default currency for online payments (e.g., AED). |
Stripe Setup
Log in to your Stripe Dashboard.
Go to Developers → API Keys → copy Live keys → Click the ⋮ (three-dot) icon in prepbase’s → Click edit → paste the Publishable Key,Secret Key and webhook key in the fields → click save.
Ensure both Stripe and PrepBase use the same default currency.
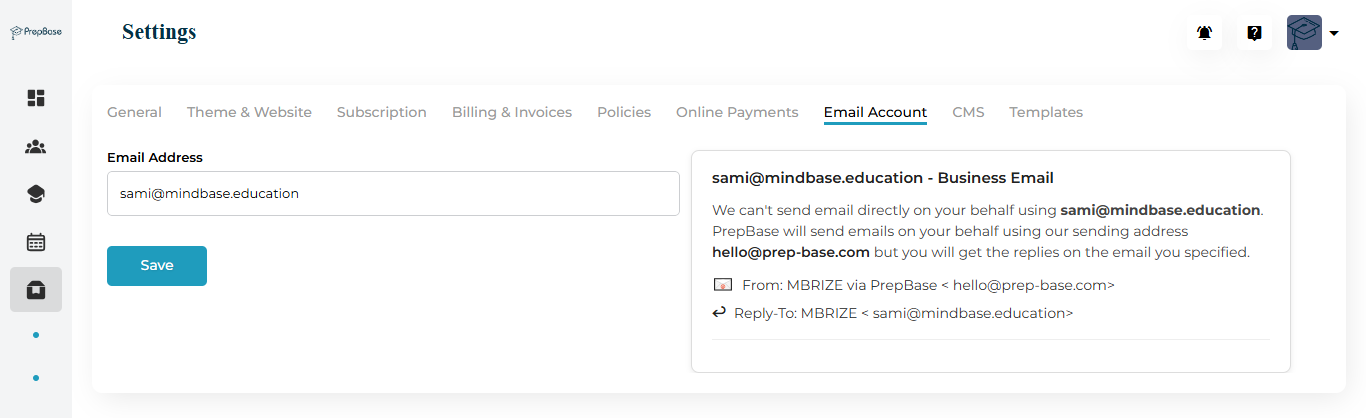
This section defines the sender email address used for automated notifications.
| Field | Description |
|---|---|
| Email Address | The “From” address that will appear in emails sent from PrepBase. |
| Sending Method | Emails are sent using PrepBase’s secure email server (hello@prep-base.com), but replies go directly to your configured address. |
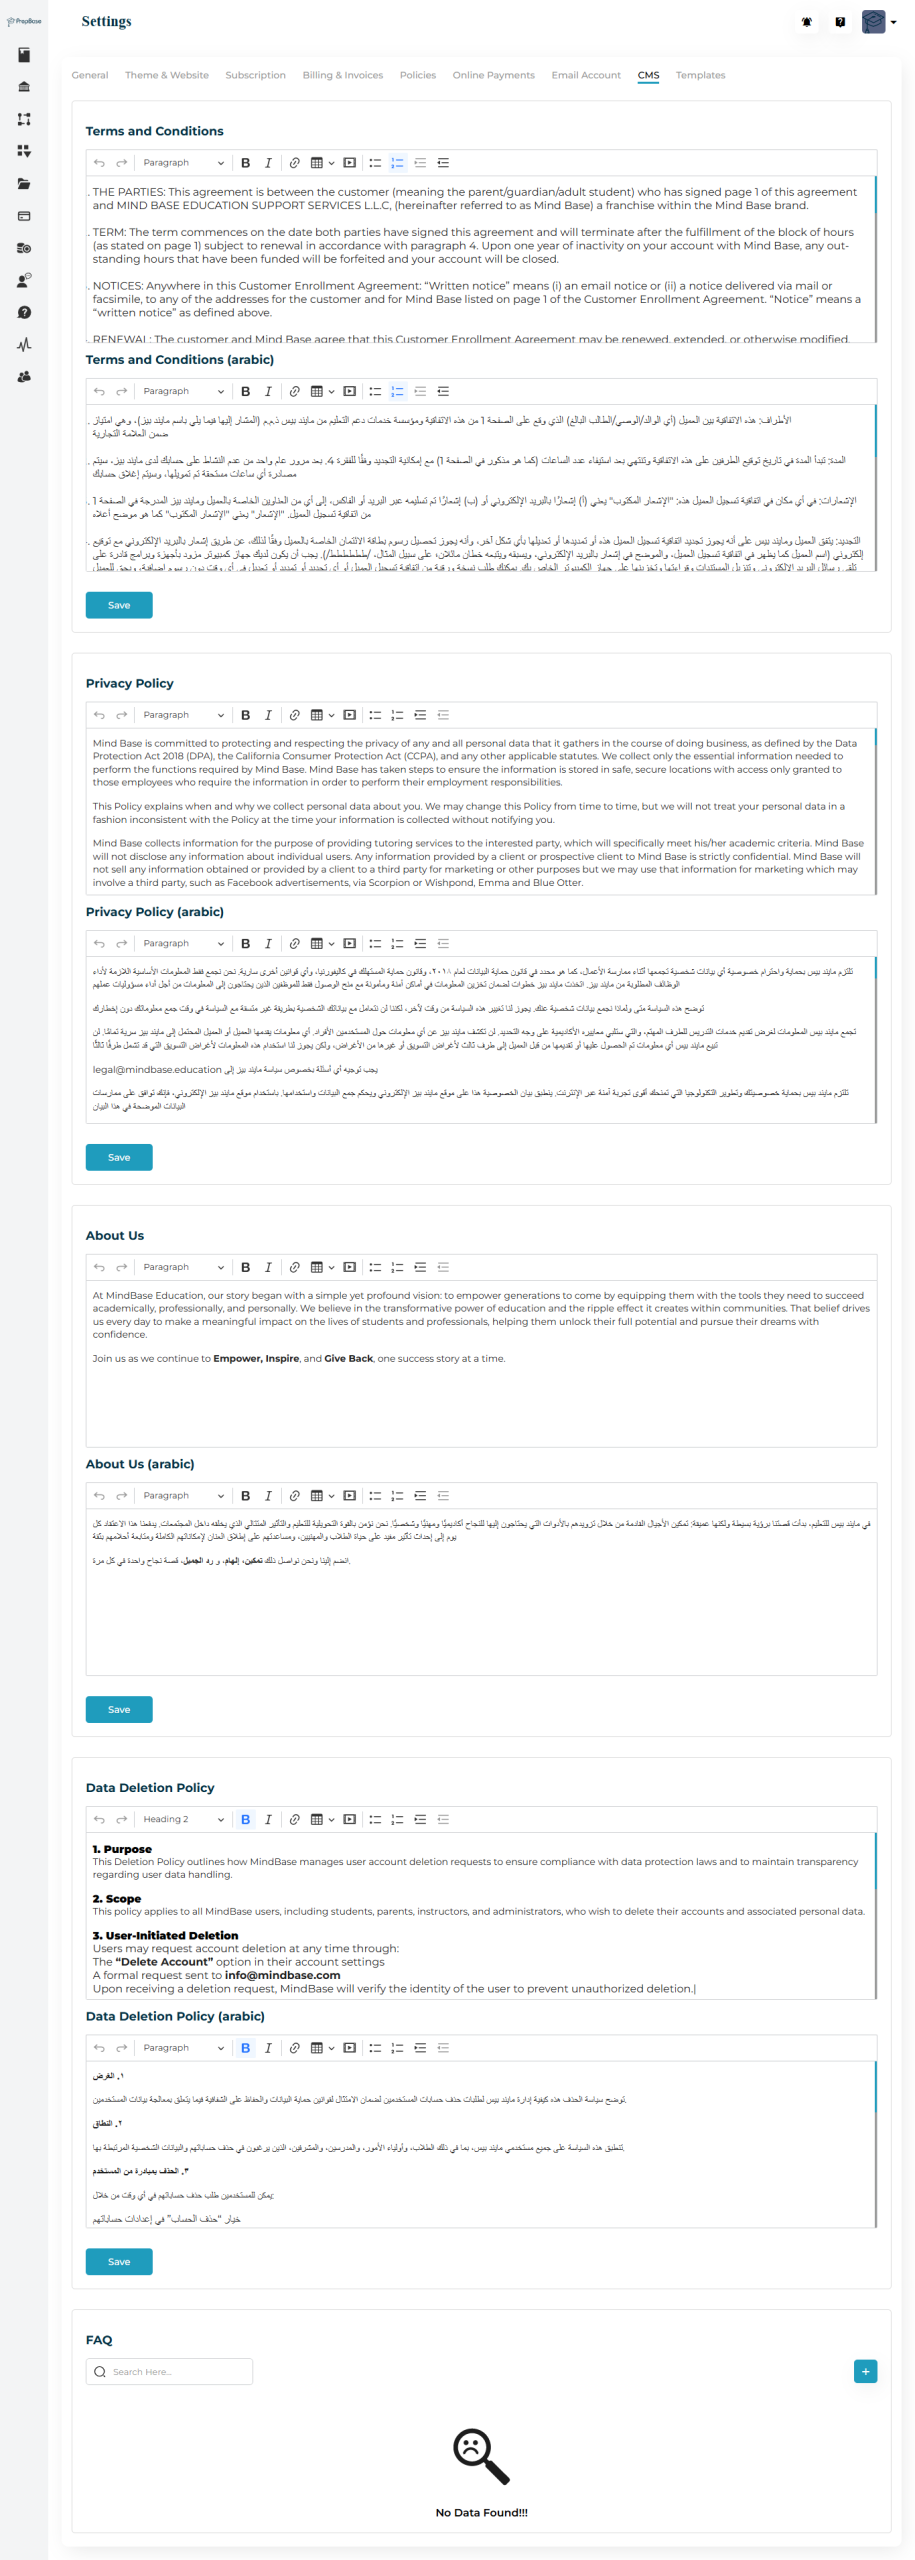
The CMS section lets you manage your organization’s content pages and legal documents displayed across portals.
Editable Sections
| Section | Description |
|---|---|
| Terms & Conditions | Add or edit your organization’s terms (English & Arabic versions supported). |
| Privacy Policy | Define data usage and privacy terms. |
| About Us | Describe your organization’s mission and values. |
| Data Deletion Policy | Outline how users can request account deletion. |
| FAQ | Manage Frequently Asked Questions for your users. |
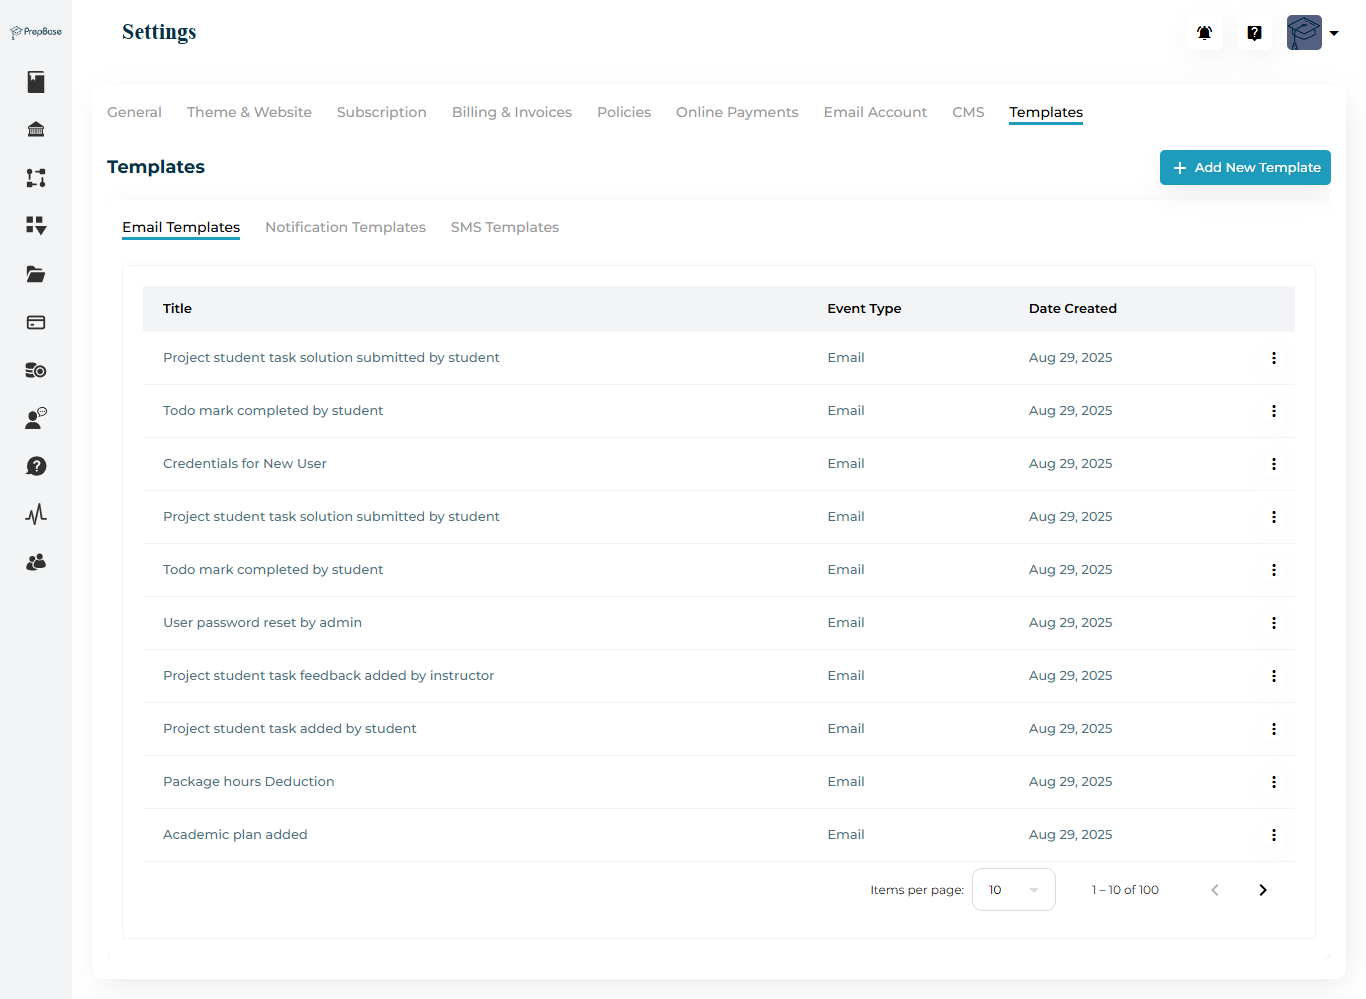
Manage all email, SMS, and notification templates used for automated communications in PrepBase.
Email Templates
Admins should review and customize all templates before launching the platform.
It’s recommended to configure and verify these templates to ensure accurate communication with users.
| Template Name | Purpose |
|---|---|
| Credentials for New User | Sends login password to students and instructors when created from admin panel |
| New User Added by Admin | Notifies users when an admin manually creates their account. |
| Onboarding as User | Receives welcome message after registration. |
| Onboarding as Instructor | Receives welcome message after registration. |
| New Registration in Portal | Confirms registration for users who sign up through your public PrepBase portal. |
| Login Enabled by Admin | Sent to notify users that their account access has been activated. |
Notification Templates
Define automated in-app notifications for different system events.
SMS Templates
Manage SMS alerts sent to students, parents, or tutors & counselors for reminders and updates.