The table displays a chronological record of all financial entries related to the instructor:

| Column | Description |
|---|---|
| Date & Time | When the amount was logged |
| Session Category | Category of the session as defined by admin in the admin panel |
| Duration | Number of hours |
| Amount | Amount earned |
| Payment | Amount paid out |
| Balance | Running outstanding amount |
| Notes | Additional remarks |
| Attachment | Uploaded files (if any) |
| Student | Associated student (if provided) |
| Source | Usually “System,” for automatic entries created by completed sessions, unless manually added as a transaction by admin or instructors |
| Status | Billable / Non-Billable (used when instructors are adding time manually from their Earning & Payroll dashboard) |
You will also see the total balance at the top:
Balance Owing: X as of [selected date]
Click the Filter icon to filter by:
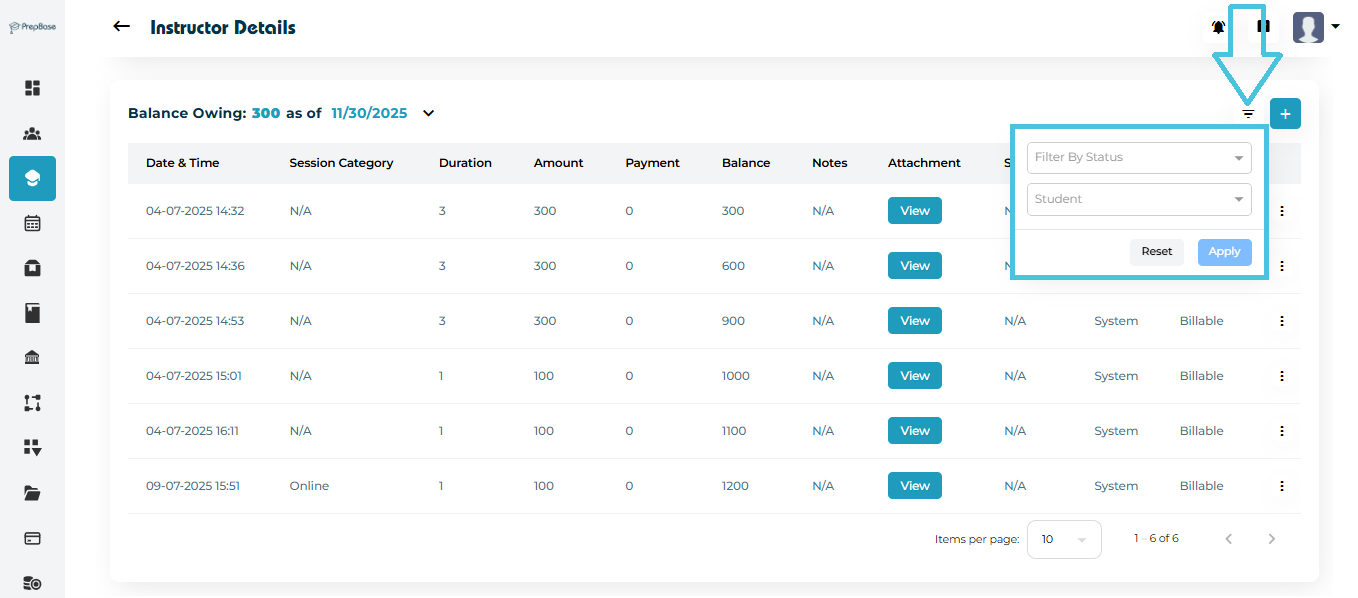
Status (added by System, Admin, or User Instructor)
Student (filter by entries for particular students)
Click Reset to clear all filters.
Financial adjustments can be made using the + button in the Balance Owing section.
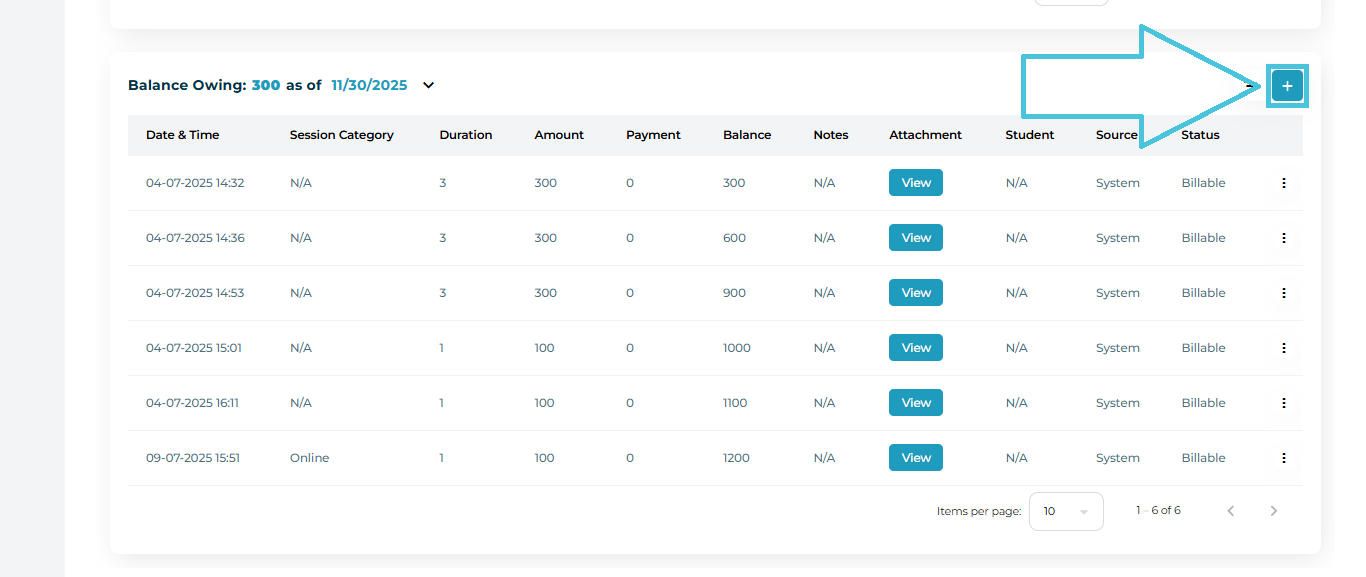
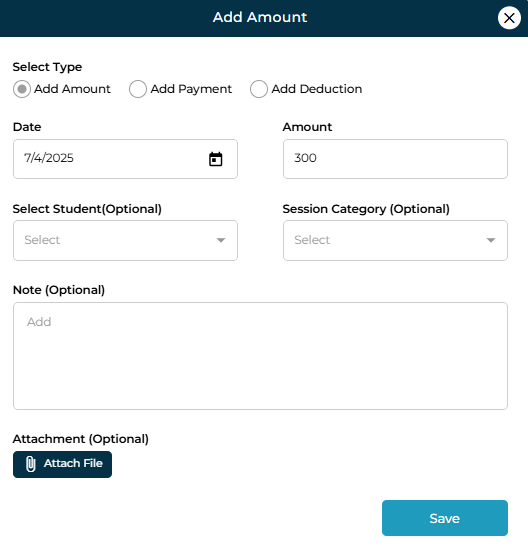
How to Add a New Entry
Click the + button next to Balance Owing.
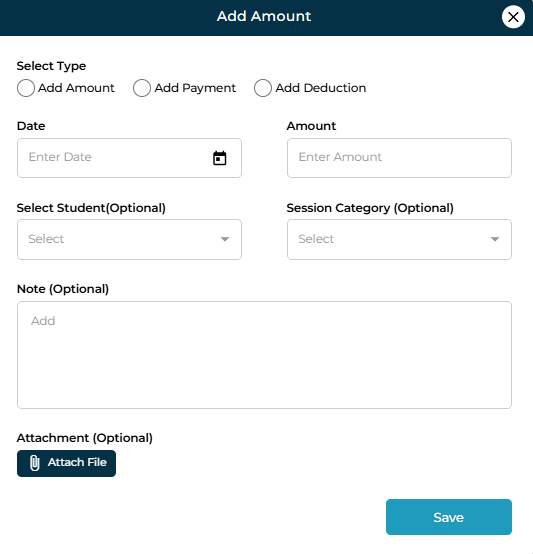
Choose the type:
Add Amount (adds earnings)
Add Payment (records payout to the instructor)
Add Deduction (subtracts from the instructor’s balance)
Fill in the form:
Date
Amount
Student (optional)
Session Category (optional)
Notes (optional)
Attachment (optional)
Click Save.
The entry will immediately appear in the ledger.
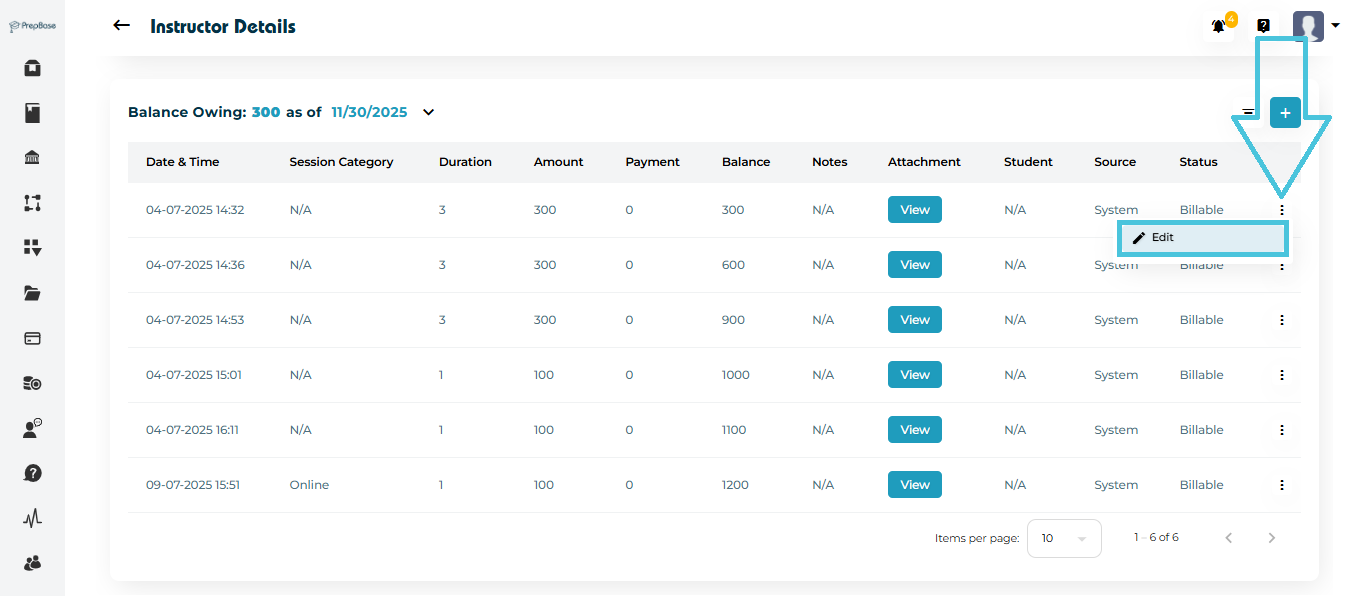
NOTE: only manual entries by Admin users or Instructors can be edited.
Click the three-dot menu next to an entry.
Select Edit.
Adjust any field (amount, category, notes, etc.).
Save the update.