Managing Student Permissions
The Permissions tab allows Admins to control what each student can view or edit within their account.
From scheduling sessions to editing personal details or updating progress milestones, these settings define the level of access available to each student inside their PrepBase portal.
By managing permissions effectively, Admins can ensure students have the right tools and visibility — while maintaining system security and workflow accuracy.
1. Accessing the Permissions Tab

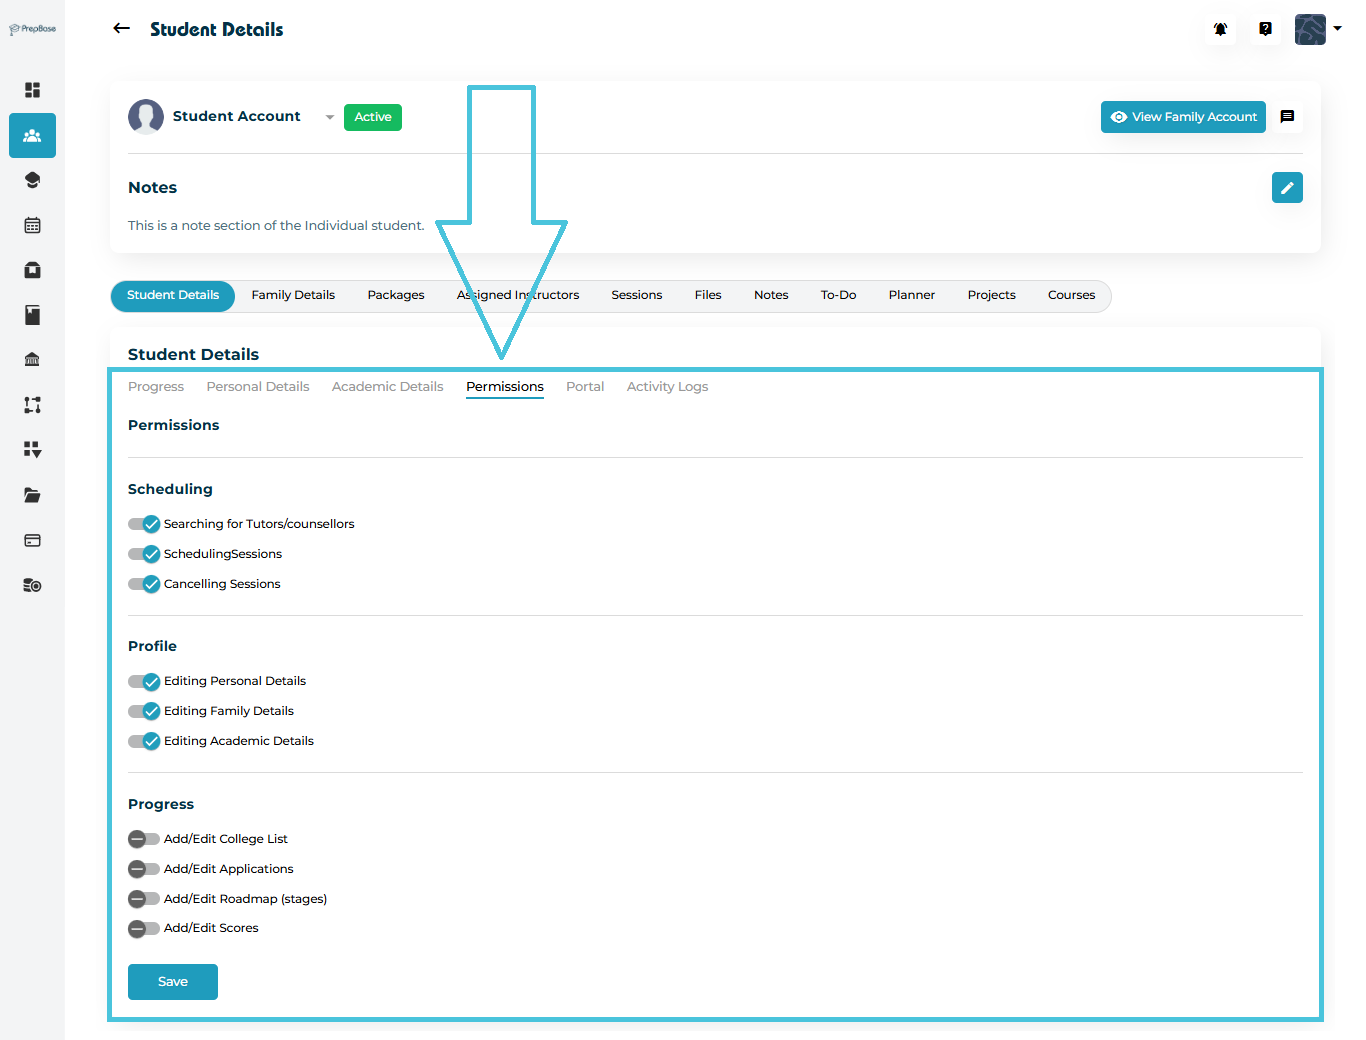
Navigate to Students → Student Profiles.
Open any student record by clicking on their name.
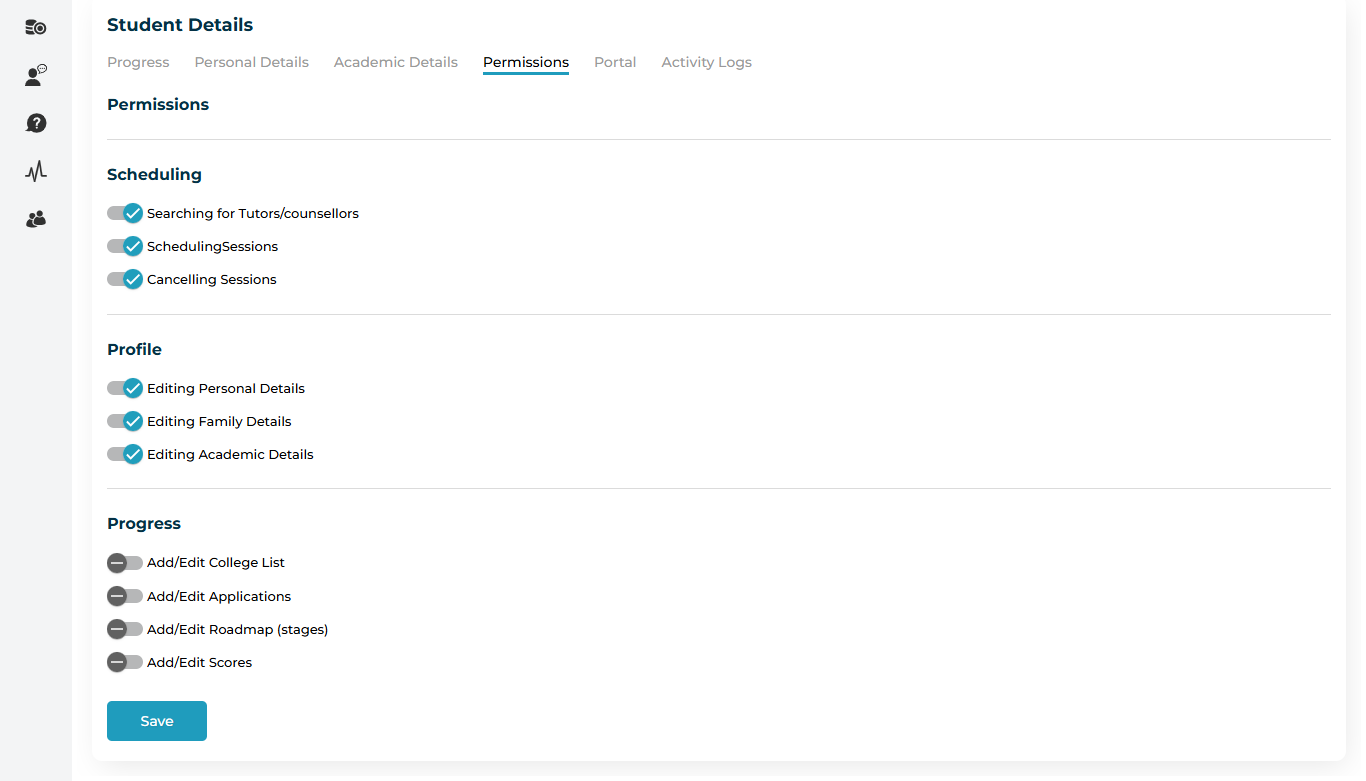
Inside the Student Details page, select the Permissions tab.
The screen will display grouped permission categories with toggle switches that can be enabled or disabled as required.
2. Understanding Permission Categories
Permissions are grouped into three main sections to make management simple and clear.
Scheduling
Controls how students interact with their tutoring and counseling sessions.
Searching for Tutors/Counselors — allows the student to browse available tutors or counselors. If this permission is disabled, then the students will only have the option to submit a service request through a pre-populated form.
Scheduling Sessions — lets the student book new sessions based on their packages.
Cancelling Sessions — grants permission to cancel scheduled sessions if needed.
Tip: Disable this option if session bookings are managed only by instructors or administrators.
Profile
Manages access to the student’s personal and family information.
Editing Personal Details — allows the student to update contact details and preferences.
Editing Family Details — enables changes to linked parent or guardian information.
Editing Academic Details — allows editing academic data like curriculum, major, or study level.
Recommendation: Keep these permissions active to ensure student data remains accurate and current.
Progress
Controls how students interact with their academic planners and performance tracking.
Add/Edit College List — enables students to search colleges and add them to their list. The full system college list can be managed under the Schools & Colleges tab in the admin panel.
Add/Edit Applications — allows students to edit the college application screen after adding colleges to their list. The college application screen fileds can be managed under the College Application subtab within the Workflow tab in the admin panel.
Add/Edit Roadmap (Stages) — provides access to change the statuses of the planner stages under the students Counseling tab on their dashboard. The planner stages and statuses can be managed from the Stages & Scores subtab within the Workflow tab in the admin panel.
Add/Edit Scores — lets students enter or modify their scores within the Planner screen under the Counseling tab on their dashboard. The Score boxes for the Planner can be managed from the Stages & Scores subtab within the Workflow tab in the admin panel.
Note: These permissions are often restricted for counselor-managed accounts.
3. Enabling or Disabling Permissions

To update a student’s permissions:
Click the toggle switch beside each option to enable (✅) or disable (🚫) the permission.
After making all changes, click the Save button at the bottom of the page.
Pro Tip: The system automatically updates student access in real time once saved — no need to refresh.
4. Why Permissions Matter
Configuring permissions ensures:
Data privacy for sensitive student or family information.
Proper control over scheduling and progress editing.
Efficient collaboration between students, instructors, and counselors.
When permissions are set correctly, students can focus on their studies while administrators maintain full oversight.