To manage session Categories:
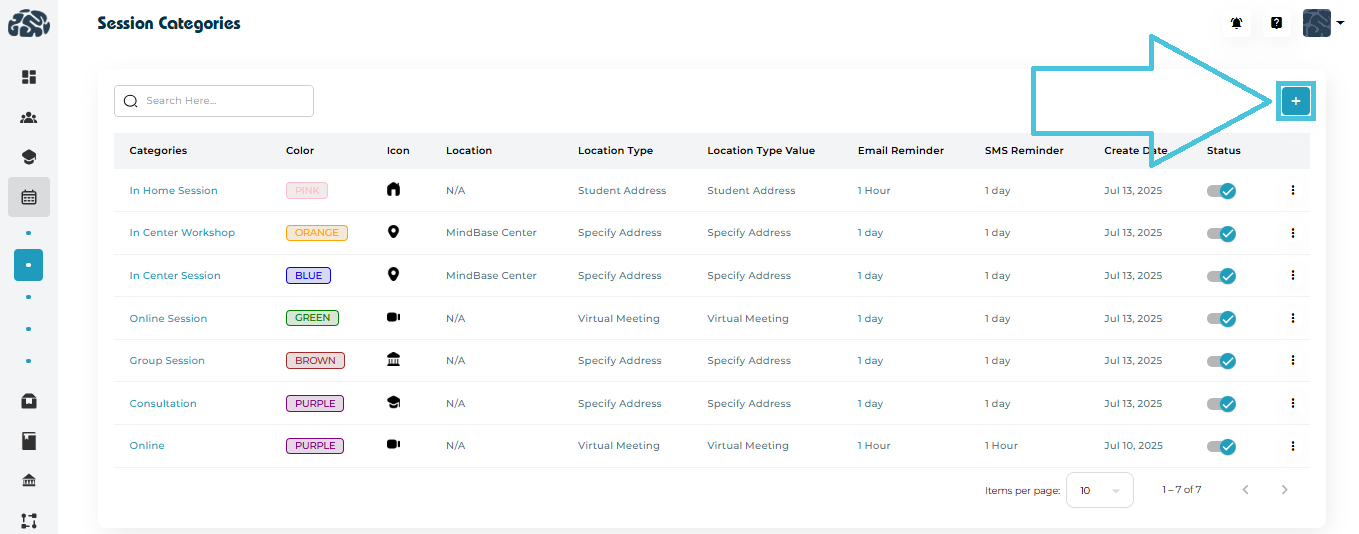
Go to Calendar & Sessions from the left navigation panel.
Click Session Categories.
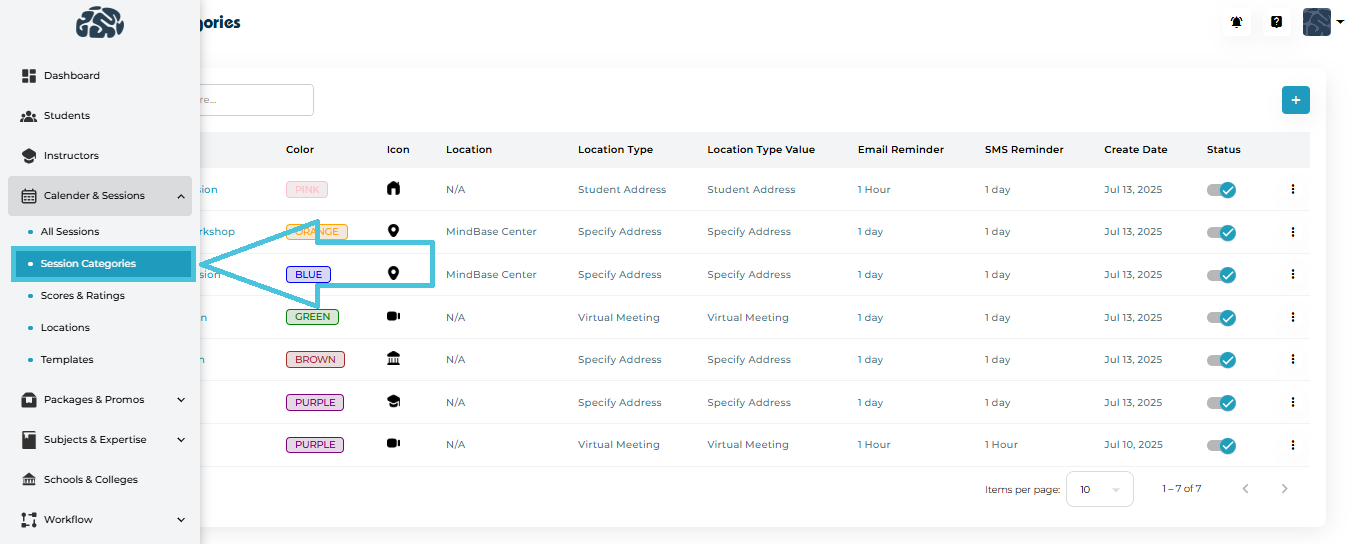
Category Name
Color Tag
Icon
- Location
Location Type and Value (e.g., Student Address, Custom Address, Virtual Meeting)
Reminder Settings
Created Date
Status Toggle
Each row includes a three-dot menu for viewing, editing, or deleting.
Click the “+” Add Session Category button at the top-right.
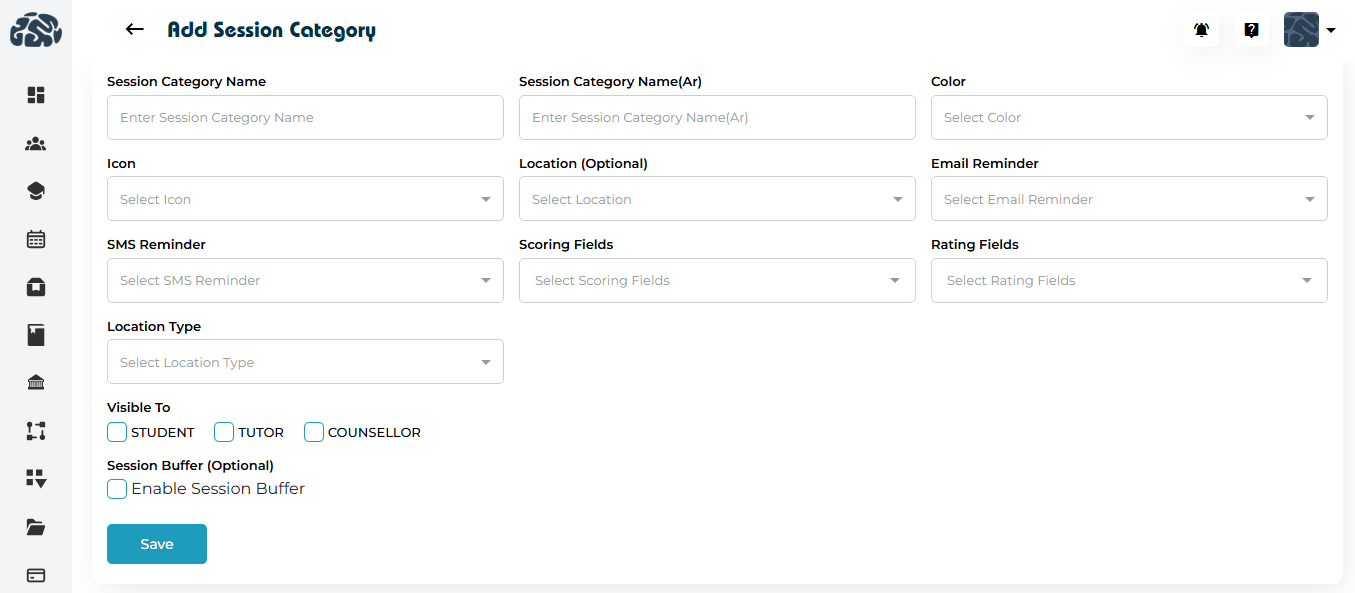
Fields Included in the Form
| Field | Description |
|---|---|
| Session Category Name | Display name used across the system. |
| Session Category Name (Arabic) | Optional Arabic label. |
| Color | Color badge used in calendars and listings. |
| Icon | Visual identifier (e.g., home, map pin, video icon). |
| Location (Optional) | Predefined location if session always occurs in a specific place. This can be defined from the Locations subtab under the Calendar & Sessions main tab in the admin panel. |
| Email Reminder | How long before the session an email should be sent. |
| SMS Reminder | How long before the session an SMS should be sent.. |
| Scoring Fields | Metrics the instructor will fill while completing the Action Plans for this session category (e.g., Engagement, Comprehension). This can be defined from the Scores & Ratings subtab under the Calendar & Sessions main tab in the admin panel. |
| Rating Fields | Fields the student may rate for this sessions category (e.g., Session Satisfaction, Guidance Quality). This can be defined from the Scores & Ratings subtab under the Calendar & Sessions main tab in the admin panel. |
| Location Type | Automatically populates the selected address value for this session category: No Address, Student Address, Specify Address, MindBase Center, Virtual Meeting. If the virtual meeting option is selected and a virtual meetings is added to the instructor profile then this will automatically populate on the scheduled sessions for the corresponding sessions category. |
| Visible To | Select whether the category is visible to Students, Tutors, and/or Counselors. |
| Session Buffer (Optional) | Adds a mandatory buffer time before and after sessions of this category to allow for travel time for example. This buffer time can be defined from the main Settings tab in the admin panel under the Policies subtab. |
After completing all fields, click Save.
To update a session category:
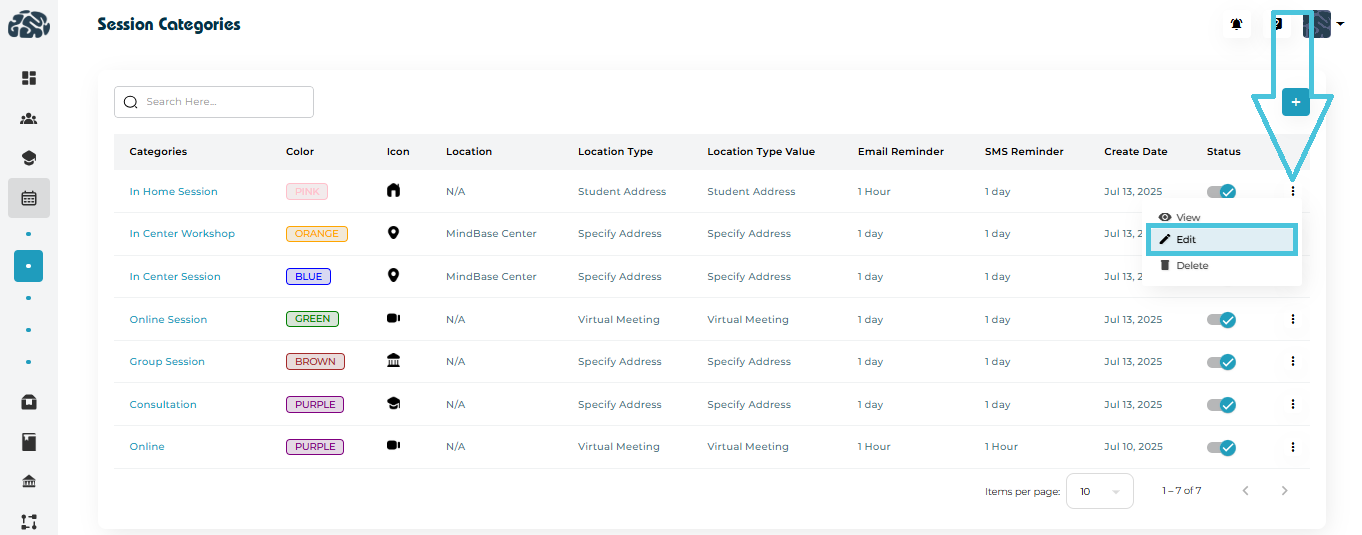
Click the three-dot menu beside the session category.
Select Edit.
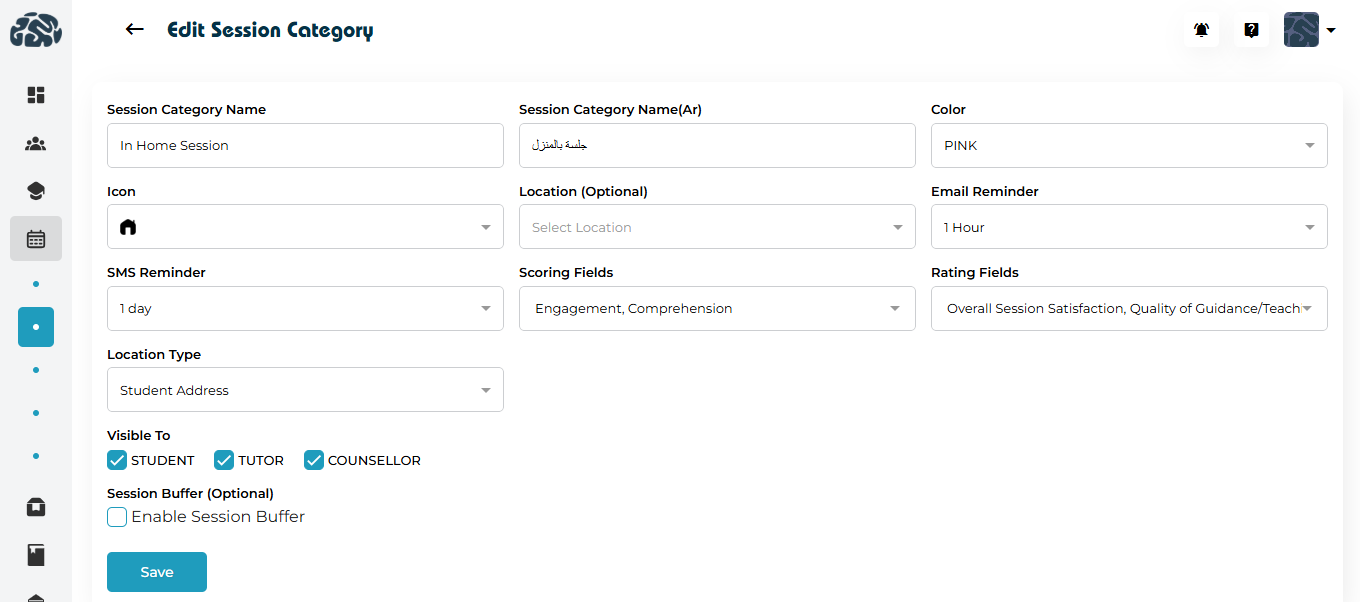
You will be redirected to the Edit page where all fields can be modified, including:
Session Category Name / Session Category Name(Ar)
Color
- Icon
Location (optional)
- Email Reminder
SMS Reminder
Scoring & rating fields
- Location Type
Visibility
- Session Buffer (optional)
Click Save to update the session category.
To inspect details of a session category:
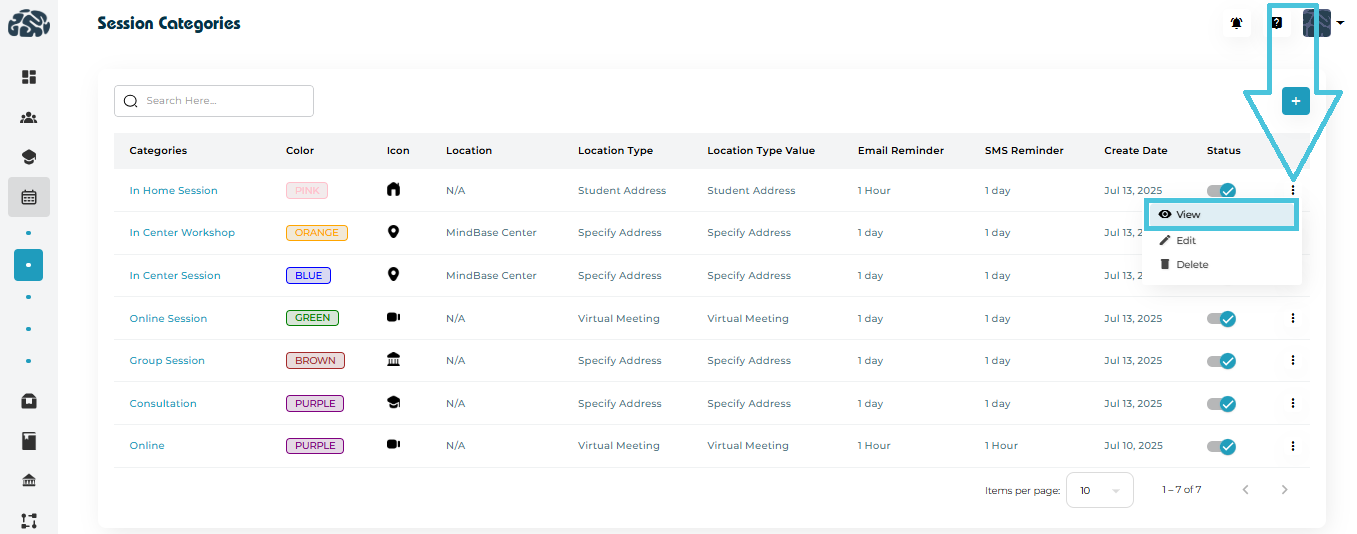
Click the name of the category or three-dot menu.
Select View.
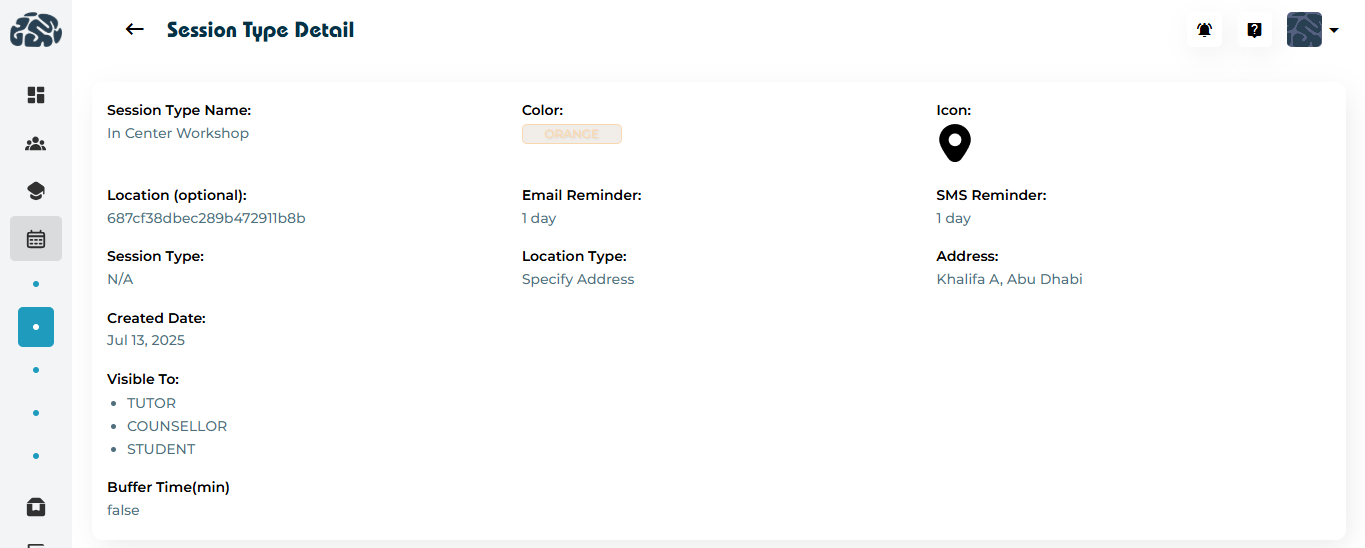
This page displays:
Session Type Name
Color
- Icon
Location(optional)
- Email Reminder
SMS Reminder
- Session Type
Location Type
Address
Created date
Visible to (roles)
- Buffer time
This is a read-only view helpful for quick verification.
If a session Category is no longer required:
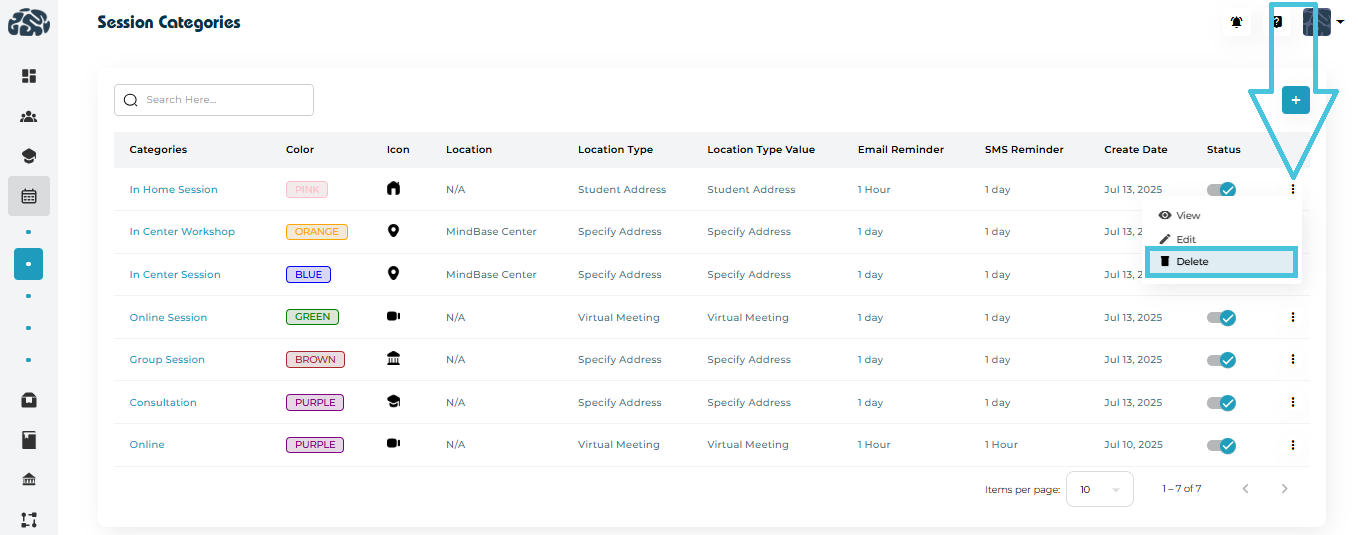
Open the three-dot menu beside it.
Select Delete.