Uploading and managing instructor files

Managing Instructor Files

The Files tab inside an instructor’s profile allows administrators to manage all documents, folders, resources, and materials associated with that instructor.
This section helps streamline file organization, ensure documentation accuracy, and maintain easy access to teaching materials and records.

This guide explains how to edit, filter, download, and delete instructor files in PrepBase.


NOTE: to add files, admin users can do so from the Files subtab within the Resource Management main tab in the admin panel.

1. Where to Find Instructor Files

  1. Navigate to Instructors from the left menu.

  2. Open any instructor’s profile.

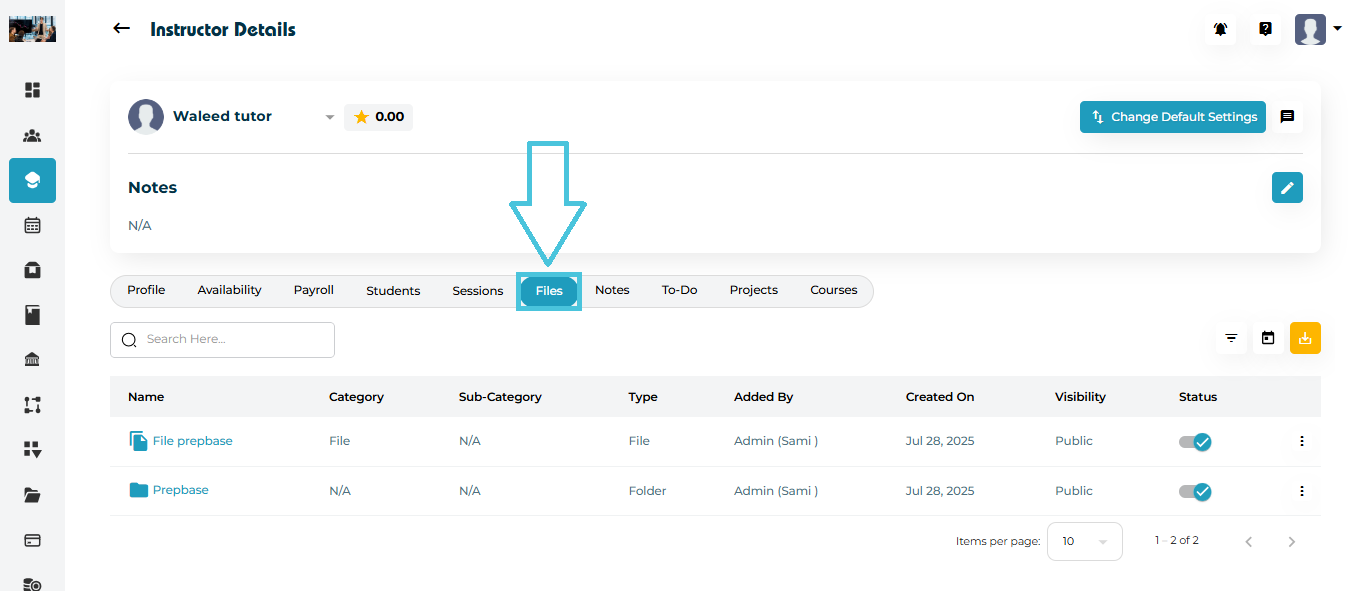
  3. Select the Files tab from the top navigation bar.

You will see a file repository table showing all files and folders linked to the instructor account.

2. Understanding the Files Table

Each file or folder is displayed with the following details:

ColumnDescription
NameFile or folder name
CategoryFile category list as defined by admin from the Categories subtab within the Resource Management main tab in the admin panel
Sub-CategoryAs defined by admin for the above categories
TypeFile or Folder
Added ByThe Admin/Instructor/Student who uploaded the file
Created OnUpload date
VisibilityPublic or Private (visible to student or instructor or admin only)
StatusActive status toggle


This structured format makes it easy to track and manage uploaded resources.

3. Editing Existing Files

To update an instructor file:

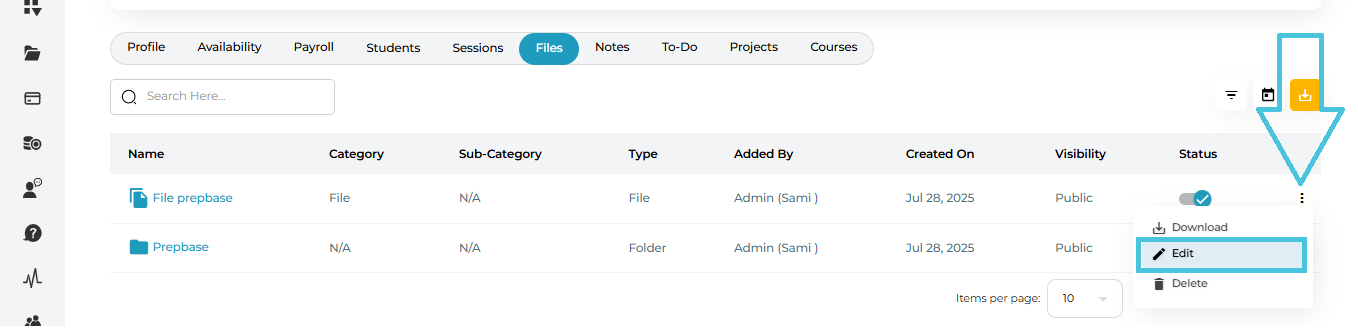
  1. Click the three-dot menu beside the file name.

  2. Select Edit.

  3. The Edit File form will open.

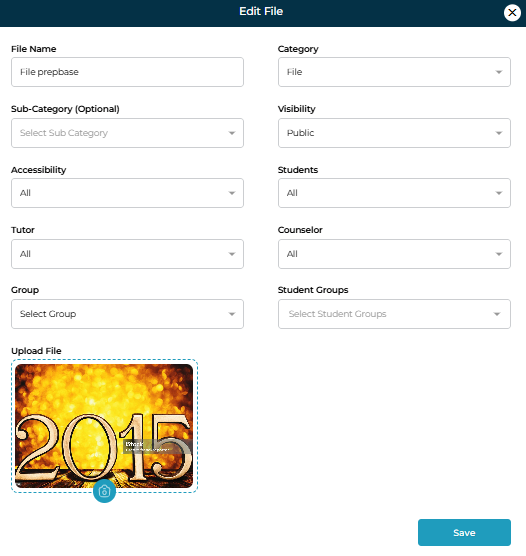
🔧 Editable Fields Include:
  • File Name

  • Category (as defined by admin)

  • Sub-Category (Optional)

  • Visibility (Public/Private)

  • Accessibility (All, Instructor-only, etc.)

  • Students, Tutor, Counselor access control

  • Associated Group or Student Groups

  • Upload File (to replace the existing one)

Click Save to update the file.

To learn more about adding a file and assigning accessability to users, please visit the Files section of the guide under Resource Management.

4. Downloading Files

Admins can download instructor files directly:

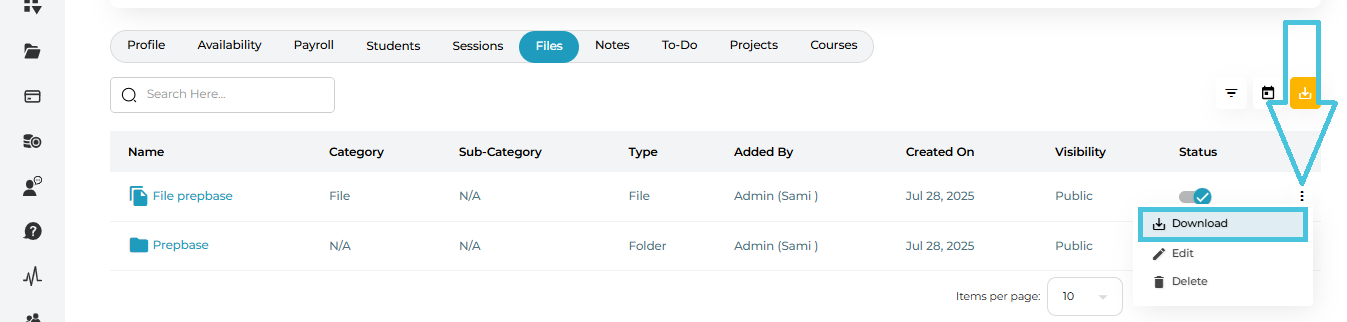
  1. Open the three-dot menu beside the file.

  2. Click Download.

This allows quick access for offline review, printing, or archiving.

5. Deleting Files

To remove a file or folder:

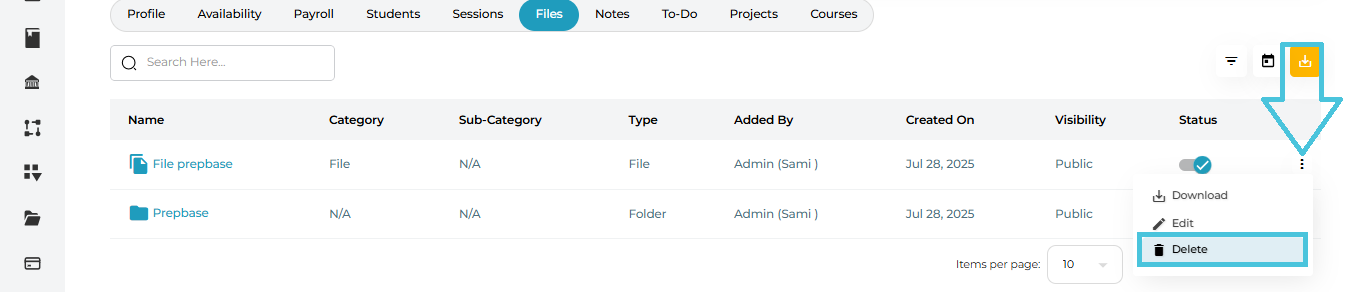
  1. Click the three-dot menu beside the item.

  2. Select Delete.

  3. Confirm removal.

Deleted items are permanently removed from the instructor’s repository.

6. Searching & Filtering Instructor Files

Large file libraries are easy to manage using built-in search and filter tools.
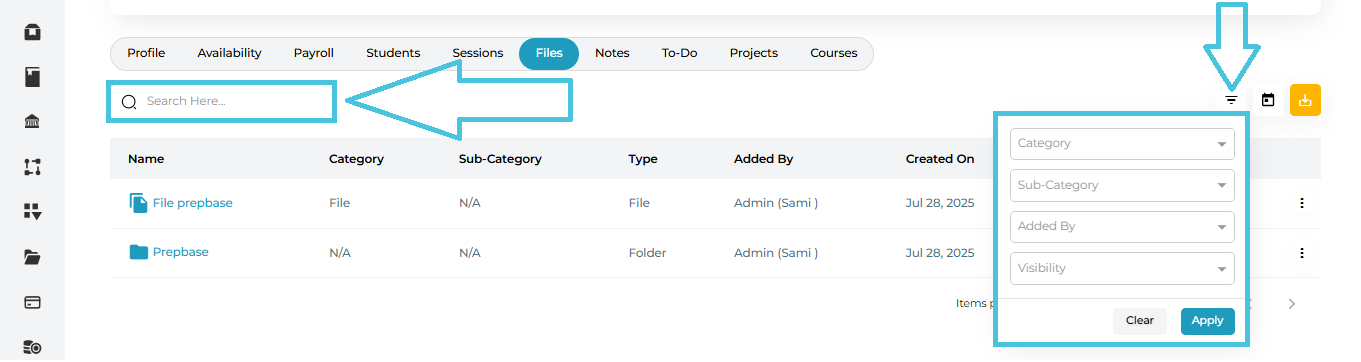
🔎 Search Bar

Search files by:

  • File name

  • Category

  • Created date

  • Uploader

🧩 Filter Options

Click the filter icon to open detailed filters:

  • Category

  • Sub-Category

  • Added By

  • Visibility

Click Apply to refine results.
Click Clear to reset filters.

IN THIS ARTICLE