Managing Student–Instructor Relationships
Assigning and Unassigning Students Effectively
To maintain smooth academic operations, administrators must be able to add, remove, and manage student–instructor relationships easily. PrepBase provides a simplified workflow for this inside each instructor’s profile.
Once a student is assigned to an instructor, they will be able to see that instructors on their dashboard under “My Tutors” and “My Counselors” sections within the Tutoring and Counseling main tabs.
NOTE: if a student or parent is given permission to book sessions directly with an instrcutor, once they book at least one session they will automatically be assigned to that instructor and they will appear on the assigned students list.
1. Assigning New Students to an Instructor
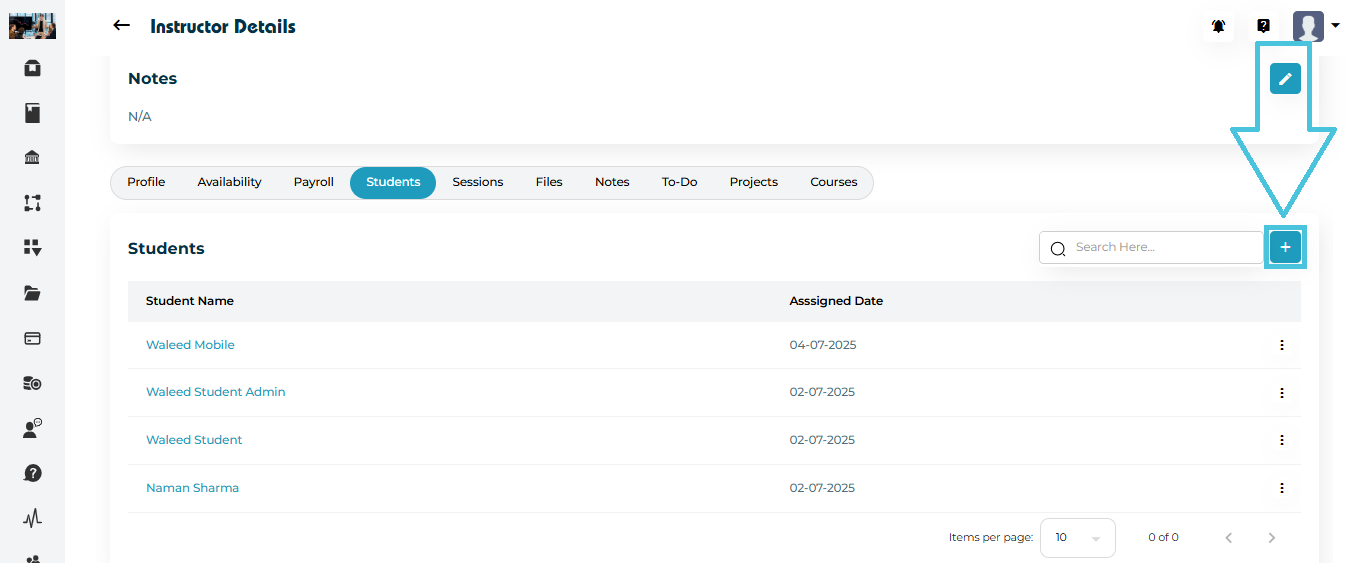
Steps to Assign Students

Go to Instructor Details → Students tab.
Click the blue (+) Add button at the top right.
The Assign Students modal will appear.
Use the dropdown field to select one or multiple students.
Click Save.
The system will instantly link the selected students to that instructor and display them in the list along with the Assigned Date.
2. Unassigning Students

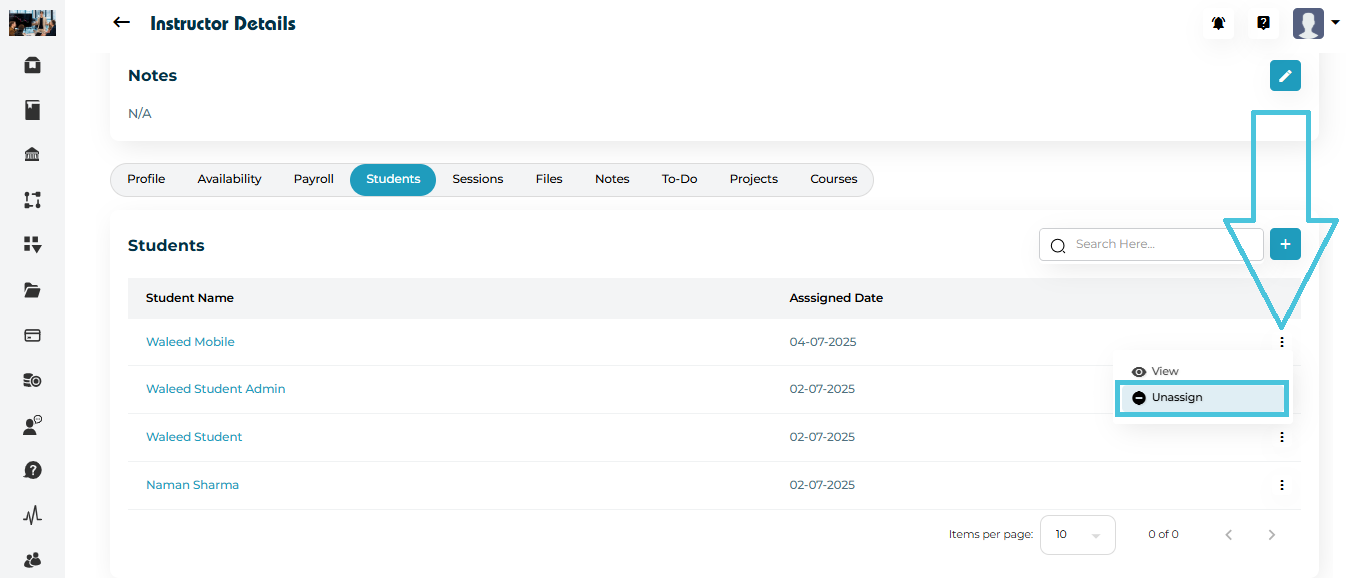
Open the Students tab.
Click the three-dot menu beside the student’s name.
Select Unassign.
The student disappears from the instructor’s list immediately.
