Go to Students → Student Profiles
Select a student
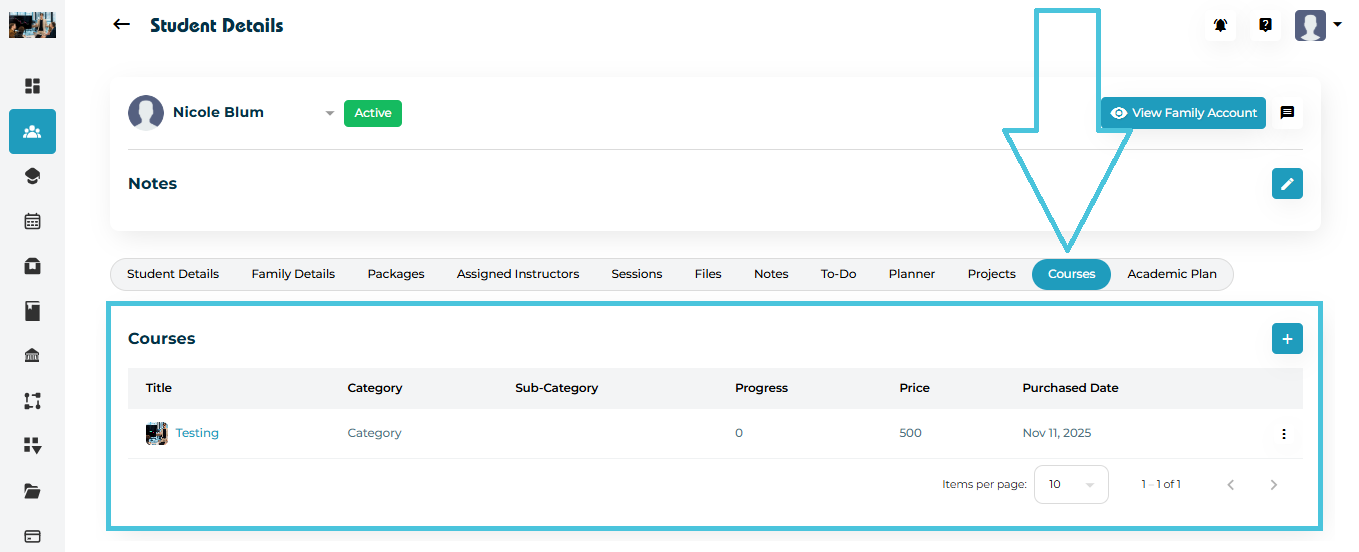
Click the Courses tab in the top navigation
Here you will see:
Course Title
Category / Sub-Category
Progress (%)
Price
Purchased Date
Action menu (View / Delete)
To add a new course to the student’s profile:
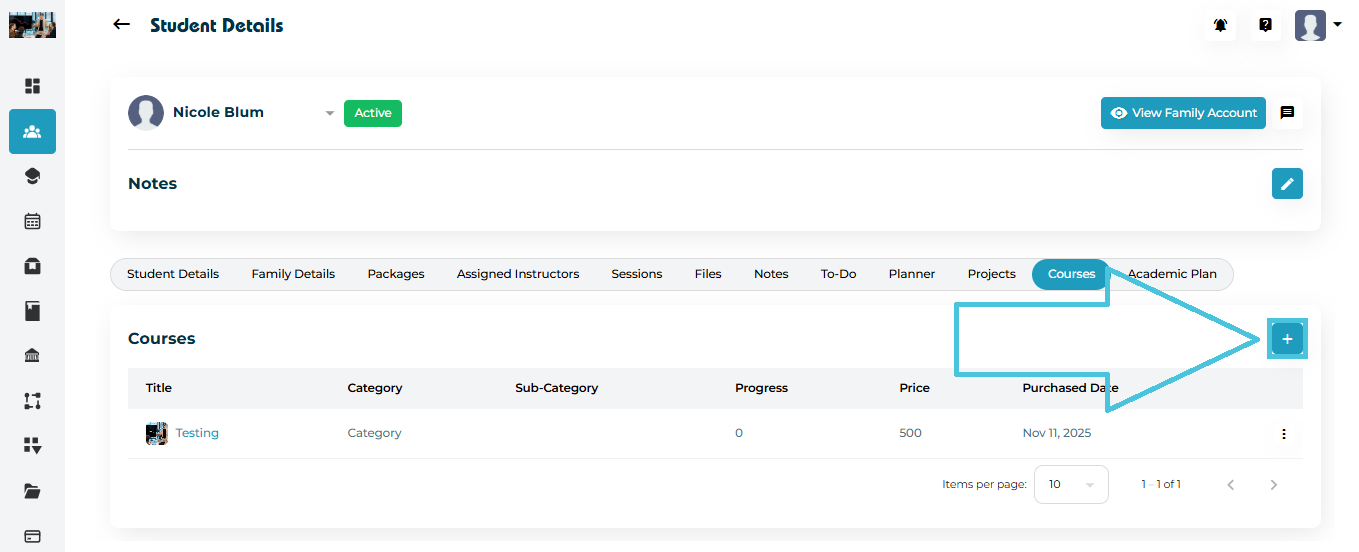
Step 1 — Click “+ Add Course”
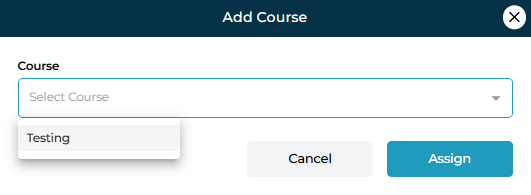
Step 2 — Select the Course
The Add Course pop-up will appear with a dropdown list.
Choose the course you want to assign (e.g., Testing).
Step 3 — Assign the Course
Click Assign.
Once assigned, the course appears in the student’s course list with:
Purchase date
Progress = 0% (initially)
Course fee
Admins can inspect detailed course information using the action menu or clicking on the course title.

Click the three-dot menu (⋮) beside the course
Select View
You will be redirected to the Course Detail page.
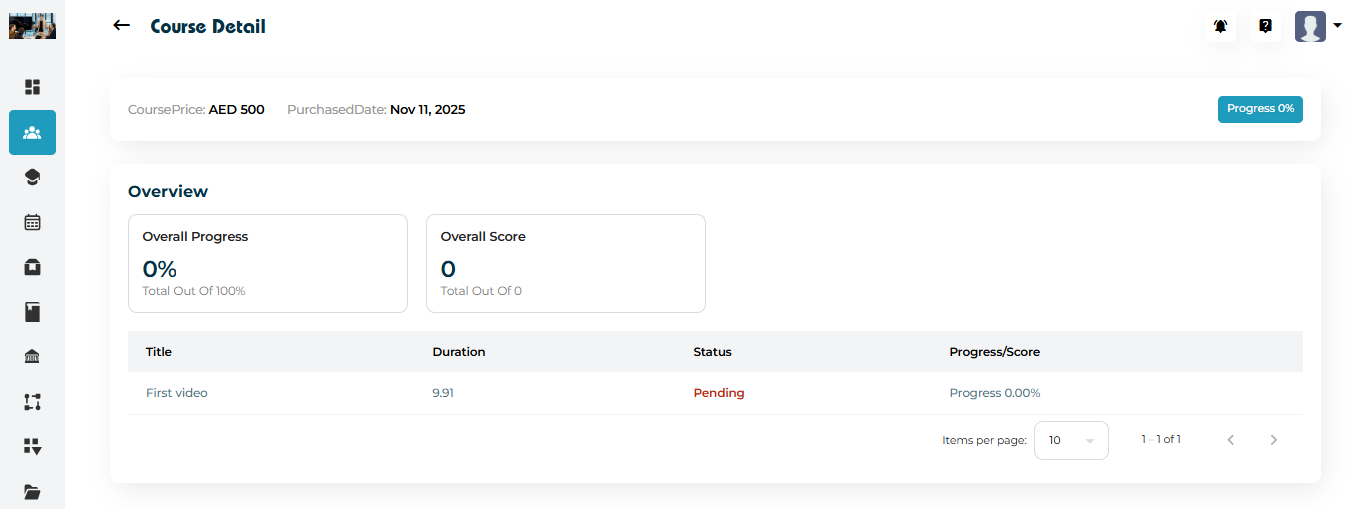
The page includes:
Header
Course Price
Purchased Date
Progress (%)
Overview Cards
Overall Progress
(for video lessons completion)Overall Score
(for mini quizes completion)
Lesson Breakdown
A table listing:
Video Lesson Title
Duration
Status (e.g., Pending, Completed)
Progress %
These values update automatically based on student activity.
If a course was assigned by mistake:
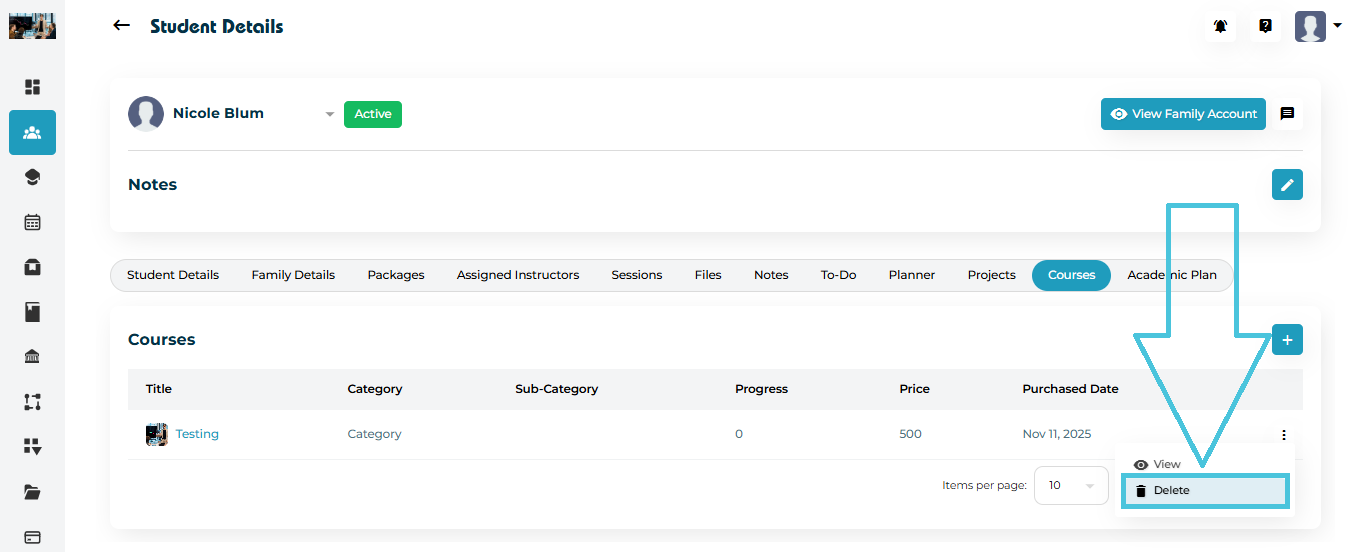
Click the three-dot menu (⋮) next to the course
Select Delete