Go to Students → Student Profiles
Select the student
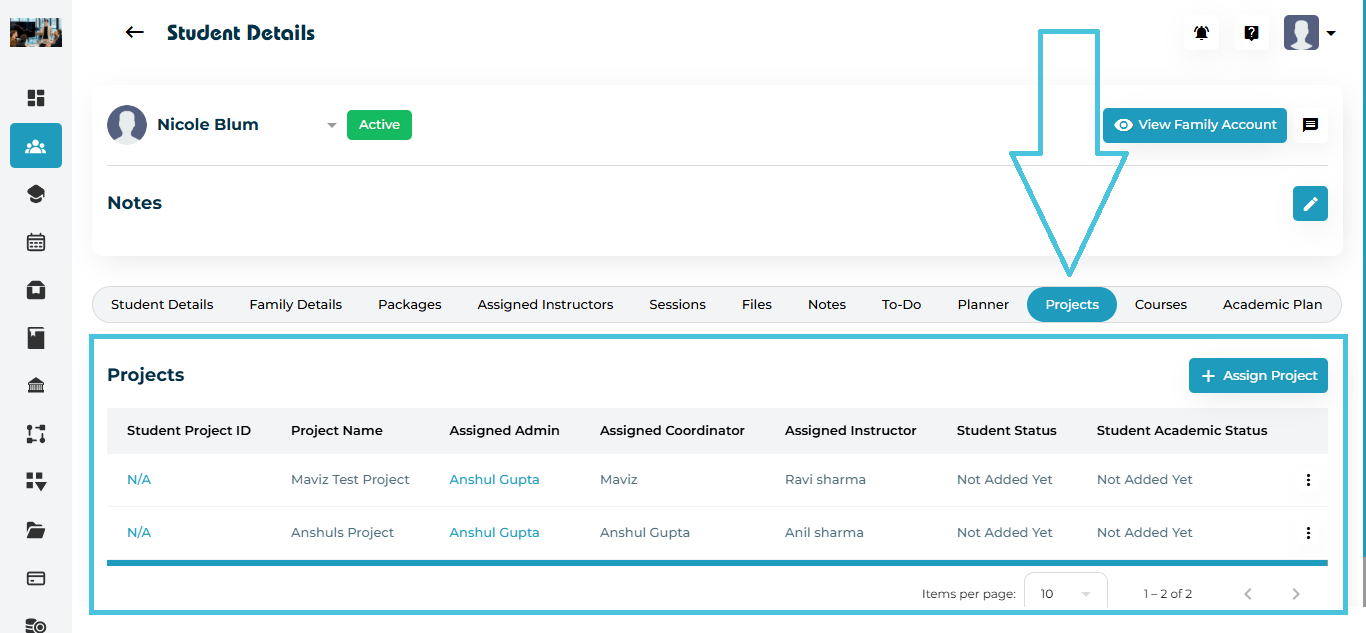
Open the Projects tab from the top navigation
You will see existing assigned projects with the below details:
Student Project ID
(can be assigned manually by admin)Project name
Assigned Admin / Coordinator / Instructor
Student Status & Academic Status
(can be manually defined by admins under the Statuses subtab within the Workflow main tab on the admin panel)Action menu (View / Edit / Delete)
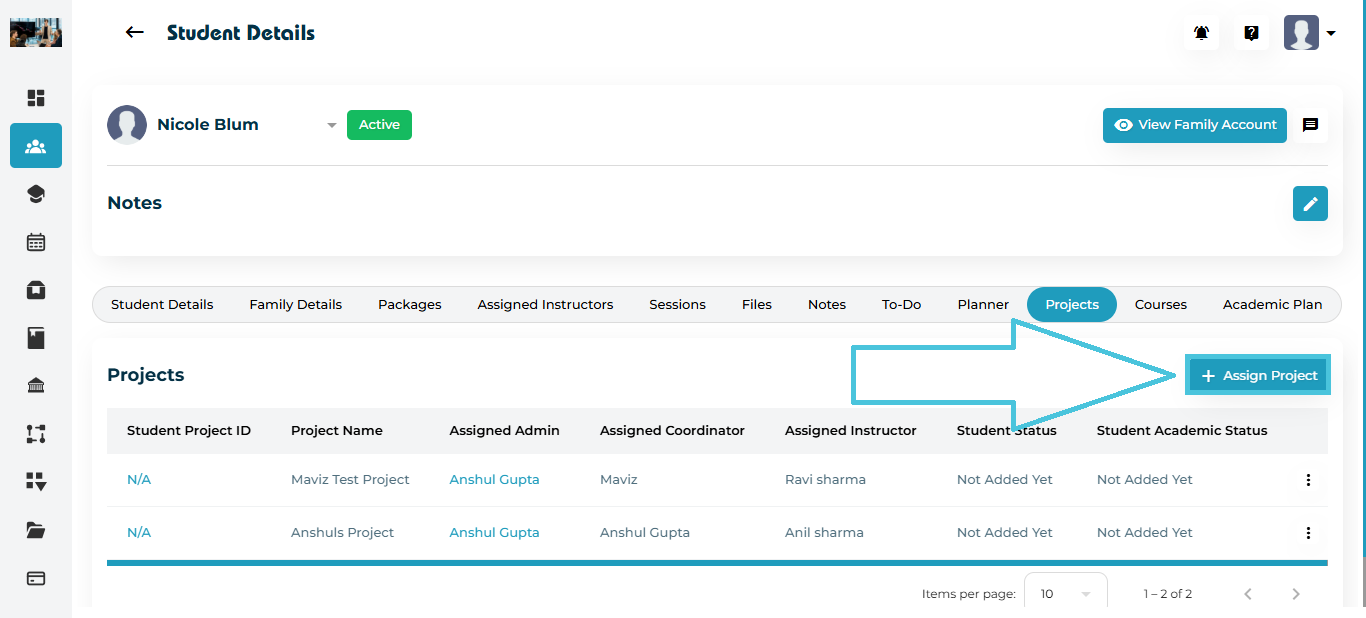
Click Assign Project (+) in the top-right corner.
The Assign to a Project pop-up will open.
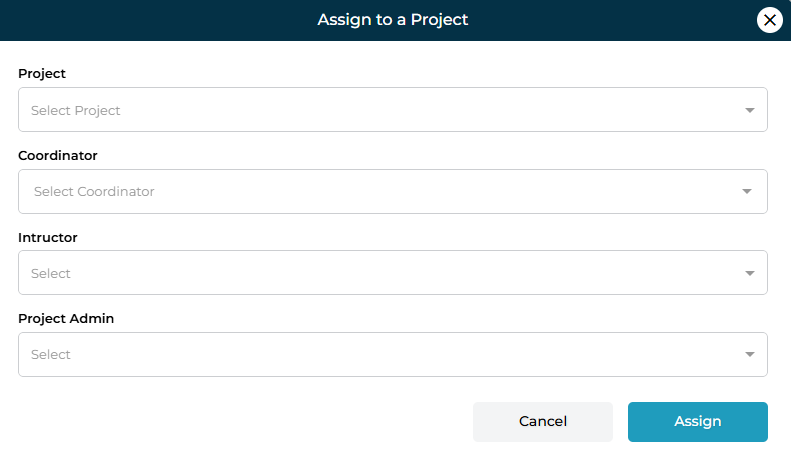
Fields Explained
| Field | Purpose |
|---|---|
| Project | Select an existing project template created by the Admin team. If you do not have any existing Projects, you can create a new one from the main Projects tab in the admin panel. |
| Coordinator | Choose the staff member responsible for overseeing the student’s project progress. This can be defined by admin while creating a project. |
| Instructor | Tutor or Counselor assigned to support student tasks within this project. |
| Project Admin | Admin user responsible for project results & approvals. |
After selecting all roles, click Assign.
The project now appears in the project table for that student.
To open full project details:
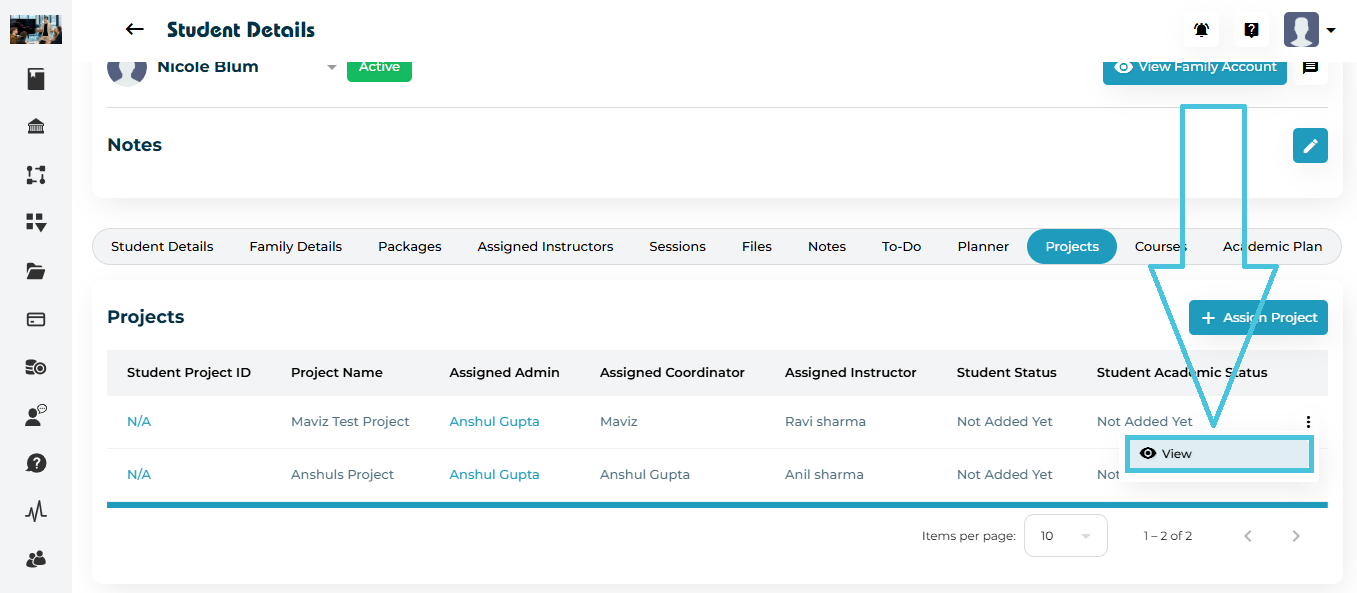
Click the Student Project ID or the three-dot menu (⋮) beside the project
Select View
You will be redirected to the Project Detail page.
The Project Detail view contains everything related to the student’s project:
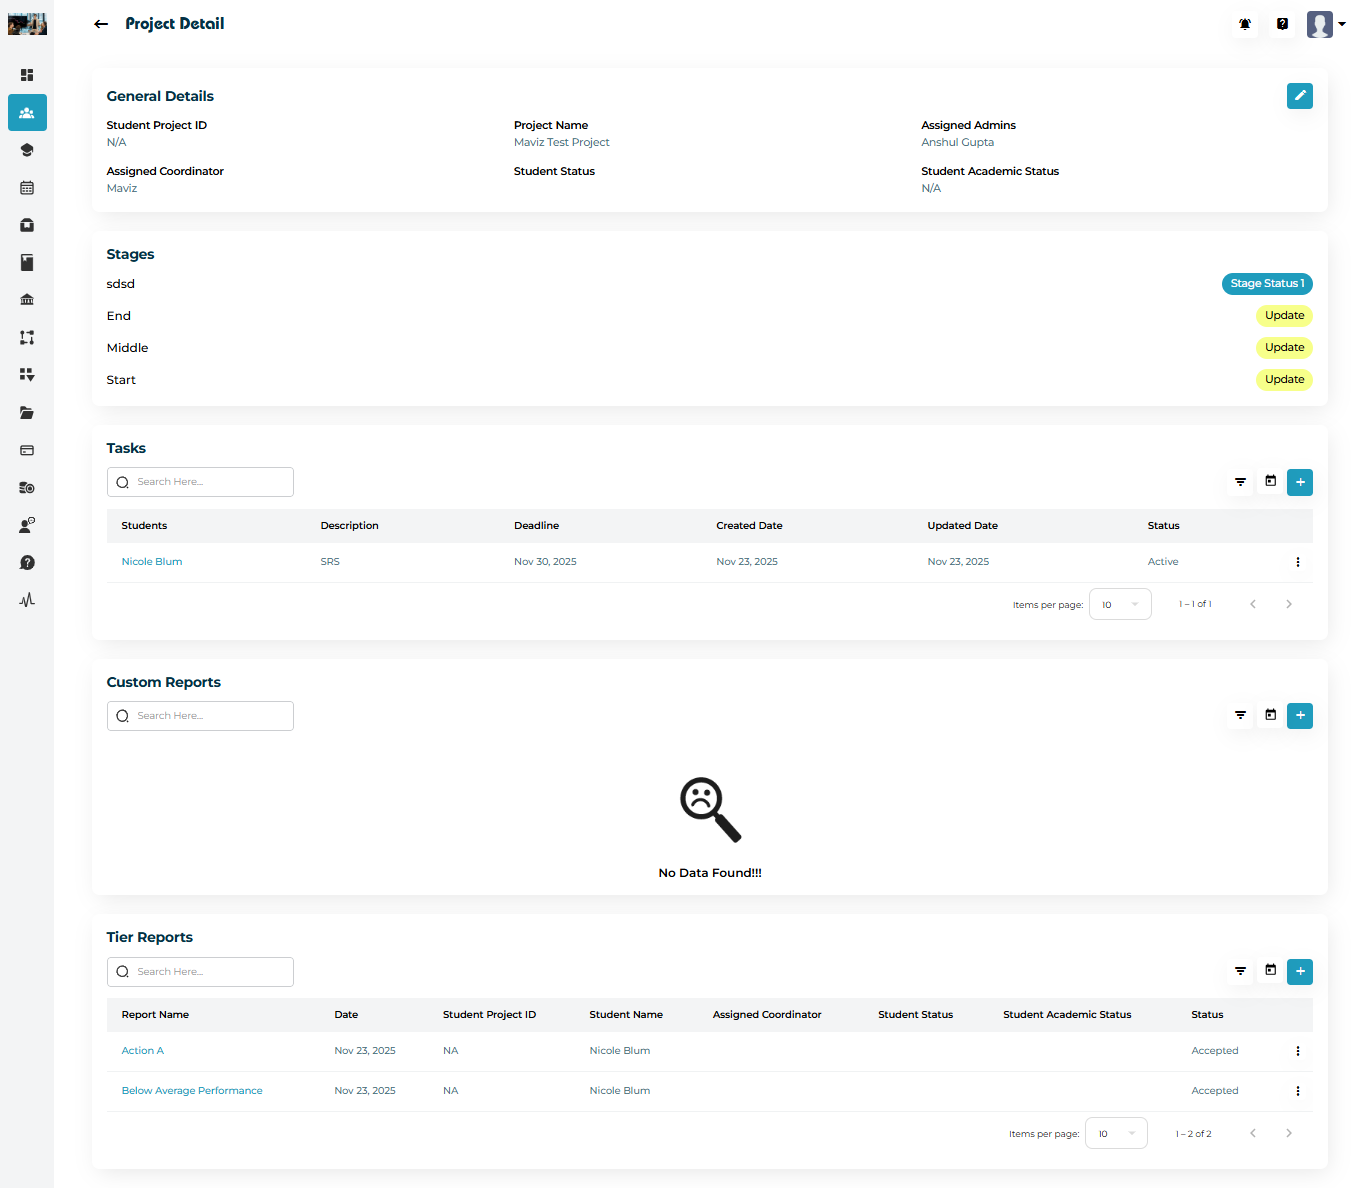
Sections Included
General Details (Student project ID, Project name, Assigned admin and, coordinator, student status and academic status)
Stages (Custom stages defined from the Stages & Scores subtab within the Workflows main tab on the admin panel by navigating to the custom list on top. Once the custom stages list has been created, admin can then added to a Project while it is being created.)
Tasks (Student deliverables created by admin or instructor)
Custom Reports submitted by the students or instructors for the porject
(can be defined by admin by navigating to the Reports subtab within the Workflow main tab on the admin panel)Tier Reports submitted by instructors for the porject
(can be defined by admin by navigating to the Tiers subtab within the Workflow main tab on the admin panel)
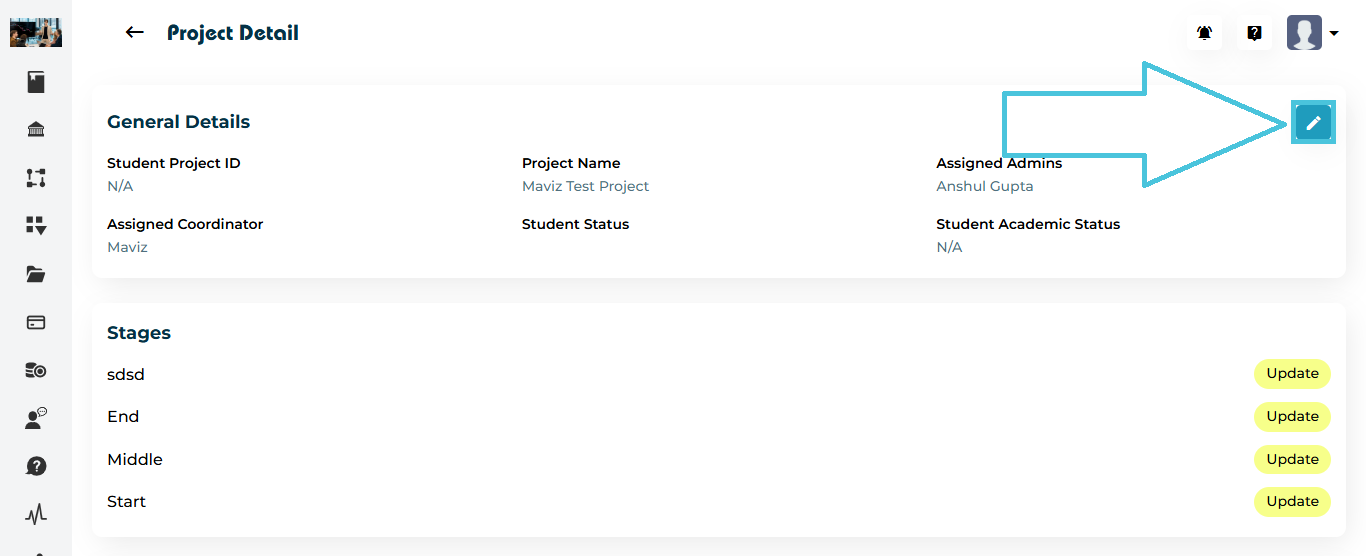
Click the Edit (✏️) icon in the General Details block.
The Edit Project – General Details pop-up will open.
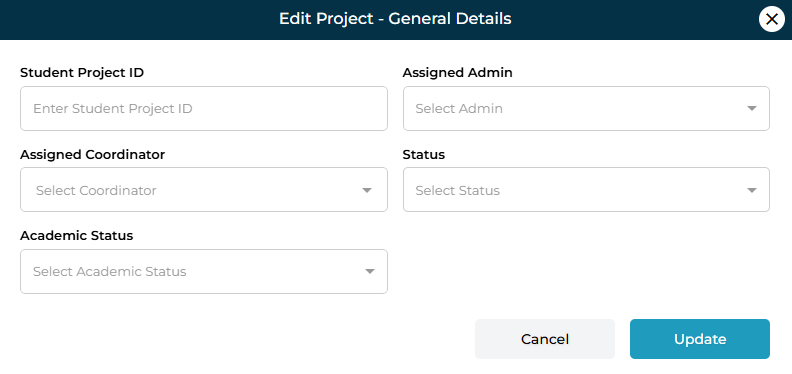
Here, you can update:
Student Project ID
Assigned Admin
Assigned Coordinator
Student Status
Student Academic Status
Click Update to save changes.
Under Custom Reports, click the + Add button.
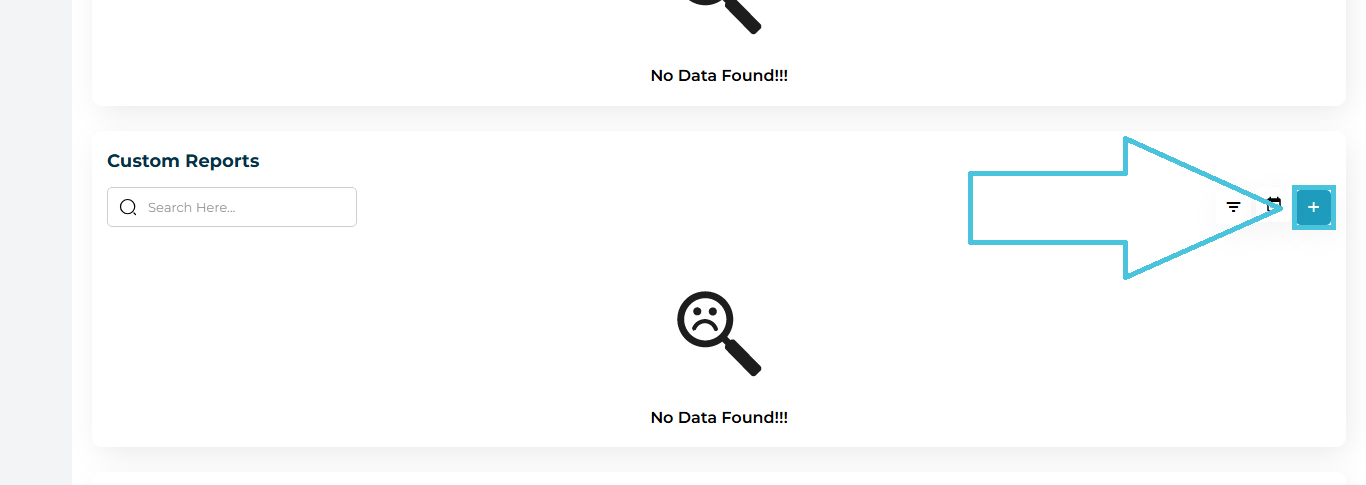
Select the report you want to add from the dropdown and this will display the report fields as it is created by admin to be filled out and completed.
Click Update to save.
Note: reports submitted by students or instructors will be highlighted in red and can be accepted or rejected by admin after review.
Tier Reports are structured performance review reports that can only be submitted by instructors linked to projects or admins.
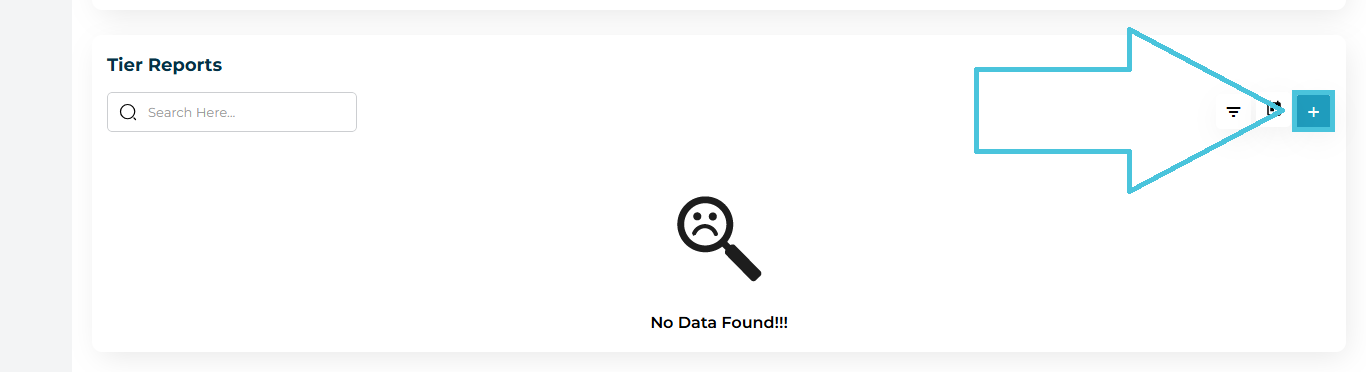
Scroll to Tier Reports
Click the + button
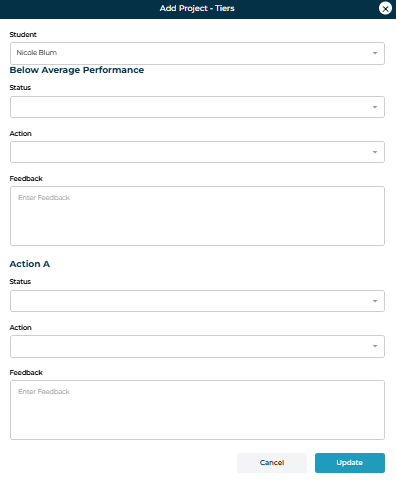
The fields for Tier Reports will be:
Status
Action
Feedback
Click Update.
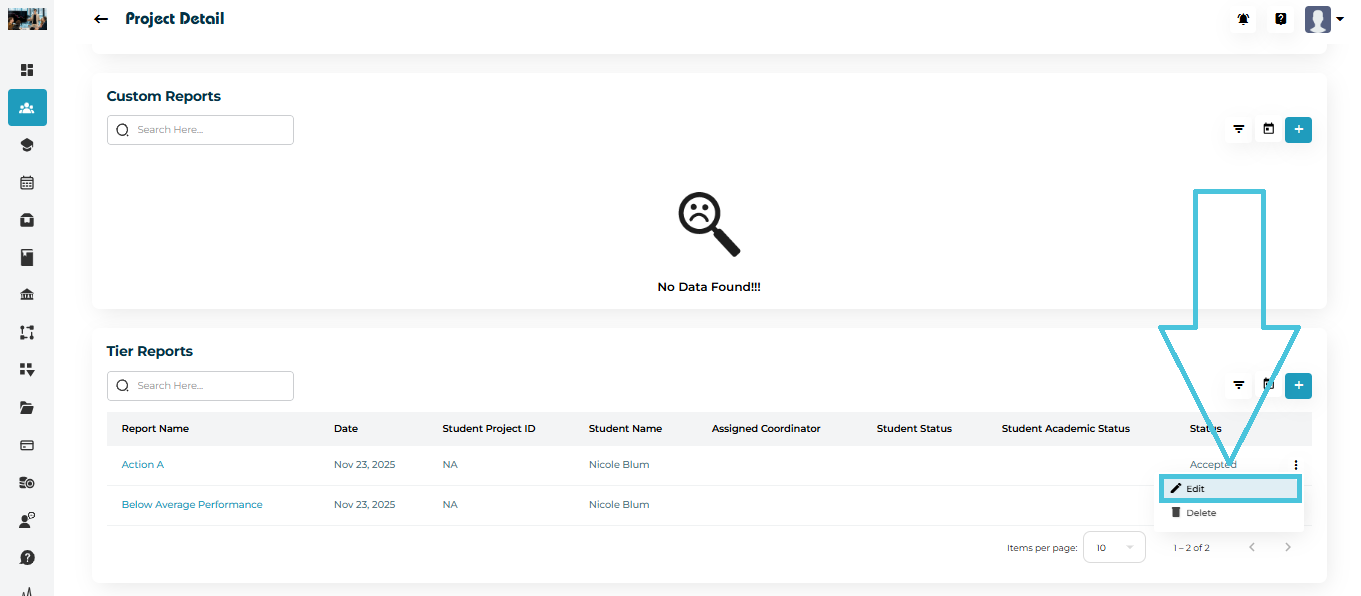
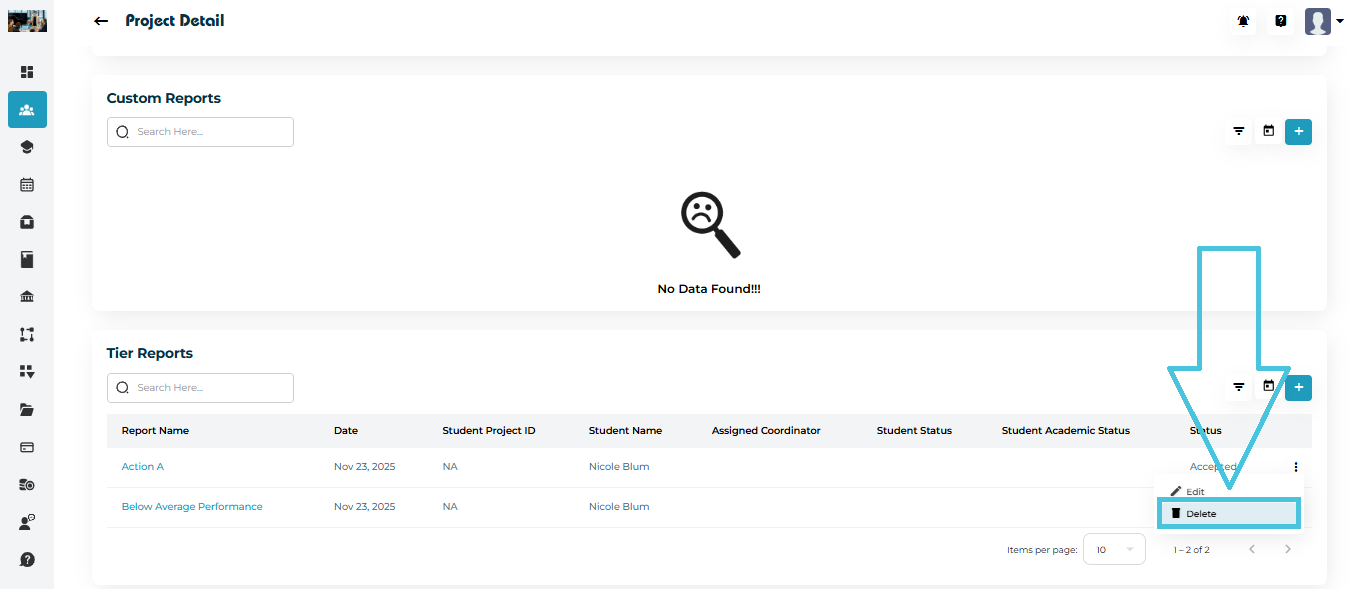
You can also edit or delete existing tier reports using the action menu.
Note:
- The status and action fields for Tier Reports can be customized and defined by admin by creating a Tiers list from the Tiers subtab within the Workflow main tab in the admin panel, and then attached to a project while creating it.
- Tier Reports submitted by instructors will be highlighted in red and can be accepted or rejected by admin after review.