Navigate to Students → Student Profiles.
Select the student whose files you want to view.
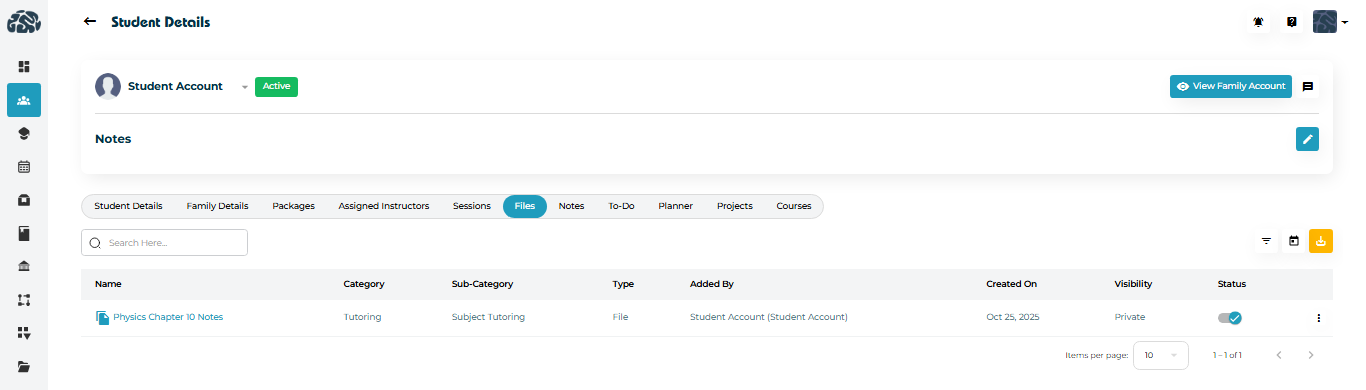
Click the Files tab in the top navigation bar.
Each file record displays:
Name of the file
Category and Sub-Category
(can be setup by admin under the Resource Management tab in the admin panel)Type (e.g., File, Folder)
Added By (Student, Tutor, Counselor, or Admin)
Created On date
Visibility (Private to student only or Public to others)
Status (Active/Inactive)
Note: Files uploaded by students, instructors, or admins automatically appear here once saved on their portals.
Admins can preview file information directly from the list view, including category and visibility settings.
To open or download a file:
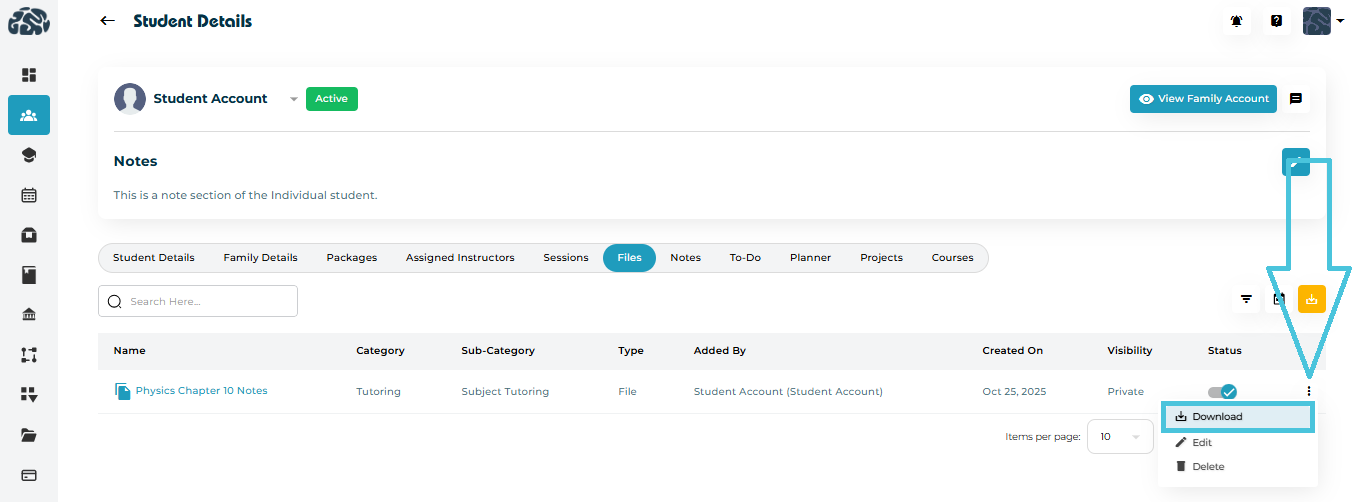
Click the name of the file to open it in a new tab.
Click the three-dot menu (⋮) beside the file.
- Select Download to open or save it locally.
If an uploaded file needs re-categorization or visibility updates, Admins can edit it from here.

Click the three-dot menu (⋮) next to the file.
Select Edit.
The Edit File pop-up will appear.
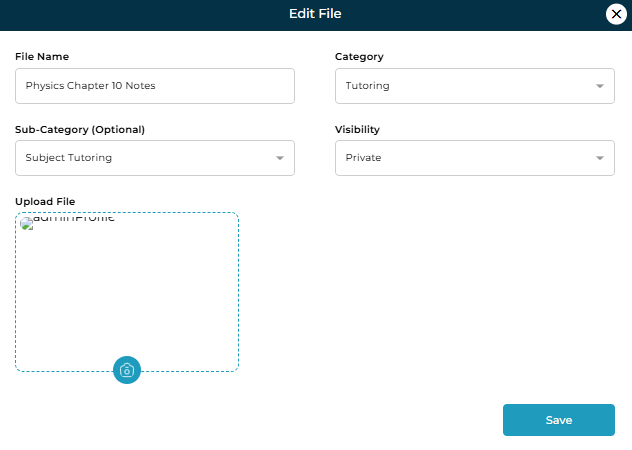
Editable Fields
| Field | Description |
|---|---|
| File Name | Rename the file for better clarity. |
| Category | Define whether it relates to Tutoring, Counseling, etc. |
| Sub-Category | Optionally specify sub-topics such as Subject Tutoring, Academic Planning, etc. |
| Visibility | Choose Private (visible only to student) or Public (visible to others) or Admin Only. |
After editing, click Save to apply changes.
To locate specific files quickly:
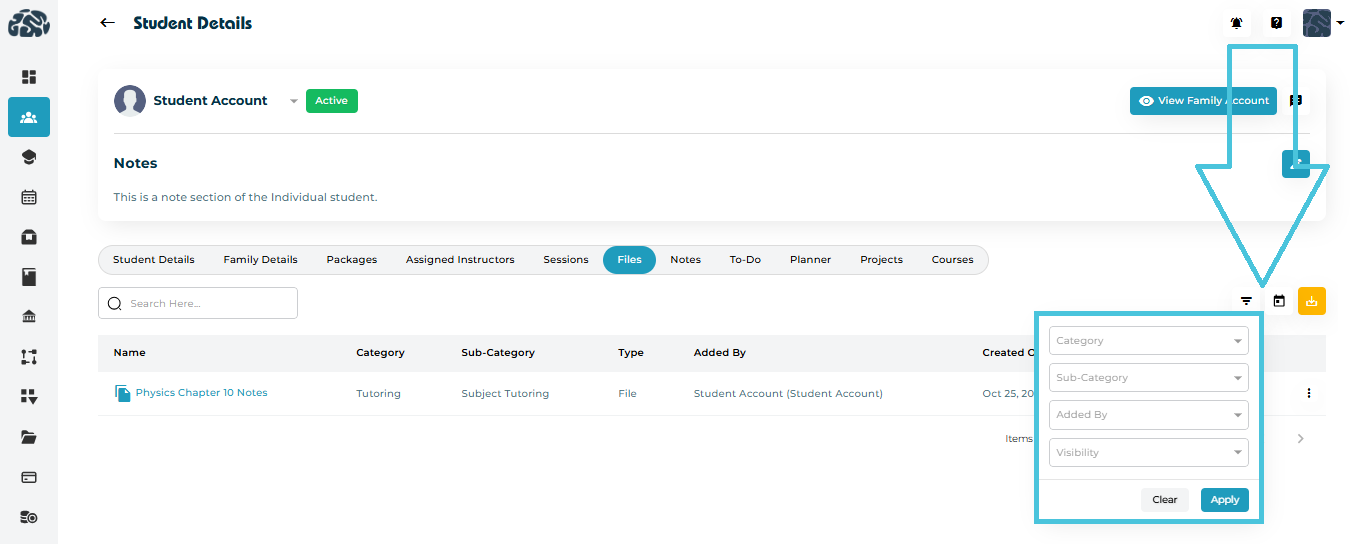
Click the Filter icon on the top-right corner of the Files tab.
Use available filters:
Category
Sub-Category
Added By
Visibility (Private/Public)
Click Apply to refine the list.
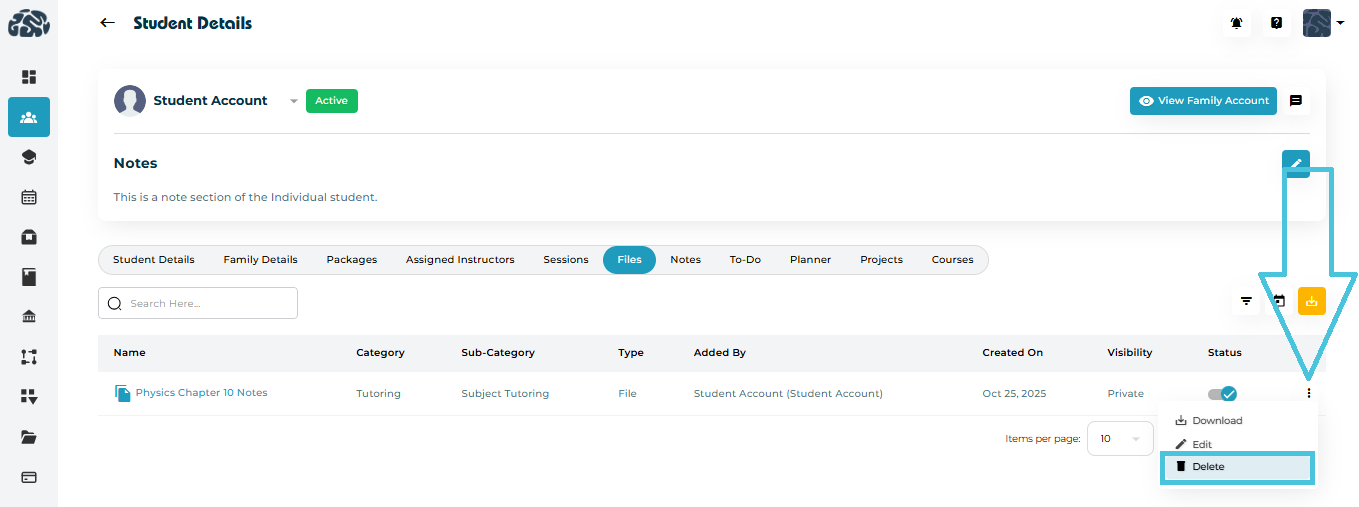
If a file is outdated or uploaded incorrectly, Admins can remove it.
Click the three-dot menu (⋮) beside the file name.
Select Delete.
Confirm the action when prompted.
Once deleted, the file is permanently removed from the student’s record and cannot be recovered.