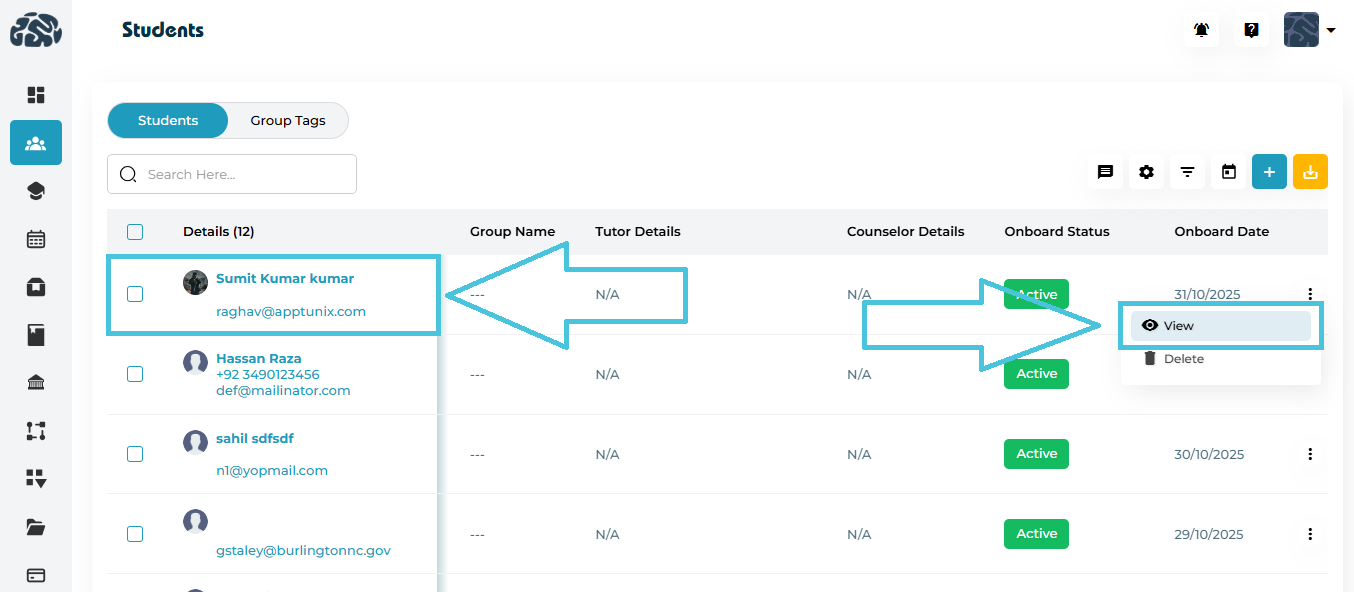
Administrators can access a student’s full profile using either of two options — directly clicking the student’s name or selecting View from the ⋮ (three-dot) action menu.
Both open the same Student Details page where all tabs (Progress, Personal Details, Academic Details, Permissions, Portal, and Family Account) are visible.
Steps
Navigate to the Students module from the left-hand sidebar.
Locate the student in the list using the search bar or scrolling.
To open the student profile:
Option 1: Click the student’s name under the Details column.
Option 2: Click the ⋮ (three-dot) icon at the end of the row and select View.
The system loads the Student Details page with all profile and activity tabs.

This dropdown allows admins to instantly switch between different student profiles without returning to the main Students List. It is especially useful when reviewing siblings, multiple leads from the same family, or when quickly navigating through several profiles during audits or admin reviews. Selecting another student from this dropdown loads their entire profile, including overview details, sessions, packages, and linked information.

The status tag highlights the student’s current lifecycle stage inside PrepBase. It can display Active, Inactive, Lead, or Trial. Each status helps admins instantly understand the student’s engagement level:
• Active – Currently enrolled and using services.
• Inactive – account disabled.
• Lead – A potential student not yet enrolled.
• Trial – Student is on a trial package. This tag helps admins decide which follow-ups or actions are needed.

A dedicated area for storing internal notes related to the student. These notes are visible only to admins and help teams keep track of important information such as behavior notes, follow-up reminders, academic concerns, or special requirements. Notes can be added at any time and serve as a historical log that supports tutoring and counseling decisions.

This button links directly to the Billing & Invoices Section. From there, admins can view and manage transactions, invoices, payment history, and family-linked student profiles. This quick link is extremely helpful during billing inquiries, package renewals, or when resolving payment-related issues.

These quick communication shortcuts allow admins to message the student directly from the profile. Clicking Email or SMS opens the corresponding sending interface where the admin can draft a message, send important updates, reminders, payment notifications, or any other communication. This ensures fast, centralized communication without switching to another screen.